Introduction
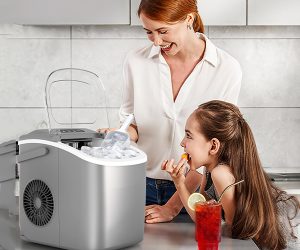
Having a countertop ice maker is a convenient way to ensure you always have ice on hand for drinks, parties, and everyday use. However, to keep your ice maker countertop running efficiently and to maintain the quality of the ice, regular cleaning is essential. This comprehensive guide will walk you through the steps of cleaning your countertop ice maker easily and effectively.
Maintaining a clean ice maker countertop is crucial for both health and performance reasons. Without proper cleaning, your ice maker can become a breeding ground for bacteria and mold, leading to unpleasant odors, poor ice quality, and potential health risks. Additionally, a well-maintained ice maker will operate more efficiently, producing clear, fresh ice quickly and using less energy.
Why Cleaning Your Ice Maker is Important
Health and Safety
Over time, home countertop ice makers can harbor bacteria, mold, and mildew, which can contaminate the ice and pose health risks. It’s essential to understand the potential hazards associated with a neglected ice maker and the importance of regular maintenance to ensure the safety and well-being of your household.
Common Contaminants in Ice Makers
- Bacteria: Harmful bacteria such as E. coli and Salmonella can thrive in the moist environment of an ice maker. If left unchecked, these bacteria can contaminate the ice, leading to foodborne illnesses.
- Mold: Mold spores can develop in damp areas within the ice maker, especially if it’s not cleaned regularly. Ingesting moldy ice can cause allergic reactions and respiratory issues.
- Mildew: Mildew, a type of mold, can produce a musty smell and taste in the ice. While not as harmful as some bacteria, it still poses health risks, particularly for those with respiratory conditions.
Health Risks Associated with Contaminated Ice
Consuming ice from a dirty home countertop ice maker can lead to various health issues, including:
- Gastrointestinal Problems: Bacteria and mold can cause stomach cramps, diarrhea, and vomiting.
- Respiratory Issues: Mold and mildew can exacerbate asthma and other respiratory conditions.
- Allergic Reactions: Exposure to mold can trigger allergic reactions, such as sneezing, runny nose, and itchy eyes.
Preventive Measures
To ensure the ice produced by your home countertop ice maker is safe for consumption, follow these preventive measures:
- Regular Cleaning: Clean your ice maker every few weeks to prevent the build-up of bacteria, mold, and mildew. Use a mixture of warm water and mild dish soap for routine cleaning and sanitize with vinegar or lemon juice periodically.
- Proper Storage: Store the ice maker in a dry, cool place when not in use. Ensure the machine is completely dry before storing it to prevent the growth of mold and mildew.
- Use Filtered Water: Using filtered water can reduce the presence of impurities and contaminants in the ice, resulting in cleaner, safer ice.
- Inspect for Mold and Mildew: Regularly check for any signs of mold or mildew inside the ice maker. If detected, clean the machine thoroughly immediately.
- Maintain Optimal Conditions: Ensure the ice maker operates in a well-ventilated area. Avoid placing it near sources of heat or moisture, as these conditions can promote the growth of bacteria and mold.
Detailed Cleaning Guide
Following a detailed cleaning routine can significantly reduce the risk of contamination in your home countertop ice maker. Here’s a step-by-step guide:
- Turn Off and Unplug the Ice Maker: Always start by turning off and unplugging the machine to ensure safety.
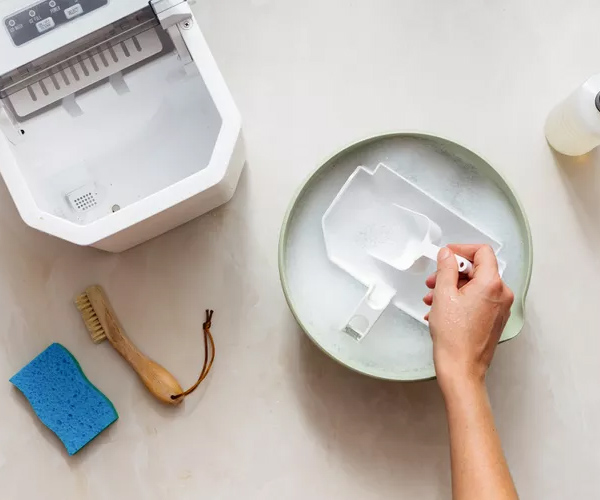
- Remove and Clean Removable Parts: Take out the ice basket and scoop, and wash them with warm water and mild dish soap. Rinse thoroughly and let them air dry.
- Empty the Water Reservoir: Drain any remaining water from the reservoir to prevent stagnant water from becoming a breeding ground for bacteria.
- Wipe Down Interior Surfaces: Use a soft cloth or sponge with warm, soapy water to clean the interior surfaces. Avoid abrasive cleaners that could damage the machine.
- Rinse and Sanitize: Rinse the interior with clean water to remove any soap residue. Then, fill the water reservoir with a solution of equal parts white vinegar or lemon juice and water. Run a cycle to allow the solution to sanitize the internal components.
- Clean the Exterior: Wipe the exterior of the ice maker with a damp cloth and mild dish soap. For stainless steel surfaces, use a specialized cleaner to maintain the finish.
- Reassemble and Dry: Once all parts are clean and dry, reassemble the ice maker. Ensure it is completely dry before using it again to prevent moisture build-up.
Efficiency
A clean ice maker functions more efficiently, producing ice more quickly and using less energy. When your home countertop ice maker is free from dirt, mold, and mineral deposits, it operates at its optimal performance level. This means that the machine doesn’t have to work as hard to produce ice, leading to several benefits:
- Faster Ice Production: A clean ice maker can produce ice more rapidly because there are no obstructions or residues affecting the freezing process. This is especially important when you need a large quantity of ice quickly, such as for parties or gatherings.
- Energy Savings: When your ice maker is clean, it uses less electricity to function. Dirt and grime can cause the machine to overwork, consuming more power. By maintaining a clean machine, you reduce energy consumption, which can lead to lower utility bills.
- Prolonged Machine Lifespan: Regular cleaning prevents the build-up of harmful substances that can cause wear and tear on the internal components of your home countertop ice maker. This helps extend the life of the appliance, ensuring you get the most out of your investment.
- Consistent Performance: A well-maintained ice maker provides consistent performance, delivering the right amount and quality of ice every time. This reliability is crucial for those who depend on their ice maker for daily use or special occasions.
- Reduced Maintenance Costs: By keeping your ice maker clean, you minimize the risk of breakdowns and the need for expensive repairs. Regular maintenance helps you avoid unexpected issues and keeps your machine running smoothly.
Ice Quality: Regular Cleaning for Clear, Odorless, and Fresh Ice
Maintaining the quality of ice produced by your home countertop ice maker involves more than just regular use; it requires diligent cleaning and maintenance. Here’s how regular cleaning contributes to superior ice quality and why it’s crucial:
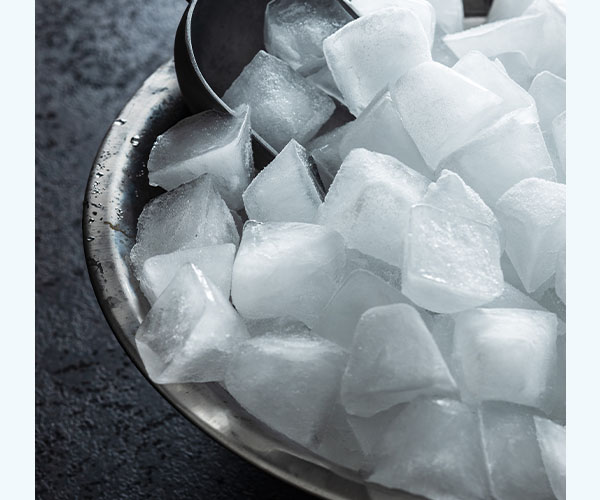
- Clarity: Regular cleaning prevents mineral deposits and impurities from accumulating in your home countertop ice maker. These deposits can make your ice appear cloudy and unappetizing. By keeping the internal components clean, you ensure that each ice cube is crystal clear and visually appealing, perfect for serving guests or using in your favorite beverages.
- Odorless: A common issue with ice makers that are not regularly cleaned is the development of unpleasant odors. These can be caused by bacteria, mold, or mildew growing in the moist environment of the machine. Regularly sanitizing your ice maker with solutions like vinegar or lemon juice helps eliminate these microorganisms, ensuring that your ice remains odor-free.
- Fresh Taste: The taste of your ice can be significantly impacted by the cleanliness of your ice maker. Residual food particles, bacteria, and impurities can alter the taste, making your drinks less enjoyable. Regular cleaning ensures that no unwanted flavors are transferred to your ice, keeping it tasting fresh and pure.
- Consistent Performance: A clean ice maker operates more efficiently. Mineral build-up and debris can hinder the performance of your machine, slowing down ice production and potentially causing mechanical issues. By maintaining a regular cleaning schedule, you help your ice maker run smoothly and produce high-quality ice consistently.
Tools and Materials Needed
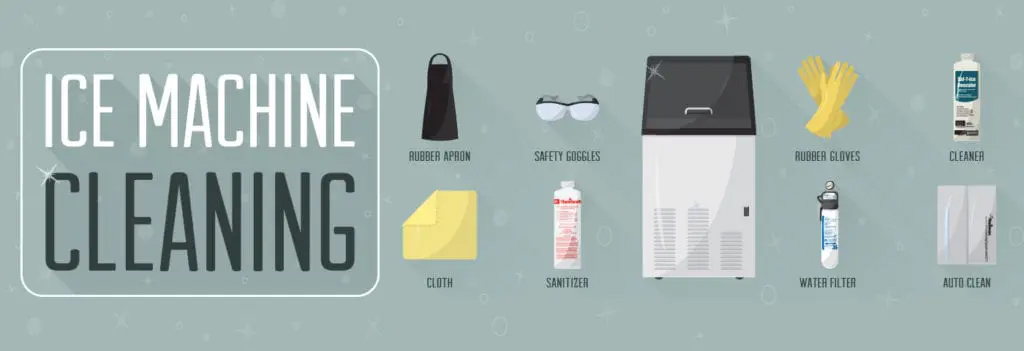
Before you begin cleaning your home countertop ice maker, it’s important to gather all the necessary tools and materials. Having everything ready will make the process smoother and more efficient. Here’s a detailed list of what you’ll need:
- Soft Cloth or Sponge: Essential for wiping down surfaces without scratching them.
- Warm Water: Used for mixing with cleaning solutions and rinsing components.
- Mild Dish Soap: A gentle cleaner that won’t damage the internal parts of your ice maker.
- White Vinegar or Lemon Juice: Natural sanitizers that help eliminate bacteria and mold.
- Ice Maker Cleaning Solution (Optional): Specifically designed for deeper cleaning and descaling.
- Soft-Bristle Brush: Useful for scrubbing away tough residues without causing damage.
- Toothbrush: Perfect for reaching small, tight areas that larger brushes can’t access.
- Dry Towels: Necessary for drying components thoroughly before reassembling the ice maker.
- Baking Soda: Effective for removing stubborn stains and odors, ensuring your ice maker remains fresh.
With these tools and materials, you’ll be well-equipped to clean your home countertop ice maker effectively and efficiently.
Step-by-Step Cleaning Guide Continued
1. Turn Off and Unplug the Ice Maker
Safety first: always turn off and unplug your ice maker before cleaning to avoid any risk of electric shock or damage to the machine.
2. Remove and Clean the Ice Basket and Scoop
Take out the ice basket and scoop. Wash them thoroughly with warm water and mild dish soap. Rinse well and dry with a clean towel.
3. Empty the Water Reservoir
Drain any remaining water from the reservoir. Some ice makers have a drain plug; if yours does, remove it and let the water flow out. If there is no drain plug, you may need to carefully tilt the machine to pour out the water.
4. Clean the Interior
Mix a solution of warm water and a few drops of mild dish soap. Use a soft cloth or sponge to wipe down the interior surfaces of the ice maker, including the ice mold and water reservoir. Avoid using abrasive cleaners or brushes that could damage the machine.
5. Rinse Thoroughly
After cleaning with soap, rinse the interior with clean water to remove any soap residue. It’s important to ensure that no soap is left behind, as it can affect the taste of the ice.
6. Sanitize with Vinegar or Lemon Juice
Sanitizing the ice maker helps eliminate bacteria and mold. Fill the water reservoir with a solution of equal parts white vinegar (or lemon juice) and water. Run the ice maker through a cycle to allow the solution to clean the internal components.
7. Clean the Exterior
Wipe down the exterior of the ice maker with a damp cloth and mild dish soap. Pay attention to buttons, the lid, and any crevices where dirt can accumulate. For stainless steel exteriors, use a stainless steel cleaner to maintain the finish.
8. Deep Clean with a Commercial Cleaner (Optional)
If your ice maker has not been cleaned in a while or you notice a significant build-up of scale or mineral deposits, consider using a commercial ice maker cleaning solution. Follow the manufacturer’s instructions for use.
9. Clean the Filter (If Applicable)
Some ice makers have filters that need regular cleaning or replacement. Check your user manual for instructions on how to clean or replace the filter.
10. Dry and Reassemble
Once all components are clean, dry them thoroughly with a clean towel. Reassemble the ice maker, including the ice basket and scoop.
11. Run a Few Cycles
Before using the ice maker again for consumption, run a few cycles of ice and discard the ice to ensure any residual cleaning solution is completely removed.
Tips for Maintaining a Clean Ice Maker
Maintaining a clean home countertop ice maker ensures it operates efficiently and produces high-quality ice. Here are additional tips to help you keep your ice maker in top condition:
- Regular Cleaning Schedule: Establish a routine cleaning schedule. Regular maintenance prevents the build-up of bacteria, mold, and mineral deposits. Aim to clean your home countertop ice maker every 2-3 weeks.
- Use Filtered Water: Always fill your ice maker with filtered water. This helps reduce mineral deposits that can lead to scale build-up. It also improves the taste and clarity of the ice.
- Inspect and Clean the Ice Maker’s Components: Frequently check all removable parts, such as the ice basket, scoop, and water reservoir. Clean these components with mild dish soap and warm water. Ensure they are completely dry before reassembling.
- Sanitize with Vinegar or Lemon Juice: Use a mixture of vinegar or lemon juice and water to sanitize your ice maker. Run this solution through a cycle to clean the internal components. Vinegar and lemon juice are effective natural disinfectants that help eliminate bacteria and mold.
- Dry After Cleaning: After every cleaning session, ensure your ice maker is thoroughly dried. Leaving it damp can promote the growth of mold and bacteria. Use a clean towel to dry all parts completely.
- Avoid Using Abrasive Cleaners: Stick to mild dish soap or dedicated ice maker cleaning solutions. Abrasive cleaners can damage the interior surfaces and reduce the efficiency of your ice maker.
- Check for Signs of Mold and Mildew: Regularly inspect your ice maker for any signs of mold or mildew. If you notice a musty odor or see visible mold, clean your ice maker immediately using a vinegar solution.
- Keep the Exterior Clean: Wipe down the exterior of your home countertop ice maker with a damp cloth and mild soap. This prevents dust and grime from entering the machine and affecting its performance.
- Use Baking Soda for Odors: If your ice maker develops unpleasant odors, use baking soda to neutralize them. Mix baking soda with water to form a paste and apply it to the affected areas. Let it sit for a few minutes before rinsing thoroughly.
- Run Cleaning Cycles: Some ice makers come with a self-cleaning feature. Utilize this feature regularly to maintain the cleanliness of your machine. Follow the manufacturer’s instructions for the best results.
- Store Properly When Not in Use: If you don’t use your ice maker regularly, store it properly. Clean and dry the machine thoroughly before storing it in a cool, dry place. Cover it with a dust cover or plastic wrap to keep it clean.
- Monitor Water Quality: The quality of water you use can impact the performance of your ice maker. Hard water with high mineral content can lead to scale build-up. Consider using distilled water if your tap water is hard.
- Clean the Water Filter: If your ice maker has a water filter, clean or replace it according to the manufacturer’s recommendations. A clean filter ensures the machine operates efficiently and produces clean ice.
- Check and Clean the Fans and Vents: Dust and debris can accumulate in the fans and vents of your ice maker. Regularly clean these areas to ensure proper ventilation and reduce noise.
- Avoid Overfilling the Reservoir: Overfilling the water reservoir can cause water to spill and lead to the growth of mold. Always follow the recommended water levels indicated by the manufacturer.
- Regularly Discard Ice: To ensure you always have fresh ice, regularly discard old ice. This helps maintain the quality of the ice and prevents any old ice from affecting the taste of new batches.
By following these tips, you can keep your home countertop ice maker clean and functioning optimally. Regular maintenance not only ensures the production of high-quality ice but also extends the lifespan of your appliance, providing you with reliable performance for years to come. Remember, a little effort in maintaining cleanliness goes a long way in enjoying the benefits of your ice maker.
Troubleshooting Common Issues
Ice Maker Not Producing Ice
If your countertop ice maker is not producing ice, it can be frustrating, especially if you rely on it for everyday use or entertaining guests. Here are some detailed troubleshooting steps to help you identify and resolve the issue.
Check the Water Supply
Ensuring the water supply is consistent and adequate is crucial for the ice maker to function properly.
- Water Reservoir: Check if the water reservoir is filled. An empty reservoir is a common reason for the ice maker not producing ice.
- Water Line: If your ice maker is connected to a water line, inspect the line for any kinks, blockages, or leaks. A damaged water line can restrict water flow, preventing ice production.
- Water Quality: Ensure that the water used is clean and free from impurities. Using filtered water can prevent clogs and improve ice quality.
Clean the Machine
A dirty ice maker can impede ice production and affect the machine’s efficiency.
- Regular Cleaning: Follow the cleaning steps outlined earlier to ensure all parts of the machine are clean. Pay special attention to the water reservoir, ice mold, and any other areas where mineral deposits or debris can accumulate.
- Deep Cleaning: Occasionally, perform a deep cleaning with a commercial ice maker cleaning solution. This can help remove stubborn build-up that regular cleaning might miss.
Inspect the Filter
Filters play a critical role in ensuring the water used for ice making is clean and free from impurities.
- Filter Condition: Check if the filter is clogged or dirty. A clogged filter can restrict water flow and reduce ice production. Clean or replace the filter as needed.
- Filter Replacement Schedule: Follow the manufacturer’s recommended schedule for replacing filters. Regular filter replacement ensures optimal performance.
Check the Power Supply
Ensuring your ice maker is properly powered is essential for its operation.
- Power Cord: Inspect the power cord for any signs of damage. A damaged cord can interrupt the power supply and prevent the ice maker from functioning.
- Electrical Outlet: Make sure the electrical outlet is working correctly. Test the outlet with another appliance to confirm it is providing power.
Examine the Settings
Incorrect settings can also affect ice production.
- Ice Size and Quantity Settings: Ensure that the settings for ice size and quantity are correctly configured. Some ice makers allow you to adjust these settings, and incorrect configurations can impact production.
- Reset the Machine: Sometimes, resetting the ice maker can resolve issues. Refer to the user manual for instructions on how to reset your specific model.
Check for Obstructions
Physical obstructions can hinder the ice-making process.
- Ice Mold: Inspect the ice mold for any ice blockages or jams. Remove any ice pieces that might be stuck.
- Moving Parts: Ensure that all moving parts, such as the ice scoop or tray, are functioning smoothly and are not obstructed.
Temperature Settings
Temperature plays a crucial role in ice production.
- Ambient Temperature: Ensure that the ice maker is placed in an environment with a suitable ambient temperature. Extreme heat can reduce the efficiency of the ice-making process.
- Internal Temperature: Check if the internal temperature of the ice maker is set correctly. The machine needs to reach a certain temperature to produce ice effectively.
Inspect the Condenser Coils
Condenser coils help in the refrigeration process of the ice maker.
- Cleaning: Regularly clean the condenser coils to ensure they are free from dust and debris. Dirty coils can hinder the machine’s ability to cool effectively.
- Ventilation: Ensure that there is adequate ventilation around the ice maker. Blocked vents can lead to overheating and reduced ice production.
Check for Mechanical Issues
Mechanical components of the ice maker should be functioning properly.
- Ice Ejector: Ensure the ice ejector mechanism is working smoothly. A malfunctioning ejector can prevent ice from being dispensed properly.
By systematically checking and addressing these potential issues, you can identify why your countertop ice maker is not producing ice and take the necessary steps to fix it. Regular maintenance and thorough troubleshooting will help keep your ice maker in optimal condition, ensuring you always have a steady supply of ice
Ice is Cloudy
If your ice is coming out cloudy, it can be a sign of underlying issues with your home countertop ice maker. Here are some detailed steps and tips to ensure your ice is clear and of high quality:
- Check the Water Quality: The most common cause of cloudy ice is the quality of water used. Hard water, which contains high levels of minerals like calcium and magnesium, can cause the ice to appear cloudy. Using filtered or distilled water can significantly improve the clarity of your ice.
- Clean the Machine Regularly: Regular cleaning of your home countertop ice maker is crucial. Mineral build-up inside the machine can affect ice quality. Follow a consistent cleaning schedule, as described in the steps above, to ensure that your ice maker is free of deposits that can cloud your ice.
- Use a Water Filter: If your ice maker model allows, install a water filter. A good quality water filter can remove impurities and minerals that cause cloudy ice. Ensure the filter is replaced regularly according to the manufacturer’s instructions.
- Control Freezing Rate: The rate at which water freezes can also affect the clarity of ice. Slower freezing often results in clearer ice because impurities have more time to settle out of the water. Some high-end home countertop ice makers come with settings that allow you to control the freezing rate. Check if your model has this feature and experiment with the settings.
- Proper Maintenance of the Ice Maker: Regular maintenance is essential. Ensure that all components of the ice maker, including the water reservoir, ice mold, and any filters, are clean and functioning properly. Address any signs of wear and tear promptly to avoid more significant issues.
- Air Bubbles: Sometimes, air trapped in the water can cause cloudiness. Ensure the water you use is free from air bubbles. You can achieve this by filling the reservoir slowly and allowing the water to settle before starting the ice-making process.
- Dealing with High Mineral Content: If you live in an area with particularly hard water, you might need to use a water softener. Alternatively, consider using bottled water with low mineral content specifically for making ice. This can make a significant difference in the quality and clarity of the ice produced by your home countertop ice maker.
- Inspect for Mold and Mildew: Cloudy ice can also be a sign of mold or mildew within the ice maker. Regularly inspect and clean your machine, paying particular attention to any crevices or hard-to-reach areas where mold might develop. Using a sanitizing solution like vinegar or a specialized ice maker cleaner can help prevent mold growth.
- Use the Right Cleaning Products: When cleaning your ice maker, use products that are safe and effective. Avoid harsh chemicals that might damage the machine or leave residues that could affect the ice. Mild dish soap, white vinegar, and lemon juice are excellent natural cleaners.
- Address Scaling Issues: Over time, scaling (mineral deposits) can build up in your ice maker, especially if you use hard water. Descaling your ice maker regularly with an appropriate descaling solution can help maintain clear ice. Follow the manufacturer’s recommendations for descaling to avoid damaging your machine.
- Routine Checks: Make it a habit to routinely check the various components of your ice maker. This includes the water lines, ice mold, and other parts. Identifying and addressing issues early can prevent them from becoming more serious and affecting the ice quality.
- Storage Conditions: Store your ice maker in a clean, dry area. Ensure it is not exposed to excessive dust or moisture, which can affect its operation and the quality of the ice.
By following these tips and maintaining a regular cleaning and maintenance schedule, you can ensure that your home countertop ice maker produces clear, high-quality ice every time. Clear ice not only looks better in drinks but also ensures that you are consuming pure, clean ice without any unwanted tastes or impurities.
Machine is Noisy (Continued)
If your home countertop ice maker is making unusual or excessive noise, it can be both annoying and a sign of potential issues. Here are some additional steps to address this problem:
- Inspect the Ice Maker Mechanism: Sometimes, noise can be caused by loose or misaligned components within the ice maker. Carefully inspect the mechanism and ensure that all parts are securely in place. If you find any loose screws or parts, tighten them as needed.
- Check for Ice Blockages: Ice blockages can cause the machine to work harder and create more noise. Regularly check for any ice build-up within the machine, especially around the ice mold and dispenser areas. Clear any blockages promptly to maintain smooth operation.
- Lubricate Moving Parts: If your home countertop ice maker has moving parts that are accessible and safe to lubricate, applying a food-safe lubricant can reduce friction and noise. Refer to the manufacturer’s manual to identify which parts can be lubricated and what type of lubricant to use.
- Examine the Water Pump: The water pump in your ice maker can sometimes become noisy if it’s clogged or malfunctioning. Check the pump for any debris or signs of wear. Cleaning or replacing the pump can often resolve noise issues.
- Reduce Vibration: Excessive vibration can amplify noise levels. Place a rubber mat or vibration-absorbing pads under the ice maker to dampen vibrations. This simple fix can significantly reduce the noise produced during operation.
- Regular Maintenance: Keeping your ice maker well-maintained with regular cleaning and inspections can prevent many noise issues. Scheduled maintenance helps identify potential problems early before they become significant issues.
- Consult the User Manual: Always refer to the user manual for specific troubleshooting tips related to your model. The manual often provides useful information on how to address common noise issues and maintain your ice maker properly.
- Seek Professional Help: If you’ve tried all the above steps and your home countertop ice maker is still noisy, it might be time to consult a professional. A technician can diagnose and fix any underlying issues that are not easily visible or accessible.
Maintaining a quiet and efficient home countertop ice maker not only enhances your kitchen environment but also ensures that the appliance functions optimally for a longer period. Noise issues are often indicative of underlying problems that, if addressed early, can prevent more significant malfunctions down the line.
Additional Maintenance Tips
Additional Maintenance Tips
To keep your home countertop ice maker in top shape, consider the following maintenance tips:
- Regularly Check and Clean the Water Reservoir: Make it a habit to empty, clean, and refill the water reservoir with fresh water. Using filtered water can also help reduce mineral deposits that may cause noise and other issues.
- Descale the Ice Maker: Mineral build-up from hard water can cause noise and reduce efficiency. Descale your ice maker regularly using a descaling solution or a mixture of vinegar and water.
- Inspect Electrical Connections: Ensure that all electrical connections are secure and free from corrosion. Loose or corroded connections can cause intermittent noise and affect the ice maker’s performance.
- Monitor Ice Production Cycles: Pay attention to the ice production cycles. If the machine takes longer than usual to produce ice or makes unusual sounds during the cycle, it might be a sign of an underlying issue that needs addressing.
- Keep the Surrounding Area Clean: Dust and debris around the ice maker can be drawn into the machine, causing noise and potentially damaging the internal components. Regularly clean the area around your ice maker to prevent this.
- Store the Ice Maker Properly: If you need to store your home countertop ice maker for an extended period, ensure it is thoroughly cleaned, dried, and stored in a cool, dry place. Proper storage prevents mold growth and maintains the machine’s integrity.
- Use the Ice Maker Consistently: Regular use of your ice maker helps maintain its functionality and prevents stagnant water from becoming a breeding ground for bacteria. If you don’t use it frequently, consider running it through a few cycles periodically to keep it in good working condition.
By incorporating these maintenance practices, you can ensure that your home countertop ice maker remains a reliable and quiet addition to your kitchen. Regular upkeep not only enhances the appliance’s performance but also contributes to its longevity, providing you with continuous access to high-quality ice.
Conclusion
Cleaning and maintaining your home countertop ice maker is essential for its efficiency, ice quality, and longevity. By following the steps outlined in this guide, you can keep your ice maker in optimal condition, ensuring it runs smoothly and quietly. Regular maintenance not only improves the performance of the ice maker but also enhances the overall kitchen experience, providing you with fresh, clean ice whenever you need it.
Remember, a little effort in maintaining your ice maker can go a long way in preventing potential issues and extending its lifespan. Keep your appliance clean, perform regular checks, and address any issues promptly to enjoy the benefits of a well-functioning home countertop ice maker.
FAQs About Home Countertop Ice Makers
1. How Often Should I Clean My Countertop Ice Maker?
Cleaning your home countertop ice maker should be done every few weeks to ensure it remains in optimal working condition. Regular cleaning helps prevent the build-up of bacteria, mold, and mildew, which can affect the taste and safety of the ice. Additionally, if you notice any unusual odors or a decline in ice quality, it’s a good indicator that your ice maker needs cleaning.
2. Can I Use Any Type of Water in My Ice Maker?
While most countertop ice makers can use tap water, it is highly recommended to use filtered or distilled water. Using filtered water reduces the mineral deposits and impurities that can accumulate inside the machine, leading to better-tasting ice and less frequent cleaning. Hard water can cause scale build-up, which might affect the efficiency and longevity of your ice maker.
3. Why Is My Ice Maker Producing Cloudy Ice?
Cloudy ice is usually caused by impurities or minerals in the water. To produce clear ice, ensure you are using filtered or distilled water. Additionally, regular cleaning of your ice maker can help remove any build-up that might be affecting the clarity of the ice. Running a cleaning cycle with a mixture of water and vinegar or a commercial descaling solution can also help produce clearer ice.
4. What Should I Do If My Ice Maker Stops Making Ice?
If your home countertop ice maker stops producing ice, there are several steps you can take:
- Check the Water Reservoir: Ensure it is filled with water.
- Inspect the Power Supply: Make sure the ice maker is properly plugged in and turned on.
- Clean the Ice Maker: A dirty ice maker can impede ice production. Follow the cleaning steps in your user manual.
- Examine the Filter: If your ice maker has a filter, check if it needs cleaning or replacing.
- Reset the Machine: Some ice makers have a reset button. Consult the user manual for instructions on how to reset your machine.
If none of these steps work, it may be necessary to contact customer service or a professional technician.
5. How Can I Prevent My Ice Maker from Getting Noisy?
To prevent your ice maker from becoming noisy, regular maintenance is key. Here are a few tips:
- Keep the Machine Level: Ensure your ice maker is placed on a flat, stable surface to reduce vibration and noise.
- Clean Regularly: Remove any dust and debris from the fans and vents.
- Inspect for Loose Parts: Check for any loose screws or components and tighten them if necessary.
- Use Vibration-Absorbing Pads: Place rubber mats or pads under the machine to dampen vibrations.
- Lubricate Moving Parts: Apply a food-safe lubricant to accessible moving parts to reduce friction and noise.
If the noise persists, consulting the user manual or a professional technician might be necessary.
6. What Is the Best Way to Store My Ice Maker When Not in Use?
When you need to store your home countertop ice maker for an extended period, follow these steps to ensure it remains in good condition:
- Clean Thoroughly: Before storing, ensure the ice maker is thoroughly cleaned and dried to prevent mold and mildew growth.
- Remove All Water: Drain any remaining water from the reservoir and ice tray.
- Dry Completely: Leave the machine open to air dry completely before storing.
- Store in a Cool, Dry Place: Keep the ice maker in a cool, dry environment to avoid damage from moisture and temperature fluctuations.
- Cover the Ice Maker: Use a cover or plastic wrap to protect the machine from dust and dirt during storage.
If you encounter persistent issues, seek professional servicing. A technician can diagnose and repair more complex problems, ensuring your ice maker remains in good working condition.
By following these tips, you can ensure your home countertop ice maker remains efficient, produces high-quality ice, and has a longer lifespan. Regular maintenance and proper usage are key to enjoying the convenience of fresh ice whenever you need it. For more detailed guides and tips, visit the Home Solution Zone Blog.

