Introduction
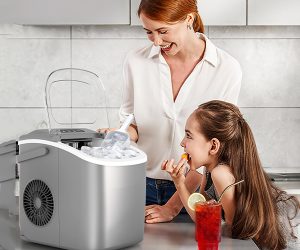
The purpose of this post is to help readers troubleshoot common issues with their home countertop ice maker. Whether you’re facing problems with ice production, strange noises, or water leaks, understanding the root cause of these issues and knowing how to fix them can save time and frustration. This guide aims to provide comprehensive solutions to ensure your ice maker operates smoothly and efficiently.
Basic Mechanics of a Home Countertop Ice Maker
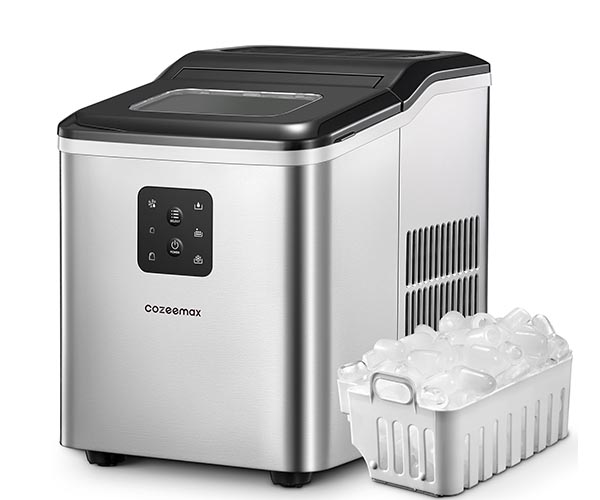
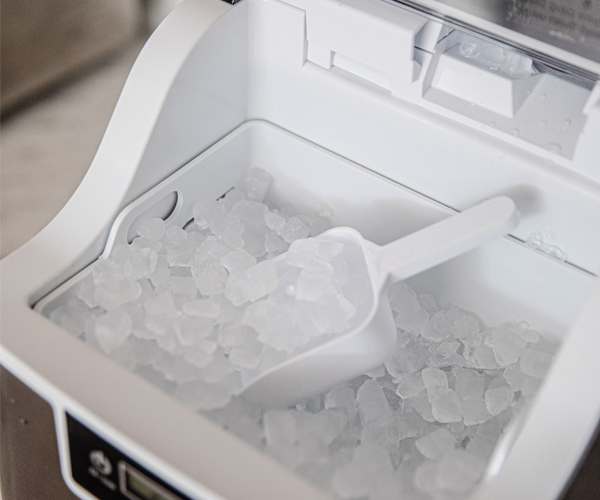
A home countertop ice maker is a compact appliance designed to produce ice quickly and efficiently. Here’s a step-by-step breakdown of its mechanics:
1. Water Reservoir and Pump System
- Water Reservoir: The process begins with a water reservoir that holds the necessary water for ice production. Users typically fill this manually.
- Pump System: A small pump draws water from the reservoir and distributes it over the ice mold or freezing tray.
2. Refrigeration and Freezing Cycle
- Compressor: The compressor plays a crucial role in the freezing process. It compresses refrigerant gas, raising its temperature and pressure.
- Condenser Coils: The high-pressure gas moves through condenser coils, usually located at the back of the unit, where it releases heat and condenses into a high-pressure liquid.
- Expansion Valve: The liquid refrigerant then passes through an expansion valve, where it rapidly expands and cools, turning into a low-pressure gas.
- Evaporator Coils: The cold gas flows through evaporator coils, which are situated around or within the ice mold. This is where the actual freezing occurs. The water in the mold freezes into ice cubes or nuggets.
3. Ice Formation and Harvesting
- Ice Mold: The water in the ice mold begins to freeze due to the cold temperature of the evaporator coils. The design of the mold determines the shape of the ice, whether cubes, nuggets, or bullet-shaped pieces.
- Thermostat and Sensor: A thermostat or sensor monitors the temperature of the ice mold. Once the ice reaches the desired hardness, the unit initiates the harvesting cycle.
- Heat Exchange: To release the ice, the unit briefly reverses the refrigeration cycle or uses a heating element to warm the mold slightly, loosening the ice.
- Ejection Mechanism: The ice is then ejected from the mold into a storage bin. This can be done using a motorized arm or a simple gravity-based drop.
4. Ice Storage and Accessibility
- Insulated Storage Bin: The freshly made ice is collected in an insulated storage bin, keeping it cold and ready for use. While this bin may not keep ice frozen indefinitely, it ensures a steady supply of ice is available.
- Accessibility: Users can access the ice through a simple lift-up lid or a drawer, depending on the design of the home countertop ice maker.
Understanding the basic mechanics of a home countertop ice maker provides valuable insight into its functionality and benefits. Whether you’re hosting a party, enjoying a cold beverage, or simply ensuring you have ice on hand, these compact machines offer a convenient and efficient solution for all your ice needs. With this knowledge, you can confidently choose the best countertop ice maker to suit your lifestyle.
Common Causes and Troubleshooting Steps
When your home countertop ice maker refuses to turn on, it can be a frustrating experience. Understanding the potential causes and troubleshooting steps can help you quickly identify and resolve the issue, ensuring your ice maker gets back to producing ice efficiently.
1. Power Supply Issues
One of the most common reasons your home countertop ice maker may not turn on is a problem with the power supply. Here are some steps to diagnose and fix power supply issues:
- Check the Power Cord: Ensure that the power cord is securely plugged into an electrical outlet. If the cord is damaged, replace it immediately.
- Inspect the Outlet: Test the outlet by plugging in another appliance to see if it works. If the outlet is not functioning, you may need to reset your circuit breaker or contact an electrician.
- Power Switch: Some models have a power switch on the back or side of the unit. Make sure it is turned on.
2. Internal Fuse or Circuit Breaker
Many ice makers have an internal fuse or circuit breaker that can trip if there is an electrical surge. Here’s how to check and reset it:
- Locate the Fuse: Refer to your user manual to find the location of the internal fuse.
- Inspect the Fuse: If the fuse appears to be blown, replace it with a fuse of the same rating.
- Reset the Circuit Breaker: If your ice maker has an internal circuit breaker, press the reset button.
3. Control Board Malfunction
The control board is the brain of your ice maker, controlling all of its functions. If it malfunctions, your ice maker may not turn on. Here’s what you can do:
- Visual Inspection: Look for any signs of damage or burnt components on the control board.
- Professional Help: If you suspect the control board is faulty, it’s best to contact a professional technician for repair or replacement.
4. Temperature Issues
Extreme temperatures can affect the functionality of your home countertop ice maker. Here’s how to address temperature-related issues:
- Ambient Temperature: Ensure that your ice maker is placed in an environment with a temperature between 55°F and 90°F. Temperatures outside this range can prevent the ice maker from operating correctly.
- Ventilation: Make sure the ice maker has adequate ventilation. Blocked vents can cause the unit to overheat, leading to shutdowns.
5. Water Supply Problems
A disrupted water supply can prevent your ice maker from turning on. Here are the steps to check and fix water supply issues:
- Water Line Connection: Verify that the water line is properly connected to the ice maker and that there are no kinks or blockages.
- Water Filter: A clogged water filter can restrict water flow. Replace the filter if it hasn’t been changed recently.
- Water Pressure: Ensure that the water pressure is within the recommended range. Low water pressure can hinder the ice-making process.
6. Internal Components
Sometimes, internal components like the compressor or motor may fail, preventing the ice maker from turning on. Here’s how to address this:
- Listen for Sounds: When you turn on the ice maker, listen for any unusual sounds like clicking or buzzing, which may indicate a problem with internal components.
- Check the Fan: Ensure that the fan is running smoothly and is not obstructed.
- Professional Inspection: If you suspect a problem with the compressor or motor, it’s advisable to have a professional technician inspect and repair the unit.
Troubleshooting a home countertop ice maker that won’t turn on involves a systematic approach to identify and resolve potential issues. By checking the power supply, internal fuse, control board, temperature, water supply, and internal components, you can often fix the problem and get your ice maker back in working order. Regular maintenance and preventive measures can also help keep your ice maker functioning smoothly, ensuring a continuous supply of your favorite nugget ice.
Water Supply Problems with Your Home Countertop Ice Maker
One of the most common issues encountered with a home countertop ice maker is related to the water supply. Ensuring a steady and clean water supply is crucial for the optimal performance and longevity of your ice maker. Let’s explore the potential problems and solutions to keep your ice maker running smoothly.
Common Water Supply Issues
- Water Line Blockages
- Blockages in the water line can disrupt the flow of water into the ice maker, resulting in inadequate ice production. These blockages are often caused by mineral deposits or debris in the water.
- Solution: Regularly check and clean the water line. If the blockage is severe, you may need to replace the water line entirely.
- Low Water Pressure
- Adequate water pressure is essential for your ice maker to function correctly. Low water pressure can lead to smaller ice cubes or slow ice production.
- Solution: Ensure that your water pressure meets the manufacturer’s recommended levels. You might need to install a pressure booster if your home has consistently low water pressure.
- Water Filter Issues
- A clogged or dirty water filter can impede the flow of water, affecting the quality and quantity of the ice produced.
- Solution: Replace the water filter according to the manufacturer’s guidelines. Regular maintenance of the water filter is essential to prevent clogs and ensure clean water supply.
- Kinked or Bent Water Hose
- If the water hose connecting to your ice maker is kinked or bent, it can restrict water flow and reduce ice production.
- Solution: Inspect the water hose for any kinks or bends and straighten it out. If the hose is damaged, replace it with a new one.
- Improper Water Connection
- An improperly connected water supply can cause leaks or insufficient water flow to your ice maker.
- Solution: Ensure that the water supply is securely and correctly connected to your ice maker. Tighten any loose connections and check for leaks.
Ensuring Optimal Water Quality
Maintaining high water quality is vital for producing clear and tasty ice. Poor water quality can lead to scaling, clogs, and unpleasant-tasting ice.
- Use a Water Softener
- Hard water can cause scaling and deposits inside the ice maker, affecting its performance.
- Solution: Install a water softener to reduce mineral content in the water, preventing scale buildup.
- Regular Cleaning and Descaling
- Periodic cleaning and descaling of your ice maker and water lines can prevent mineral buildup and ensure efficient operation.
- Solution: Follow the manufacturer’s instructions for cleaning and descaling your ice maker. Use approved descaling solutions to remove mineral deposits.
- Monitor Water Quality
- Regularly test the water quality to ensure it meets the necessary standards for ice production.
- Solution: Use water quality testing kits to monitor the levels of minerals and contaminants in your water supply. Adjust your water treatment solutions as needed.
How to Clean or Replace Filters in Your Home Countertop Ice Maker
Maintaining your home countertop ice maker is essential to ensure it produces high-quality ice and operates efficiently. One of the most crucial maintenance tasks is to regularly clean or replace the filters. Here’s a step-by-step guide on how to keep your ice maker’s filters in top condition.
Why Filter Maintenance is Important
The filters in your home countertop ice maker play a critical role in removing impurities from the water used to make ice. Clean filters ensure:
- Better Ice Quality: Reduces contaminants that can affect the taste and clarity of the ice.
- Longer Machine Lifespan: Prevents buildup that can cause damage to the ice maker.
- Efficient Operation: Ensures the ice maker works at its optimal performance, saving energy and reducing wear and tear.
Steps to Clean or Replace Filters
1. Turn Off and Unplug the Ice Maker
- Before performing any maintenance, always turn off the ice maker and unplug it from the power source to ensure safety.
2. Locate the Filters
- Refer to the user manual of your specific home countertop ice maker model to find the location of the filters. Common locations include:
- Near the water reservoir
- Behind a service panel
- Within the water intake line
3. Remove the Filters
- Carefully remove the filters as instructed in the user manual. This may involve unscrewing a panel or gently pulling the filter from its housing.
4. Cleaning the Filters
- Rinse Under Water: Use clean water to rinse off any debris or sediment from the filters.
- Use Vinegar Solution: Soak the filters in a solution of vinegar and water (1:1 ratio) for about 10-15 minutes to dissolve any mineral buildup.
- Brush Away Residue: Use a soft brush to gently scrub away any remaining residue. Avoid using harsh chemicals or abrasive materials that could damage the filter.
5. Replacing the Filters
- If the filters are too clogged or damaged, it’s best to replace them with new ones. Make sure to purchase the correct replacement filters compatible with your home countertop ice maker.
6. Reinstall the Filters
- Once cleaned or replaced, reinstall the filters into the ice maker, ensuring they are securely and correctly positioned.
7. Run a Cleaning Cycle
- After reinstalling the filters, run a cleaning cycle to flush out any residual cleaning solution and ensure the ice maker is functioning correctly. This can be done by running the machine without making ice, letting water pass through the new or cleaned filters.
8. Regular Maintenance Schedule
- Monthly Cleaning: Aim to clean the filters at least once a month to prevent buildup and maintain ice quality.
- Biannual Replacement: Replace the filters every 6 months or as recommended by the manufacturer, especially if you notice a decline in ice quality or production.
Adjusting the Temperature Settings on Your Home Countertop Ice Maker
Proper temperature settings are crucial for the optimal performance of your home countertop ice maker. Adjusting these settings can help ensure your machine produces the best quality ice while maintaining efficiency. Here’s how to fine-tune the temperature settings on your ice maker for the best results:
Importance of Temperature Settings
- Ice Quality: The right temperature ensures that your ice is clear and properly formed. Too high or too low temperatures can lead to cloudy or misshapen ice.
- Machine Efficiency: Proper temperature settings can enhance the efficiency of your ice maker, reducing energy consumption and prolonging the machine’s lifespan.
- Consistency: Maintaining a consistent temperature helps the ice maker produce ice at a steady rate, ensuring you always have enough ice on hand.
Steps to Adjust the Temperature Settings
- Refer to the User Manual
- Start by reading the user manual specific to your home countertop ice maker. Different models have different methods for adjusting the temperature.
- Manuals typically provide a recommended temperature range that ensures optimal ice production and quality.
- Locate the Temperature Control
- On most home countertop ice makers, the temperature control dial or digital display is located inside the machine or on the control panel.
- For machines with digital displays, navigate to the settings menu to find the temperature adjustment options.
- Set to the Recommended Range
- Adjust the temperature to the manufacturer’s recommended setting. This is usually between 0°F and 5°F (-18°C to -15°C) for most ice makers.
- Use a thermometer to verify the internal temperature if your machine doesn’t have a built-in display.
- Monitor Ice Production
- After adjusting the temperature, monitor the ice production for the next 24 hours.
- Check the quality and clarity of the ice. If the ice appears cloudy or melts quickly, you may need to fine-tune the settings.
- Fine-Tuning the Settings
- If the ice quality is not satisfactory, make small adjustments (1-2 degrees) to the temperature.
- Allow the machine to run for a few hours after each adjustment before re-evaluating the ice quality.
Dirty Components in Your Home Countertop Ice Maker: How to Clean and Maintain
When it comes to the home countertop ice maker, keeping it clean is crucial for ensuring it produces safe and high-quality ice. Over time, components can become dirty, leading to problems like unpleasant odors, decreased ice quality, and even potential health risks. Here’s a detailed guide on how to address and clean dirty components in your home countertop ice maker.
Common Dirty Components and Their Issues
1. Water Reservoir
- Problem: Mineral buildup and algae growth.
- Solution: Regularly empty and clean the water reservoir with a mixture of water and vinegar.
2. Ice Storage Bin
- Problem: Mold and mildew development.
- Solution: Wipe down the bin with a disinfectant solution. Ensure it’s thoroughly dried before using it again.
3. Evaporator Plate
- Problem: Lime scale and residue buildup.
- Solution: Use a soft brush to scrub off any buildup. Clean it with a descaling solution periodically.
4. Ice Scoop
- Problem: Bacteria and grime accumulation.
- Solution: Wash the ice scoop regularly with hot soapy water and sanitize it.
5. Condenser Coils
- Problem: Dust and debris accumulation.
- Solution: Use a vacuum cleaner or a brush to remove dust from the coils to maintain efficient operation.
Detailed Cleaning Process
Step 1: Unplug and Empty the Machine
Before starting any cleaning process, make sure your home countertop ice maker is unplugged and all remaining ice and water are removed.
Step 2: Clean the Water Reservoir
- Mixture: Combine equal parts of white vinegar and warm water.
- Process: Pour the solution into the reservoir and let it sit for 15 minutes. Use a soft brush to scrub any visible buildup. Rinse thoroughly with clean water.
Step 3: Disinfect the Ice Storage Bin
- Solution: Mix one tablespoon of bleach with one gallon of water.
- Process: Wipe down the interior of the bin with the solution using a cloth. Allow it to air dry completely before reinserting it into the machine.
Step 4: Descale the Evaporator Plate
- Descaling Agent: Use a commercial descaling solution or a homemade mixture of lemon juice and water.
- Process: Apply the descaling agent to the plate, let it sit for 10-20 minutes, and then scrub gently with a soft brush. Rinse thoroughly.
Step 5: Sanitize the Ice Scoop
- Sanitizer: Use a food-safe sanitizer or soak the scoop in a bleach solution.
- Process: Rinse well after sanitizing and allow it to air dry.
Step 6: Clean the Condenser Coils
- Tool: Use a vacuum cleaner with a brush attachment.
- Process: Gently vacuum the coils to remove dust and debris, which can hinder the machine’s efficiency.
Regular Maintenance Tips
- Weekly: Wipe down the exterior and empty the ice bin to prevent mold.
- Monthly: Deep clean the water reservoir, ice bin, and evaporator plate.
- Quarterly: Check and clean the condenser coils.
Why Regular Cleaning is Important
Regular maintenance of your home countertop ice maker not only extends the life of the appliance but also ensures that the ice it produces is safe for consumption. Dirty components can lead to a host of issues, from strange-tasting ice to potential health hazards. By keeping up with a cleaning schedule, you can enjoy the convenience and benefits of having an ice maker at home without the worry of contamination.
Impurities in the Water
When using a home countertop ice maker, the quality of the water you use is crucial to the performance and longevity of your machine. Impurities in the water can have several negative impacts, ranging from affecting the taste and clarity of your ice to causing damage to the ice maker itself. Here’s why paying attention to water quality is essential:
1. Impact on Ice Quality
- Taste and Smell: Impurities such as chlorine, heavy metals, and organic compounds can impart unpleasant tastes and odors to your ice. This not only affects the flavor of your beverages but can also be off-putting for guests.
- Appearance: Clean, pure water produces clear ice, while water with impurities often results in cloudy or discolored ice cubes. This can detract from the aesthetic appeal of your drinks.
2. Health Considerations
- Contaminants: Water can carry harmful bacteria, viruses, and parasites. Using contaminated water in your home countertop ice maker could pose health risks if ingested.
- Minerals and Hard Water: High levels of minerals like calcium and magnesium can lead to hard water, which, over time, can build up inside your ice maker and affect its efficiency and performance.
3. Machine Performance and Maintenance
- Scaling: Mineral deposits from hard water can accumulate in the internal components of your ice maker. This scaling can reduce the efficiency of the machine, cause mechanical failures, and necessitate more frequent maintenance.
- Clogging: Sediments and particulate matter in impure water can clog the water lines and filters, leading to reduced water flow and potential damage to the machine.
4. How to Ensure Clean Water for Your Ice Maker To maintain the optimal performance of your home countertop ice maker and ensure the quality of your ice, consider the following steps:
- Use Filtered Water: Installing a water filter can significantly reduce the impurities entering your ice maker. Filters can remove chlorine, sediments, heavy metals, and other contaminants, resulting in cleaner, better-tasting ice.
- Regular Cleaning: Regularly clean your ice maker according to the manufacturer’s instructions. This helps to remove any buildup of impurities and ensures the machine operates efficiently.
- Descale Periodically: Use descaling solutions specifically designed for ice makers to remove mineral buildup. This maintenance step is especially important if you have hard water.
- Check Water Quality: Periodically test your water quality using home testing kits. This helps you identify any impurities and take corrective action before they affect your ice maker.
5. Types of Water Filters When choosing a water filter for your home countertop ice maker, consider the following types:
- Carbon Filters: Effective at removing chlorine, organic compounds, and some heavy metals. These are typically used in pitcher filters and faucet-mounted filters.
- Reverse Osmosis Systems: These systems can remove a wide range of contaminants, including dissolved salts, heavy metals, and microorganisms. They are more comprehensive but also more expensive and complex to install.
- Sediment Filters: These filters are designed to remove particulate matter such as sand, silt, and rust. They are often used as a pre-filter in conjunction with other filtration systems.
Ensuring the water you use in your home countertop ice maker is free from impurities is vital for producing high-quality ice, maintaining your health, and extending the lifespan of your machine. By using filtered water, performing regular maintenance, and periodically checking water quality, you can enjoy the best possible performance from your ice maker. This attention to detail not only improves the taste and appearance of your ice but also ensures that your appliance remains in top working condition for years to come.
Malfunctioning Ice Trays in Home Countertop Ice Makers
When it comes to home countertop ice makers, one of the most common issues users face is malfunctioning ice trays. This can disrupt your ice-making process, leaving you without a steady supply of ice. Understanding the causes of malfunctioning ice trays and how to address them can help you maintain the efficiency of your ice maker and ensure it operates smoothly.
Common Causes of Malfunctioning Ice Trays
Several factors can lead to malfunctioning ice trays in your home countertop ice maker. Here are some of the most common causes:
- Blockages and Obstructions: Ice or other debris can block the ice tray, preventing it from moving properly.
- Temperature Issues: If the temperature inside the ice maker is not correctly regulated, it can cause the ice to freeze improperly.
- Mechanical Failures: Broken or worn-out components, such as motors or gears, can prevent the ice tray from functioning correctly.
- Water Supply Problems: An inadequate or inconsistent water supply can hinder the ice-making process, affecting the ice tray’s performance.
Diagnosing the Problem
To effectively address a malfunctioning ice tray in your home countertop ice maker, it’s crucial to diagnose the problem accurately. Here are some steps to follow:
- Inspect for Blockages: Check the ice tray and surrounding areas for any ice build-up or foreign objects that might be obstructing movement.
- Check Temperature Settings: Ensure that the temperature inside the ice maker is set correctly. Refer to the manufacturer’s guidelines for optimal settings.
- Examine Mechanical Parts: Look for any visible signs of wear or damage in the mechanical components of the ice tray mechanism.
- Verify Water Supply: Ensure that the water supply line is connected properly and that there is a steady flow of water to the ice maker.
Troubleshooting Tips
If you’ve identified the cause of the malfunctioning ice tray, here are some troubleshooting tips to help you resolve the issue:
- Remove Blockages: If you find any ice or debris blocking the tray, carefully remove it. Use a soft cloth or warm water to melt any ice build-up.
- Adjust Temperature: If the temperature is too high or too low, adjust it to the recommended settings. This can help ensure that the ice forms properly and the tray operates smoothly.
- Replace Worn Components: If you find that any mechanical parts are damaged or worn out, consider replacing them. Consult your ice maker’s manual for instructions on how to replace specific components.
- Ensure Proper Water Flow: Check the water supply line for kinks or blockages and ensure it is securely connected. A consistent water supply is crucial for the proper functioning of the ice tray.
Preventative Measures
To prevent future issues with your ice trays in your home countertop ice maker, consider implementing the following preventative measures:
- Regular Cleaning: Regularly clean your ice maker and ice tray to prevent build-up of ice and debris. This can help maintain smooth operation and prolong the life of your appliance.
- Routine Maintenance: Follow the manufacturer’s recommended maintenance schedule. This may include periodic checks and replacement of certain components to keep your ice maker in top condition.
- Monitor Temperature: Regularly check and adjust the temperature settings to ensure they remain within the optimal range for ice production.
Dealing with a malfunctioning ice tray in your home countertop ice maker can be frustrating, but understanding the common causes and knowing how to troubleshoot and prevent these issues can help you keep your ice maker running efficiently. By following these tips and maintaining your ice maker properly, you can enjoy a steady supply of perfect ice for all your needs.
Excessive Noise in Home Countertop Ice Makers
One of the common issues with a home countertop ice maker is excessive noise. While these machines are designed to be as quiet as possible, there are times when they can produce an unexpected amount of noise. Understanding the reasons behind this noise and how to address it can help ensure your ice maker operates smoothly and quietly.
Causes of Excessive Noise
- Vibration
- Unstable Surface: Placing the ice maker on an uneven or unstable surface can cause it to vibrate excessively.
- Loose Components: Internal components that are not properly secured can vibrate and produce noise.
- Fan Issues
- Dirty Fan Blades: Dust and debris on the fan blades can cause it to make noise as it operates.
- Worn-out Fan Motor: A fan motor that is old or damaged can become noisy over time.
- Compressor Problems
- Overworked Compressor: If the compressor is working too hard, it can generate a significant amount of noise.
- Mechanical Issues: Internal mechanical problems within the compressor can lead to loud, unusual sounds.
- Ice Production Cycle
- Ice Ejection: The process of ice being ejected from the mold into the storage bin can be noisy.
- Water Pump: The water pump operating during the ice-making cycle can produce sound, especially if it is struggling to draw water.
Solutions to Reduce Noise
- Stabilize the Ice Maker
- Ensure the ice maker is placed on a flat, stable surface.
- Use anti-vibration pads under the unit to absorb movement and reduce noise.
- Clean and Maintain
- Regularly clean the fan blades and other components to prevent dirt buildup.
- Inspect the fan motor and replace it if it shows signs of wear or damage.
- Check and Secure Components
- Open the ice maker and check for any loose parts. Tighten any screws or fasteners as needed.
- Ensure all internal components are properly secured and in their correct positions.
- Monitor the Compressor
- If the compressor is consistently noisy, consider having it inspected by a professional.
- Regular maintenance can help prevent the compressor from becoming overworked.
- Optimize Ice Production
- Make sure the water supply to the ice maker is adequate and consistent.
- Avoid overloading the machine, as this can cause strain and noise during the ice-making cycle.
By addressing these potential issues and following the suggested solutions, you can significantly reduce the noise level of your home countertop ice maker. This not only ensures a more pleasant environment in your kitchen or home but also helps extend the lifespan and efficiency of your appliance.
How to Store Your Ice Maker When Not in Use
Properly storing your home countertop ice maker when it’s not in use is essential to maintain its longevity and performance. Neglecting this step can lead to issues like mold growth, mechanical problems, and a shorter lifespan for your appliance. Here’s a detailed guide to help you store your home countertop ice maker effectively.
1. Clean the Ice Maker Thoroughly
Before storing your home countertop ice maker, it’s crucial to clean it thoroughly. This ensures that no ice residues, bacteria, or mold remain inside. Follow these steps for a comprehensive cleaning:
- Empty the Ice Bin: Remove all ice from the bin and discard it.
- Run a Cleaning Cycle: Most modern ice makers have a cleaning mode. Use this function with a mixture of water and a mild detergent or a manufacturer-recommended cleaning solution.
- Wipe Down Surfaces: Use a soft cloth and a mild cleaning solution to wipe down all internal and external surfaces of the ice maker. Pay special attention to the ice bin, water reservoir, and ice chute.
- Rinse: Rinse all parts thoroughly with clean water to remove any detergent residues.
- Dry: Ensure all components are completely dry before storage to prevent mold growth. Leave the lid open for a few hours if necessary.
2. Disassemble Removable Parts
Disassemble any removable parts from your home countertop ice maker. This typically includes the ice bin, water reservoir, and sometimes the ice scoop. Cleaning these parts separately ensures they are thoroughly sanitized and dried before storage.

3. Store in a Cool, Dry Place
The environment where you store your home countertop ice maker is crucial. Choose a location that is:
- Cool: Extreme temperatures can damage the ice maker’s components.
- Dry: Humidity can lead to rust and mold growth.
- Away from Direct Sunlight: Prolonged exposure to sunlight can damage the plastic parts and affect the appliance’s performance.
4. Cover the Ice Maker
Covering your home countertop ice maker protects it from dust and debris. You can use the original box if you still have it, or a large plastic bag or a dust cover specifically designed for appliances.
5. Secure Cables and Accessories
Wrap the power cord neatly and secure it with a twist tie or a Velcro strap. Store any accessories, like the ice scoop or cleaning brush, in a ziplock bag and place it inside the ice maker or with the appliance.
6. Periodic Maintenance
If you plan to store your home countertop ice maker for an extended period, it’s a good idea to check on it periodically. Open the cover and inspect for any signs of mold, rust, or pest infestation. This periodic check ensures that the appliance remains in good condition.
7. Preparing for Use After Storage
When you’re ready to use your home countertop ice maker again, follow these steps to ensure it’s ready for operation:
- Inspect: Check for any signs of damage or wear and tear that may have occurred during storage.
- Clean: Give it a quick clean, focusing on removing any dust or debris that may have accumulated.
- Test Run: Run a cycle with water only to flush out any remaining residues before making ice.
Properly storing your home countertop ice maker when not in use will significantly extend its lifespan and ensure it operates efficiently when you need it. By following these steps, you’ll keep your ice maker in top condition, ready to provide you with high-quality nugget ice whenever you need it. Regular maintenance and mindful storage practices are key to enjoying the benefits of your appliance for years to come.
Signs That Indicate Serious Problems with Your Home Countertop Ice Maker
Even the best home countertop ice makers can encounter issues. Recognizing the signs of serious problems early can save you time, money, and frustration. Here are some critical indicators that your ice maker needs professional attention or a possible replacement:
1. Unusual Noises
- Grinding Sounds: If your home countertop ice maker starts making grinding noises, it could be due to a malfunctioning motor or a problem with the auger.
- Loud Banging: Loud banging or clunking sounds often indicate that internal components are loose or misaligned.
2. Poor Ice Production
- Decreased Output: A significant drop in the amount of ice produced, despite regular cleaning and maintenance, can suggest an issue with the compressor or evaporator.
- Inconsistent Ice Size: If your ice maker produces uneven or irregularly shaped ice nuggets, it could be a sign of problems with the freezing mechanism or water supply.
3. Ice Quality Issues
- Cloudy Ice: While some cloudiness can be normal, consistently cloudy ice might indicate poor water quality or a problem with the filtration system.
- Off-Tasting Ice: If your ice has a strange taste, it could be due to mold, mildew, or contaminated water lines.
4. Leaks and Water Issues
- Water Leaks: Puddles forming under or around your ice maker suggest a leak. This could be due to a damaged water line, a faulty pump, or a cracked reservoir.
- Inadequate Water Supply: If the ice maker isn’t getting enough water, it might not produce ice at all. This can be caused by blockages or issues with the water inlet valve.
5. Electrical Problems
- Frequent Power Cycling: If your home countertop ice maker keeps turning on and off, it might be due to electrical issues such as a faulty thermostat or a wiring problem.
- No Power: A unit that won’t power on at all could indicate a serious electrical fault or a blown fuse.
6. Error Messages and Indicators
- Error Codes: Many modern ice makers come with digital displays that show error codes when something goes wrong. Refer to your user manual to interpret these codes.
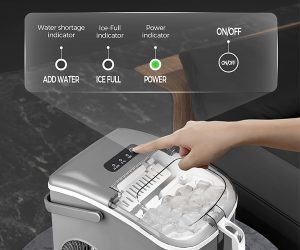
- Warning Lights: Blinking or steady warning lights often signal that the machine requires maintenance or has encountered a fault.
7. Physical Damage
- Cracks and Breaks: Visible damage to the exterior or interior components can affect the performance of your ice maker.
- Corrosion and Rust: Corrosion, particularly around the water lines and ice storage area, can compromise the quality and safety of the ice produced.
Troubleshooting and Solutions
Basic Troubleshooting Steps
- Check Power Supply: Ensure the unit is plugged in and the outlet is working.
- Inspect Water Line: Make sure there are no kinks or blockages in the water supply line.
- Clean the Machine: Regular cleaning can prevent many issues. Use a solution of water and vinegar to descale the unit.
- Refer to the Manual: Your user manual can provide specific troubleshooting tips for your model.
When to Call a Professional
- Persistent Issues: If basic troubleshooting doesn’t resolve the problem, it might be time to call a professional technician.
- Complex Repairs: Electrical issues, motor problems, and significant leaks often require expert intervention.
Preventative Maintenance Tips
- Regular Cleaning: Clean your ice maker at least once a month to prevent buildup of minerals and mold.
- Filter Replacement: Replace the water filter as recommended by the manufacturer to ensure the ice quality remains high.
- Scheduled Inspections: Consider periodic professional inspections to catch and fix small issues before they become major problems.
By keeping an eye out for these signs and performing regular maintenance, you can ensure your home countertop ice maker continues to produce high-quality ice efficiently and effectively. Remember, early intervention can often prevent the need for costly repairs or replacements.
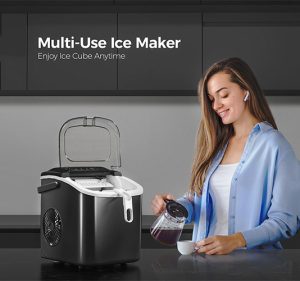
Investing in a home countertop ice maker can significantly enhance your kitchen experience, offering convenience and versatility for a variety of needs. Whether you are hosting parties, enjoying a quiet evening with a chilled drink, or requiring ice for therapeutic purposes, having a reliable ice maker on your countertop can be a game-changer.
Key Benefits of a Home Countertop Ice Maker
- Convenience: One of the primary benefits of a home countertop ice maker is the convenience it offers. No more running to the store for bags of ice or dealing with bulky ice trays. With a countertop ice maker, you can have a steady supply of ice at your fingertips.
- Speed: These machines are designed to produce ice quickly, often within minutes. This is especially useful when you need a large quantity of ice on short notice.
- Compact Design: Most home countertop ice makers are compact and can fit easily on your kitchen counter without taking up too much space. Their portable design also means you can move them around as needed.
- Variety of Ice Types: Many modern ice makers offer different types of ice, such as bullet, nugget, or cube ice, allowing you to choose the perfect ice for your drinks and other needs.
- Cost-Effective: Over time, having a home countertop ice maker can be more cost-effective than regularly purchasing bagged ice. It’s a one-time investment that pays off in the long run.
Features to Look For
When selecting a home countertop ice maker, consider the following features:
- Ice Production Capacity: Check how much ice the machine can produce in a day. Higher capacity models are ideal for larger families or frequent entertainers.
- Ice Storage Capacity: Ensure the machine has sufficient storage to hold the ice it produces until you are ready to use it.
- Ease of Use: Look for user-friendly controls and settings. Some models come with digital displays and touch controls, making them easier to operate.
- Maintenance and Cleaning: Choose a model that is easy to clean and maintain. Some ice makers come with self-cleaning functions.
- Energy Efficiency: Consider models that are energy efficient to help reduce your electricity bills.
Top Picks for Home Countertop Ice Makers
Here are some top-rated home countertop ice makers to consider:
- GE Profile Opal Nugget Ice Maker: Known for its chewable nugget ice and sleek design, this model is perfect for ice enthusiasts.
- Igloo ICEB26HNSS: A compact and affordable option that produces bullet-shaped ice quickly.
- NewAir AI-100BK: Offers fast ice production and a large storage capacity, making it ideal for parties.
Maintenance Tips for Longevity
To ensure your home countertop ice maker lasts for years, follow these maintenance tips:
- Regular Cleaning: Clean the machine regularly to prevent buildup of minerals and bacteria. Use a mixture of vinegar and water for a thorough clean.
- Use Filtered Water: Using filtered water can reduce mineral deposits and improve the taste of the ice.
- Check for Leaks: Regularly inspect the machine for any leaks or issues. Addressing problems early can prevent more significant damage.
- Defrost if Needed: Some models may require defrosting to maintain efficiency. Follow the manufacturer’s instructions for this process.
Conclusion
In conclusion, a home countertop ice maker is a valuable addition to any kitchen. It provides convenience, speed, and the ability to produce various types of ice on demand. By choosing the right model and maintaining it properly, you can enjoy the benefits of fresh, high-quality ice anytime you need it. Whether for daily use or special occasions, a countertop ice maker enhances your culinary and beverage experiences, making it a worthwhile investment.
FAQ for Home Countertop Ice Makers
1. How long does it take for a home countertop ice maker to produce ice?
- Most home countertop ice makers can produce their first batch of ice in as little as 6-15 minutes, depending on the model and the type of ice being made.
2. How do I clean my home countertop ice maker?
- To clean your ice maker, unplug it and remove any remaining ice. Use a mixture of vinegar and water to wipe down the interior surfaces. Some models have a self-cleaning function, which simplifies the process.
3. Can I use tap water in my countertop ice maker?
- While you can use tap water, it is recommended to use filtered water to improve the quality of the ice and to reduce mineral buildup within the machine, which can extend its lifespan.
4. How much ice can a home countertop ice maker produce in a day?
- Production capacity varies by model, but most home countertop ice makers can produce between 26 to 40 pounds of ice per day.
5. What type of ice can a home countertop ice maker produce?
- Home countertop ice makers can produce various types of ice, including nugget, bullet, and cube ice. The type of ice produced depends on the specific model of the ice maker.
Conclusion
In conclusion, a home countertop ice maker is a valuable addition to any kitchen. It provides convenience, speed, and the ability to produce various types of ice on demand. By choosing the right model and maintaining it properly, you can enjoy the benefits of fresh, high-quality ice anytime you need it. Whether for daily use or special occasions, a countertop ice maker enhances your culinary and beverage experiences, making it a worthwhile investment.
We’d love to hear from you! Share your experiences and tips with home countertop ice makers in the comments. Visit Home Solution Zone to join the conversation.

