Introduction
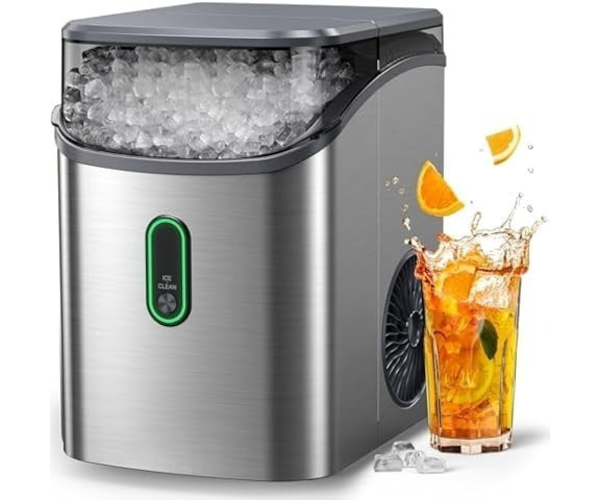
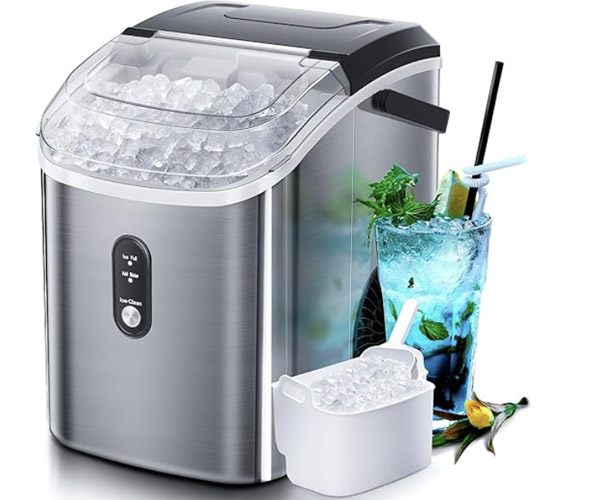
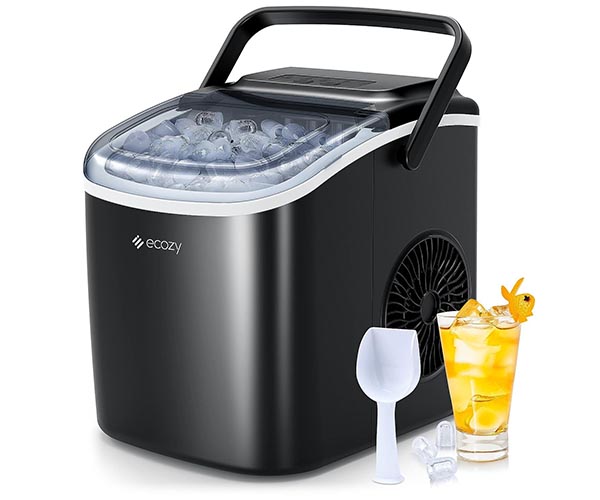
To make sure you always have fresh, hygienic ice on hand, it’s imperative to maintain the efficiency and cleanliness of your countertop ice maker. Regular maintenance not only keeps your appliance working longer, but it also shields it from frequent issues like mildew, mineral buildup, and bad odors. This thorough guide will bring you through every step of maintaining the best possible condition for your ice maker, from regular cleaning schedules to typical problem solving. You can make sure your ice maker is a dependable and effective component of your kitchen by following these instructions.https://amzn.to/3WoePQf
Understanding Your Countertop Ice Maker
When it comes to maintaining your countertop ice maker, understanding its components and functionality is crucial. Not only does this knowledge help in performing routine maintenance, but it also ensures that your machine runs efficiently and produces the best quality ice. Let’s dive into the key components and the benefits of regular maintenance for your ice maker.
Components and Functionality
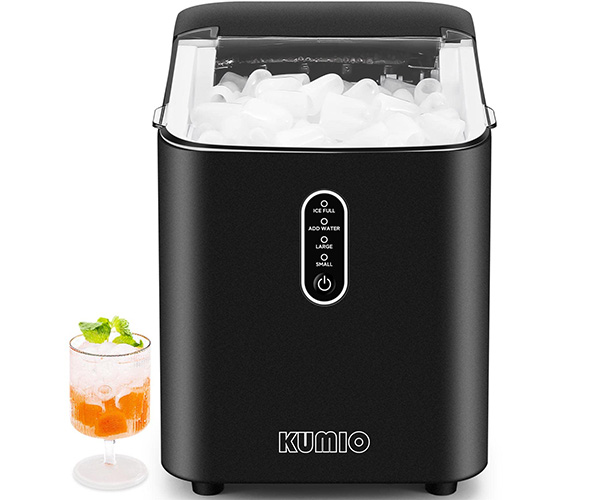
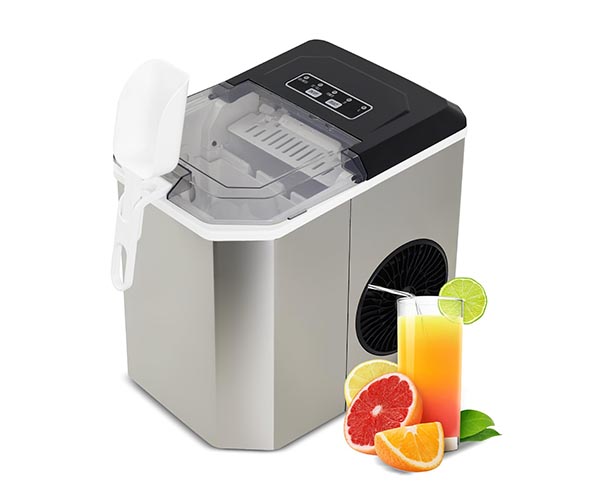
A countertop ice maker consists of several essential parts that work together to produce ice. Here’s a breakdown of the main components and their functions:
- Water Reservoir: This is where the water is stored before it is converted into ice. Keeping this reservoir clean is vital for producing clear and hygienic ice.
- Ice Tray: The tray holds the water as it freezes into ice cubes. Regular cleaning prevents the buildup of minerals and other residues that can affect ice quality.
- Compressor: The compressor is responsible for cooling the water in the ice tray. It compresses the refrigerant, which then absorbs heat from the water, causing it to freeze.
- Condenser: The condenser dissipates the heat absorbed by the refrigerant during the cooling process. Ensuring it is clean and free of dust enhances the efficiency of the cooling process.
- Fan: The fan helps in circulating air over the condenser to improve the cooling efficiency. Regular cleaning prevents dust accumulation, which can hinder its performance.
- Water Pump: This pump moves water from the reservoir to the ice tray. It is essential to keep the pump clean to prevent blockages and ensure smooth operation.
- Sensors and Controls: These components monitor the water levels, ice production, and overall operation of the ice maker. Keeping these sensors clean ensures accurate readings and efficient functioning.
Benefits of Regular Maintenance
Maintaining your countertop ice maker is not just about keeping it clean; it’s about ensuring it operates at its best. Here are some key benefits of regular maintenance:
- Enhanced Efficiency: Regular cleaning and maintenance prevent the buildup of minerals and residues, which can impede the machine’s efficiency. An efficient machine consumes less energy and produces ice faster.
- Improved Ice Quality: Clean components mean that the ice produced is clear and free from any unpleasant tastes or odors. Using filtered water and keeping the reservoir clean are crucial steps in maintaining ice quality.
- Extended Lifespan: Regular maintenance can significantly extend the lifespan of your ice maker. By preventing wear and tear on critical components, you reduce the risk of breakdowns and costly repairs.
- Cost Savings: An efficiently running ice maker uses less electricity, which can lead to lower energy bills. Additionally, preventing major issues through regular maintenance saves money on repairs and replacements.
- Consistent Performance: Regularly maintained ice makers are less likely to experience issues such as slow ice production, unusual noises, or water leakage. Consistent performance means you always have a steady supply of ice when you need it.
- Hygiene and Safety: Regular cleaning prevents the growth of mold, bacteria, and other harmful microorganisms. This is especially important for ensuring the ice is safe to consume.
Maintenance Tips
To keep your countertop ice maker in top condition, follow these maintenance tips:
- Daily Cleaning: Wipe down the exterior and interior surfaces with a soft cloth and mild detergent. Ensure all parts are thoroughly dried before reassembling and using the machine.
- Weekly Deep Cleaning: Disassemble the removable parts and clean them thoroughly with a mixture of vinegar and water. Pay special attention to hard-to-reach areas and ensure all parts are dried completely.
- Monthly Checks: Inspect the water line for any leaks or blockages and check the filters. Replace the filters as needed to maintain water quality.
- Descaling: Perform descaling every three to six months to remove mineral buildup. Use a commercial descaling solution or a mixture of vinegar and water for best results.
- Preventive Measures: Use filtered water to reduce mineral deposits, keep the machine dry to prevent mold growth, and store it properly when not in use.
By understanding the components and functionality of your countertop ice maker and committing to a regular maintenance routine, you can ensure that your machine remains efficient and produces high-quality ice for years to come. Remember, a well-maintained ice maker is not only more efficient but also safer and more economical in the long run.
Daily Cleaning Routine for Your Countertop Ice Maker
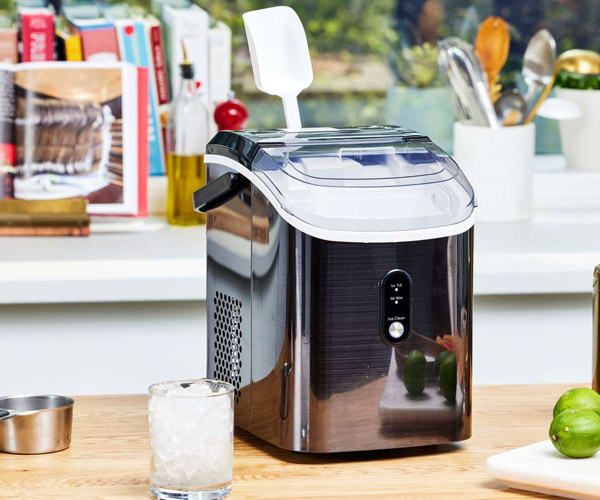
Maintaining a clean and efficient countertop ice maker is essential for ensuring the quality and hygiene of the ice it produces. Here’s a detailed guide on how to perform a quick daily cleaning routine for your ice maker, including the required tools and materials, and tips to prevent buildup and mold.https://amzn.to/3WoePQf
Quick Daily Cleaning Steps
Keeping your countertop ice maker cleaning solution simple yet effective can save you time and effort. Follow these steps to ensure your ice maker remains in top condition:
- Unplug the Machine: Always start by unplugging your ice maker to ensure safety.
- Empty the Ice Bin: Remove any remaining ice from the bin and discard it. If your ice maker has a water reservoir, empty that as well.
- Wipe Down Surfaces: Use a soft cloth dampened with a mild detergent to wipe down the interior and exterior surfaces of the ice maker. Pay special attention to the ice bin and any areas where water collects.
- Rinse and Dry: After wiping down, use a clean cloth dampened with water to rinse away any detergent residue. Dry all surfaces thoroughly with a dry cloth.
- Reassemble and Plug In: Once everything is clean and dry, reassemble any removable parts and plug the ice maker back in.
Required Tools and Materials
To perform daily cleaning of your countertop ice maker effectively, you’ll need the following tools and materials:
- Soft Cloths: Use these for wiping and drying the surfaces.
- Mild Detergent: A gentle cleaning agent that won’t leave harmful residues.
- Warm Water: For dampening the cloths and rinsing.
- Dry Towels: Ensure all parts are completely dry before reassembling.
Tips to Prevent Buildup and Mold
Preventing buildup and mold is crucial for maintaining the efficiency and hygiene of your ice maker. Here are some tips to keep in mind:
- Use Filtered Water: Using filtered water can reduce mineral deposits and improve the quality of your ice.
- Keep the Ice Maker Dry: After cleaning, ensure that all parts are thoroughly dried before reassembling. This helps prevent mold growth.
- Regular Inspections: Frequently check your ice maker for any signs of mold or mineral buildup. Early detection can prevent larger issues.
- Proper Storage: If you’re not using the ice maker for an extended period, clean it thoroughly and store it in a dry place.
By following these daily cleaning steps and tips, you can ensure that your countertop ice maker remains clean and efficient, providing you with fresh and hygienic ice at all times. Regular maintenance not only enhances the performance of your ice maker but also extends its lifespan, making it a reliable appliance in your kitchen.
Weekly Deep Cleaning for Your Countertop Ice Maker
Keeping your countertop ice maker in optimal condition requires more than just daily maintenance. A thorough weekly deep cleaning is essential to ensure that your ice maker remains efficient and free from contaminants. Here’s a detailed guide to help you carry out a comprehensive cleaning process, safely disassemble the parts, and choose the right cleaning solutions.
Detailed Deep Cleaning Process
A deep clean involves more than just wiping down surfaces. It requires getting into the nooks and crannies of your countertop ice maker to remove any hidden dirt, mold, and mineral deposits. Here’s how to do it:
- Unplug the Ice Maker: Safety first! Always start by unplugging your machine to avoid any electrical hazards.
- Empty the Ice Bin: Remove all ice from the bin. Dispose of any ice that may have been sitting for a while.
- Remove All Removable Parts: Carefully take out the ice tray, water reservoir, and any other detachable components. Refer to your user manual for specific instructions on how to remove these parts safely.
- Prepare a Cleaning Solution: Mix a solution of warm water and mild dish soap. For tougher stains, a vinegar solution (one part vinegar to two parts water) works wonders.
- Scrub Each Part: Use a soft brush or cloth to scrub all removable parts. Pay special attention to corners and crevices where mold and dirt can accumulate.
- Clean the Interior: Wipe down the interior surfaces of the ice maker with the cleaning solution. Ensure you reach all corners.
- Rinse Thoroughly: Rinse all parts and the interior with clean water to remove any soap residue.
- Dry Completely: Use a clean, dry cloth to wipe down all parts and the interior. Leave them to air dry completely before reassembling.
Disassembling Parts Safely
Disassembling your countertop ice maker is a crucial step in the deep cleaning process. Here’s how to do it without damaging your appliance:
- Consult the Manual: Always refer to the manufacturer’s manual for instructions on disassembling your specific model. This will ensure you don’t accidentally break any parts.
- Handle with Care: Parts like the ice tray and water reservoir are often made of plastic and can be fragile. Handle them gently to avoid cracks or breaks.
- Keep Track of Small Parts: Place small screws and components in a safe place to avoid losing them. A small bowl or container works well for this purpose.
- Label the Parts: If you’re worried about forgetting where each part goes, consider labeling them or taking photos during disassembly. This will make reassembly easier.
Recommended Cleaning Solutions
Choosing the right cleaning solutions is essential to maintain the efficiency and longevity of your countertop ice maker. Here are some recommended options:
- Mild Dish Soap: A basic yet effective cleaner for everyday use. It’s gentle on surfaces and effective at removing dirt and grease.
- Vinegar Solution: Perfect for descaling and removing mineral deposits. Mix one part white vinegar with two parts water. Vinegar’s acidity helps break down stubborn buildup without harming your appliance.
- Baking Soda Paste: For stubborn stains, a paste of baking soda and water can be very effective. Apply it to the stain, let it sit for a few minutes, then scrub gently with a soft brush.
- Commercial Ice Maker Cleaners: These are specifically designed for ice makers and can be very effective. Always choose a cleaner recommended by your ice maker’s manufacturer.
By following these steps and using the right countertop ice maker cleaning solution, you can ensure your appliance stays clean, efficient, and ready to produce fresh ice whenever you need it. Regular weekly deep cleaning will not only improve the performance of your ice maker but also extend its lifespan, saving you time and money in the long run. Keep your ice maker in top shape and enjoy the benefits of clean, crisp ice for all your beverages and recipes.
Monthly Maintenance Tasks
Regular monthly maintenance is crucial to ensure your countertop ice maker remains in top condition and continues to produce high-quality ice. Here’s a detailed guide on the essential checks and procedures you should perform each month.https://amzn.to/3WoePQf
Essential Monthly Checks
Performing essential monthly checks helps you catch potential issues early and maintain the efficiency of your countertop ice maker. Here are the steps to follow:
- Inspect the Water Line: Look for any leaks or blockages. A clear and unobstructed water line is vital for efficient ice production.
- Check the Ice Bin: Examine the ice bin for any signs of damage or excessive wear. Ensure it’s clean and free from mold or mildew.
- Monitor Ice Production: Keep an eye on the quantity and quality of ice produced. Any significant changes could indicate a problem with the machine.
Filter Inspection and Replacement
A clean water filter is essential for producing pure and fresh-tasting ice. Over time, filters can become clogged with impurities, affecting both the taste of the ice and the efficiency of the machine. Here’s how to inspect and replace the filter:
- Locate the Filter: Find the water filter in your ice maker, usually located near the water inlet or within the water reservoir.
- Inspect the Filter: Check for any visible signs of dirt or clogging. If the filter appears dirty, it’s time to replace it.
- Replace the Filter: Follow the manufacturer’s instructions to remove the old filter and install a new one. Typically, this involves unscrewing the old filter and screwing in the new one.
- Reset the Filter Indicator: If your ice maker has a filter indicator, reset it according to the manual. This will remind you when it’s time for the next replacement.
Detecting Wear and Tear
Regularly checking for wear and tear can prevent small issues from becoming major problems. Here’s what to look for:
- Examine Seals and Gaskets: Check the seals and gaskets around the ice bin and water reservoir. These should be intact and free from cracks or leaks.
- Inspect Moving Parts: Look at the moving parts of the ice maker, such as the ice tray and auger. Ensure they move smoothly without any unusual noise or resistance.
- Check the Compressor: The compressor is a vital component of your ice maker. Listen for any unusual noises that might indicate it’s working harder than it should. This could be a sign of a larger issue.
Detailed Cleaning Process
A deep clean once a month ensures your ice maker remains hygienic and operates efficiently. Here’s a step-by-step guide to performing a deep clean:
- Unplug the Machine: Always start by unplugging your ice maker to ensure safety.
- Empty the Ice Bin and Reservoir: Remove any remaining ice and water from the machine.
- Disassemble Removable Parts: Take out removable parts such as the ice tray, water reservoir, and any other detachable components.
- Clean Each Part: Use a soft brush and mild detergent to clean each part thoroughly. Pay special attention to hard-to-reach areas where mold and dirt can accumulate.
- Rinse and Dry: Rinse all parts with clean water and dry them completely before reassembling.
- Wipe Down the Interior and Exterior: Use a cloth dampened with a mild cleaning solution to wipe down the interior and exterior of the machine. Avoid using harsh chemicals that can damage the surfaces.
- Reassemble and Test: Put all the parts back together and plug the machine back in. Run a test cycle to ensure everything is working correctly.
By following these detailed steps, you’ll keep your countertop ice maker in excellent condition, ensuring it continues to produce clean and efficient ice. Regular maintenance not only extends the life of your appliance but also guarantees you enjoy fresh, high-quality ice whenever you need it.

Descaling Your Ice Maker
Keeping your countertop ice maker in optimal condition requires regular maintenance, including a thorough descaling process. Deep clean countertop ice makers regularly to ensure efficient performance and extend their lifespan.
Importance and Frequency of Descaling
Descaling is crucial for removing mineral deposits that accumulate over time. These deposits can impair the efficiency of your ice maker and affect the quality of the ice produced. It is recommended to descale your machine every three to six months, depending on the hardness of your water and the frequency of use. Regular descaling ensures your ice maker runs smoothly and produces clear, great-tasting ice.
Step-by-Step Descaling Instructions
- Prepare the Descaling Solution
- Use a commercial descaling solution or make a homemade mixture by combining equal parts of white vinegar and water.
- Empty the Ice Maker
- Unplug the machine and remove any remaining ice and water from the reservoir.
- Add the Descaling Solution
- Pour the descaling solution into the water reservoir, filling it to the recommended level.
- Run a Cleaning Cycle
- Plug the machine back in and run a cleaning cycle as per the manufacturer’s instructions. This will allow the solution to circulate through the machine, breaking down and removing mineral deposits.
- Rinse Thoroughly
- After the cleaning cycle is complete, empty the reservoir and rinse it thoroughly with clean water to remove any residue from the descaling solution.
- Run Additional Water Cycles
- Run one or two more water-only cycles to ensure all descaling solution is flushed out of the machine.
- Wipe Down the Interior
- Use a soft cloth to wipe down the interior of the ice maker, ensuring it is completely dry before using it again.
Safe Descaling Products
When choosing a descaling product, it is important to select one that is safe for use in your ice maker and effective at removing mineral buildup. Here are some recommended options:
- Commercial Descaling Solutions: These are specifically formulated for ice makers and kitchen appliances. Look for products that are non-toxic and safe for food preparation surfaces.
- White Vinegar: A natural and cost-effective solution, white vinegar is effective at breaking down mineral deposits and is safe to use in your ice maker.
- Lemon Juice: Another natural option, lemon juice can be used as a mild descaling agent. It is also safe and leaves a fresh scent.
By regularly descaling your ice maker, you can prevent the buildup of harmful minerals, ensuring your machine operates efficiently and produces high-quality ice. Remember, a deep clean countertop ice maker not only functions better but also provides cleaner, better-tasting ice for your enjoyment.
Preventive Measures
Preventing issues before they arise is crucial to keeping your countertop ice maker in optimal condition. Here are some essential tips to avoid common problems and ensure your machine remains efficient and reliable.
Tips to Avoid Common Issues
- Regular Cleaning: Make it a habit to deep clean your countertop ice maker regularly. This helps prevent buildup of mold, bacteria, and mineral deposits, which can affect the taste and quality of the ice.
- Monitor Ice Production: Keep an eye on the ice production rate. If you notice a significant drop, it might be time for a thorough cleaning or maintenance check.
- Check for Leaks: Regularly inspect the machine for any water leaks. Addressing small leaks early can prevent bigger issues and costly repairs.
Using Clean, Filtered Water Using clean, filtered water is one of the most effective ways to maintain your ice maker. It not only ensures better tasting ice but also reduces the risk of mineral deposits and scale buildup.
- Invest in a Good Water Filter: A high-quality water filter can remove impurities and minerals from your tap water, extending the life of your ice maker.
- Change Filters Regularly: Follow the manufacturer’s recommendations for replacing the water filter. Typically, filters should be changed every six months to maintain optimal performance.
- Use Filtered Water for Cleaning: When performing a deep clean, use filtered water to rinse and clean the internal components. This helps prevent reintroducing contaminants into the system.
Proper Storage Practices Proper storage practices are essential when your ice maker is not in use, especially during extended periods. This ensures that the machine stays in good condition and is ready for use whenever needed.
- Clean Before Storage: Always perform a thorough cleaning before storing your ice maker. This prevents mold and bacteria from growing while the machine is not in use.
- Dry Completely: Make sure all parts of the ice maker are completely dry before storing. Moisture can lead to mold growth and unpleasant odors.
- Store in a Cool, Dry Place: Choose a storage location that is cool and dry. Avoid areas with high humidity, as this can cause condensation and potential water damage.
- Cover the Machine: If possible, cover the ice maker to protect it from dust and debris. A clean, dry cloth or a plastic cover works well for this purpose.
By following these preventive measures, you can significantly extend the life of your countertop ice maker and ensure it produces clean, fresh ice whenever you need it. Regular maintenance, using clean, filtered water, and proper storage practices are key to keeping your ice maker in top condition. Remember, taking a few extra steps today can save you from bigger headaches down the road.
Troubleshooting Common Issues
Maintaining your countertop ice maker is essential, but even with regular upkeep, you might encounter some issues. Here’s how to identify and resolve common problems and know when it’s time to seek professional help.
Identifying and Resolving Problems
1. Slow Ice Production
- Issue: If your ice maker is producing ice more slowly than usual, it could be due to a blockage in the water line, a dirty filter, or a malfunctioning compressor.
- Solution: Start by checking the water line for any blockages and ensuring that the filter is clean. If the problem persists, inspect the compressor for any signs of wear and tear.
2. Unusual Noises
- Issue: Strange noises coming from your ice maker can be alarming. These noises often indicate an obstruction in the fan or motor.
- Solution: Turn off the machine and carefully inspect the fan and motor areas. Remove any debris that may be causing the noise. If the noise continues, it may be due to a deeper mechanical issue.
3. Water Leakage
- Issue: Water leaking from your ice maker can be a sign of loose connections or cracks in the reservoir.
- Solution: Check all water connections to ensure they are secure. Examine the reservoir for any visible cracks or damage. Tighten any loose connections and replace any damaged parts.
4. Poor Ice Quality
- Issue: If the ice produced is cloudy or has an unusual taste, it might be due to dirty water or an unclean machine.
- Solution: Perform a deep clean of your countertop ice maker. Ensure you are using clean, filtered water. Regularly replace the water filter as per the manufacturer’s recommendations.
5. Ice Maker Not Turning On
- Issue: If your ice maker doesn’t turn on, it could be due to a power issue, a faulty switch, or an internal electrical problem.
- Solution: Check the power cord and ensure it’s properly plugged in. Inspect the power switch and any internal fuses. If these appear to be in working order, you might need to consult a professional for further diagnosis.
When to Seek Professional Help
While many issues with your countertop ice maker can be resolved with regular maintenance and minor repairs, there are times when professional help is necessary:
- Persistent Issues: If you’ve tried troubleshooting common problems and the issues persist, it’s time to call a professional. This includes continuous slow ice production, recurring water leaks, and persistent unusual noises.
- Electrical Problems: Any issues related to the electrical components of your ice maker should be handled by a professional to avoid the risk of electric shock or further damage to the machine.
- Complex Mechanical Failures: Problems with the compressor, condenser, or other critical mechanical parts often require specialized tools and expertise to fix. A professional can ensure these components are repaired or replaced correctly.
Remember, maintaining your countertop ice maker with regular deep clean routines not only extends its life but also ensures the production of high-quality ice. By addressing issues promptly and knowing when to seek professional assistance, you can keep your ice maker running smoothly and efficiently for years to come. If you found this guide helpful, be sure to share it with friends and family who might benefit from these tips.
For more detailed guides and troubleshooting tips, explore our additional resources and stay tuned for more expert advice on keeping your kitchen appliances in top shape.
Conclusion
Maintaining your countertop ice maker is essential for ensuring its efficiency and longevity. By following a regular cleaning routine, you can prevent common issues such as mineral buildup, mold, and unpleasant odors, ensuring your machine produces fresh, hygienic ice every time.
Recap of Maintenance Benefits
Regular maintenance of your countertop ice maker provides several key benefits:
- Extended Lifespan: Proper care can significantly extend the lifespan of your appliance, saving you money on replacements.
- Improved Efficiency: A clean machine operates more efficiently, producing ice faster and reducing energy consumption.
- Better Ice Quality: Regular cleaning ensures that your ice is free from impurities, enhancing its taste and clarity.
- Prevention of Issues: By addressing potential problems early, you can prevent major issues that could require costly repairs.
Encouragement to Follow the Guide for Efficiency
By adhering to the steps outlined in this guide, you can keep your countertop ice maker in top working condition. Here are some key takeaways to ensure optimal performance:
- Daily Cleaning: A quick daily wipe-down helps prevent the buildup of dirt and bacteria, ensuring your ice remains clean and safe.
- Weekly Deep Cleaning: Performing a thorough clean once a week removes any accumulated grime and ensures all parts are functioning correctly.
- Monthly Maintenance: Regular monthly checks, such as inspecting the filter and looking for signs of wear, help keep your machine running smoothly.
- Descaling: Regular descaling is crucial for removing mineral deposits that can hinder the machine’s performance.
Embracing these practices will not only improve the efficiency of your ice maker but also enhance the overall quality of the ice it produces. Here are some additional tips to keep in mind:
- Use Filtered Water: Always use clean, filtered water in your ice maker to reduce the risk of mineral buildup and improve the taste of your ice.
- Keep the Machine Dry: After cleaning, ensure all parts are thoroughly dried before reassembling to prevent mold and mildew.
- Proper Storage: When not in use, store your ice maker in a cool, dry place to avoid dust and moisture accumulation.
Incorporating these maintenance routines into your regular schedule might seem like a hassle, but the benefits far outweigh the effort. Not only will you enjoy better-tasting ice, but you’ll also extend the life of your appliance and save money in the long run.
Remember, a well-maintained countertop ice maker is a reliable appliance that can serve you efficiently for years. So, take the time to follow this guide and make these practices a part of your routine. Your ice maker—and your taste buds—will thank you.
FAQs
1. How often should I clean my countertop ice maker?
It’s recommended to perform a quick clean daily, a thorough deep clean weekly, and descaling every three to six months. Regular maintenance helps prevent buildup, ensures efficient operation, and extends the lifespan of the appliance.
2. What cleaning solutions are safe to use on my ice maker?
Mild detergent and warm water are generally safe for daily cleaning. For deep cleaning and descaling, a mixture of white vinegar and water or a commercial descaling solution recommended by the manufacturer works well.
3. Can I use bleach to clean my ice maker?
Bleach is not recommended for cleaning your ice maker as it can leave a residue and potentially contaminate your ice. Instead, use a vinegar and water solution or a designated appliance cleaner to ensure safe and effective cleaning.
4. What should I do if my ice maker has a foul odor?
A foul odor usually indicates mold or bacterial buildup. Clean all removable parts with warm, soapy water and run a cleaning cycle with a vinegar solution. Rinse thoroughly to ensure no residue remains.
5. How can I prevent mold and mildew in my ice maker?
Regular cleaning and drying of all parts are crucial. Ensure the ice maker is in a well-ventilated area and use filtered water to minimize the risk of mold and mildew growth. Additionally, store the machine properly when not in use.
6. What steps should I take if my ice maker is not producing ice efficiently?
First, check for any blockages in the water line or ice chute. Clean the machine thoroughly, including the filters. If the problem persists, descale the ice maker to remove any mineral buildup that might be affecting its performance.
7. How can I descale my countertop ice maker?
To descale, mix a solution of vinegar and water or use a commercial descaler. Pour the solution into the water reservoir and run a cleaning cycle. Rinse the machine thoroughly with clean water to remove any residue. Descaling should be done every three to six months.
8. Is it necessary to use filtered water in my ice maker?
Using filtered water is highly recommended. It reduces mineral deposits, which can cause buildup and affect the taste of your ice. Filtered water also helps maintain the efficiency and longevity of your ice maker.
Regular maintenance of your countertop ice maker is crucial for ensuring it runs efficiently and produces high-quality ice. By following these cleaning and care guidelines, you can extend the lifespan of your appliance and enjoy fresh, clean ice anytime you need it.

