Introduction
Picture this: You’re having a backyard BBQ on a sweltering summer day. You grab your go-to portable ice maker, thinking it will produce enough ice to fill your cooler, only to discover it isn’t working. You start to feel frustrated as you consider your options. For many people, portable ice makers are a godsend since they provide a consistent supply of ice for a variety of uses. However, if they break down, it can ruin your plans.
This comprehensive guide will cover common problems with portable ice makers, provide step-by-step troubleshooting instructions, detailed repair instructions, maintenance tips to avoid future issues, and guidance on when to call a professional or replace your machine. You will know everything you need to know to get your ice maker operating properly again by the time you finish reading this article. https://amzn.to/3WoePQf
Common Issues with Portable Ice Makers
Understanding the common problems that can cause your portable ice maker to stop working is the first step toward effective countertop ice maker repair. Here are some typical issues you might encounter:
Power Supply Problems
Power Cord Issues
- Inspect the power cord for any visible damage. A frayed or broken cord can prevent your ice maker from receiving the necessary power to operate. If you notice any damage, replacing the cord might resolve the issue.
Electrical Outlet Problems
- Ensure the outlet you’re using is functional. Test it with another appliance to confirm. Sometimes, the problem might be as simple as a faulty electrical outlet. If the outlet isn’t working, try plugging the ice maker into a different one.
Water Supply Issues
Insufficient Water Levels
- One of the most common reasons for a portable ice maker not producing ice is insufficient water in the reservoir. Always check and ensure that the water level is adequate. Without enough water, the machine simply can’t produce ice.
Blocked Water Line
- A blocked or kinked water line can impede the flow of water necessary for ice production. Inspect the water line for any obstructions and ensure it is straight and clear.
Mechanical Issues
Faulty Motor or Pump
- If the motor or pump is malfunctioning, your ice maker won’t be able to produce ice. Listen for any unusual sounds that might indicate a problem with these components. A faulty motor or pump often requires professional repair or replacement.
Broken or Malfunctioning Parts
- Inspect the internal components of your ice maker for any broken or malfunctioning parts. Common issues include a broken compressor or a malfunctioning thermostat. Identifying and replacing these parts can often restore your machine to working order.
Power Supply Problems
- Power Cord Issues: If your countertop ice maker isn’t turning on, check the power cord for any visible signs of wear and tear. A frayed or broken cord can interrupt the power supply.
- Electrical Outlet Problems: Confirm that the outlet is functioning properly by plugging in another device. Sometimes, the issue lies in the outlet itself rather than the ice maker.
Water Supply Problems
- Insufficient Water Levels: Portable ice makers require a certain amount of water to function correctly. Check the water reservoir regularly to ensure it’s filled to the required level.
- Blocked Water Line: Inspect the water line for any blockages or kinks. A blocked water line can prevent water from reaching the ice-making components, thus stopping ice production.
Mechanical Issues
- Faulty Motor or Pump: If the motor or pump is not working correctly, your ice maker won’t produce ice. Unusual noises coming from the machine can be a sign of motor or pump failure.
- Broken or Malfunctioning Parts: Look for any broken or malfunctioning parts within the ice maker. Components like the compressor or thermostat are critical for ice production and should be checked if your machine is not making ice.
In summary, addressing these common issues can often resolve problems with your portable ice maker. Regular maintenance and troubleshooting are key to keeping your ice maker in good working condition and ensuring you always have a steady supply of ice. For more complex repairs, consulting a professional might be necessary, especially if the problem lies within the machine’s mechanical components.
Troubleshooting Steps
Preliminary Checks
- Ensuring the Machine is Properly Plugged In: Double-check that your portable ice maker is securely plugged into a functioning outlet. Sometimes, a loose plug can be the culprit behind your countertop ice maker repair woes.
- Checking the Water Reservoir: Ensure that the water reservoir is filled to the appropriate level. Without sufficient water, your ice maker cannot produce ice.
Step-by-Step Guide to Diagnosing Issues
- Listening for Unusual Sounds: Unusual sounds can be an indicator of mechanical issues. Pay attention to any irregular noises coming from the machine, such as grinding or buzzing.
- Checking for Error Codes or Lights: Many portable ice makers have indicator lights or error codes that can help you identify the issue. Refer to your user manual to understand what these indicators mean.
- Inspecting Internal Components: Open up the machine to inspect internal components. Look for any obvious signs of damage or wear and tear, such as broken parts or leaks. This step is crucial in the countertop ice maker repair process as it helps you pinpoint the exact problem.
Detailed Repair Instructions
- How to Clean the Ice Maker
- Cleaning Solutions and Tools Needed: Gather a mild cleaning solution, a soft cloth, and a small brush. Avoid harsh chemicals that can damage the internal components.
- Step-by-Step Cleaning Process:
- Unplug the machine and remove any remaining ice and water.
- Use the cleaning solution to wipe down the interior surfaces.
- Clean the water reservoir and any removable parts thoroughly.
- Rinse with clean water and allow the machine to air dry before reassembling.
- Replacing Faulty Parts
- Identifying the Faulty Part: Through inspection, identify which part needs replacement. Common parts that might need replacing include the motor, water pump, or ice tray.
- Sourcing Replacement Parts: Purchase replacement parts from a reputable supplier or the manufacturer. Ensure you have the correct part for your specific model.
- Instructions for Replacing Common Components:
- Motor: Follow the manufacturer’s guidelines for replacing the motor. This typically involves disconnecting power, removing screws, and carefully replacing the old motor with the new one.
- Water Pump: Similar to motor replacement, ensure the machine is unplugged. Disconnect the old pump, attach the new one, and secure it in place.
- Ice Tray: Remove the damaged ice tray and replace it with a new one, ensuring it fits properly and is securely attached.
Maintenance Tips to Prevent Future Issues
- Regular Cleaning Schedule: Implement a regular cleaning schedule to keep your ice maker in top condition. Clean it every few weeks to prevent buildup and ensure smooth operation.
- Proper Usage Tips:
- Filling the Water Reservoir: Always use clean, filtered water to fill the reservoir. This helps prevent mineral buildup and prolongs the machine’s lifespan.
- Avoiding Overuse and Overheating: Give your ice maker breaks between cycles to avoid overheating. Overuse can lead to mechanical failures.
- Seasonal Maintenance:
- Preparing the Ice Maker for Storage: Before storing your ice maker for an extended period, clean it thoroughly and ensure it’s completely dry.
- Winterizing the Machine: If you live in a cold climate, make sure your ice maker is stored in a frost-free environment to prevent damage from freezing temperatures.
When to Seek Professional Help
- Signs That the Problem is Beyond DIY Repair:
- Persistent issues despite troubleshooting
- Electrical or complex mechanical failures
- How to Choose a Reliable Repair Service:
- Look for technicians with good reviews and proper certifications.
- Consider the estimated costs and warranty options.
Alternatives to Repair
- Considering Replacement:
- When it’s more cost-effective to buy a new machine rather than repair the old one.
- Features to Look for in a New Portable Ice Maker: Energy efficiency, ice production speed, and additional functionalities.
- Sustainable Disposal of Old Machines:
- Recycling and Disposal Tips: Find local recycling programs that accept small appliances or check with the manufacturer for disposal recommendations.
Conclusion
- Recap of key points: Ensuring your portable ice maker is functioning correctly involves regular maintenance, proper usage, and knowing when to repair or replace parts.
- Encouragement to perform regular maintenance: Regular care can prevent many common issues and extend the life of your ice maker.
- Invitation to share personal experiences or tips in the comments: Engaging with readers can provide additional insights and foster a community of shared knowledge. https://amzn.to/3WoePQf
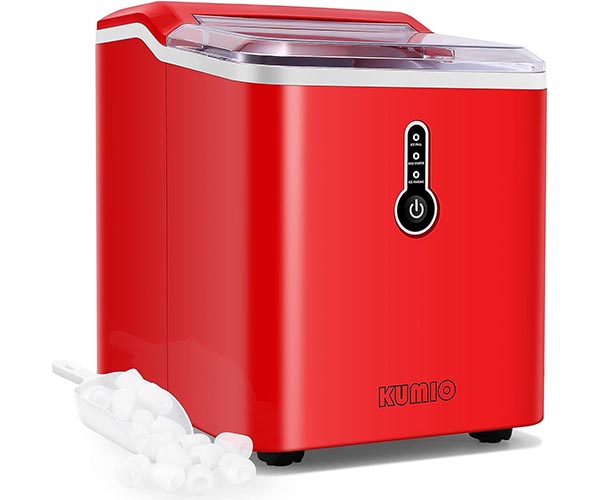
Detailed Repair Instructions
How to Clean the Ice Maker
Cleaning solutions and tools needed:
- Mild dish soap
- White vinegar or lemon juice
- Soft cloths or sponges
- A toothbrush or small brush
- A clean, dry towel
Step-by-step cleaning process:
- Unplug the Ice Maker: Always start by unplugging the machine to ensure safety.
- Empty the Ice Maker: Remove any ice and water from the machine.
- Prepare the Cleaning Solution: Mix a solution of warm water and a few drops of mild dish soap or a combination of half white vinegar and half water.
- Clean the Interior: Using a soft cloth or sponge dipped in the cleaning solution, wipe down the interior surfaces of the ice maker. For hard-to-reach areas, use a toothbrush.
- Rinse Thoroughly: After cleaning, rinse the interior with fresh water to remove any soap or vinegar residue.
- Wipe Dry: Use a clean, dry towel to thoroughly dry the interior of the ice maker.
- Clean the Exterior: Wipe down the exterior surfaces with a damp cloth and a bit of the cleaning solution. Dry with a clean towel.
- Sanitize the Ice Bin: Soak the ice bin in a solution of one part white vinegar to three parts water for a few minutes, then rinse and dry it completely.
- Run a Cleaning Cycle: If your ice maker has a cleaning cycle, run it to ensure the entire system is clean. Follow the manufacturer’s instructions for this step.
- Reassemble and Test: Reassemble all parts, plug the machine back in, and test it by running a batch of ice.
Replacing Faulty Parts
Identifying the faulty part:
- Visual Inspection: Carefully inspect all internal components for signs of wear, damage, or malfunction. Look for broken pieces, burnt smells, or unusual wear.
- Error Codes: Check for any error codes displayed on the machine, which can indicate specific parts that need attention.
Sourcing replacement parts:
- Manufacturer’s Website: Visit the manufacturer’s website to find and order official replacement parts.
- Authorized Dealers: Purchase parts from authorized dealers to ensure compatibility and quality.
- Online Retailers: Websites like Amazon or specialized appliance parts stores can also be good sources for parts.
Instructions for replacing common components (e.g., motor, water pump):
- Motor Replacement:
- Unplug the Ice Maker: Ensure the machine is unplugged.
- Access the Motor: Remove the exterior panels to access the motor. This may involve unscrewing panels or covers.
- Disconnect the Motor: Carefully disconnect the wires and any mounting screws holding the motor in place.
- Install the New Motor: Position the new motor, reconnect the wires, and secure it with screws.
- Reassemble the Machine: Replace all panels and screws, then plug in the machine to test the new motor.
- Water Pump Replacement:
- Unplug the Ice Maker: Ensure the machine is unplugged.
- Drain the Water: Remove any water from the reservoir.
- Access the Water Pump: Open the machine’s panels to locate the water pump.
- Disconnect the Pump: Disconnect the water lines and electrical connections from the old pump.
- Install the New Pump: Connect the new pump to the water lines and electrical system.
- Reassemble and Test: Reassemble the machine, refill the water, and test the new pump.
Regular maintenance and cleaning are crucial to avoid frequent repairs. Always refer to your machine’s user manual for specific instructions and safety guidelines. By following these steps, you can effectively handle countertop ice maker repair and keep your machine running smoothly.
For more detailed tutorials and replacement part recommendations, check out the additional resources section at the end of this guide.
Maintenance Tips to Prevent Future Issues
Regular maintenance is key to keeping your countertop ice maker in optimal condition and preventing it from not working. Here’s a detailed guide to help you maintain your ice maker effectively.
Regular Cleaning Schedule
Maintaining a regular cleaning schedule is essential for the longevity of your ice maker.
- Frequency and Methods:
- Weekly Cleaning: Clean the ice maker at least once a week to prevent mold and mildew buildup.
- Cleaning Solution: Use a mixture of warm water and mild detergent. Avoid harsh chemicals.
- Rinsing: Ensure you thoroughly rinse the machine to remove any soap residue.
Proper Usage Tips
Using your countertop ice maker correctly can prevent common issues and prolong its lifespan.
- Best Practices for Filling the Water Reservoir:
- Use Filtered Water: Always use filtered or distilled water to avoid mineral buildup.
- Proper Level: Fill the reservoir to the recommended level; neither too high nor too low.
- Tips for Avoiding Overuse and Overheating:
- Moderate Usage: Allow the machine to rest between cycles to prevent overheating.
- Ventilation: Ensure the ice maker is placed in a well-ventilated area to facilitate proper airflow and cooling.
Seasonal Maintenance
Seasonal maintenance is crucial, especially if you don’t use your ice maker year-round.
- Preparing the Ice Maker for Storage:
- Thorough Cleaning: Clean the machine thoroughly before storing it.
- Drying: Make sure the ice maker is completely dry to prevent mold growth during storage.
- Storage Environment: Store in a cool, dry place.
- Winterizing the Machine:
- Draining Water: Ensure all water is drained from the machine to prevent freezing damage.
- Covering: Use a cover to protect the ice maker from dust and debris when not in use.
By adhering to these maintenance tips, you can prevent your countertop ice maker from not working and ensure it continues to produce ice efficiently.
When to Seek Professional Help
Knowing when to seek professional help for your countertop ice maker not working can save you time, money, and frustration. Here are some signs that the problem might be beyond DIY repair:
Signs That the Problem is Beyond DIY Repair
- Persistent Issues Despite Troubleshooting:
- If you’ve followed all the troubleshooting steps and your ice maker still isn’t functioning, it might be time to call a professional.
- Repeated errors or the machine not producing ice despite having water and power indicate deeper issues.
- Electrical or Complex Mechanical Failures:
- Electrical problems are dangerous and should be handled by a certified technician.
- Issues like a burnt-out motor, malfunctioning compressor, or other complex mechanical failures require professional expertise.
How to Choose a Reliable Repair Service
Choosing a reliable repair service is crucial to ensuring your ice maker gets the best care. Here’s what to look for:
- What to Look for in a Technician or Service:
- Certification and Experience: Ensure the technician is certified and has experience with countertop ice makers.
- Reputation: Look for reviews and ratings online to gauge the reliability and quality of service.
- Service Guarantee: A good repair service should offer a guarantee on their work, ensuring that if the problem recurs, they will fix it at no additional cost.
- Estimated Costs and Warranty Considerations:
- Cost Estimates: Get a detailed cost estimate before any work begins. This should include labor, parts, and any additional fees.
- Warranty: Check if your ice maker is still under warranty. Some repairs might be covered, reducing your out-of-pocket expenses.
- Replacement Parts: Ensure that the service uses genuine or high-quality replacement parts to avoid further issues.
When dealing with a countertop ice maker not working, knowing when to seek professional help can make all the difference. Persistent issues and complex failures are strong indicators that it’s time to call in an expert. By choosing a certified and reputable repair service, you can ensure that your ice maker is in good hands and that any repairs are done correctly and efficiently. Always consider the costs and check your warranty to make the most informed decision.
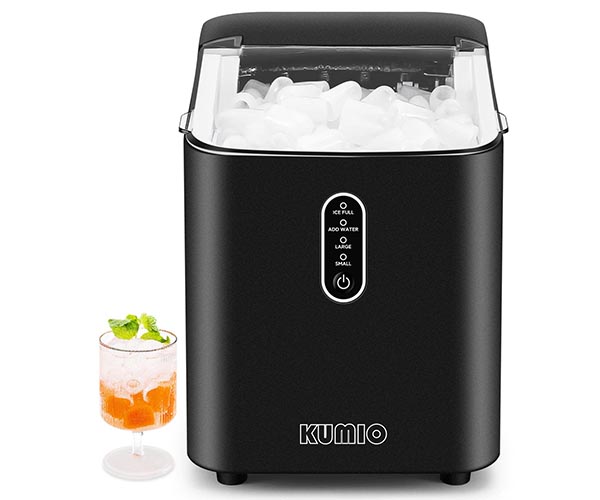
Alternatives to Repair
Considering Replacement
Sometimes, despite your best efforts, it may be more cost-effective to replace your countertop ice maker rather than repair it. Here’s when to consider buying a new machine:
- Frequent Breakdowns: If your ice maker has frequent issues and you’re constantly troubleshooting or repairing it, a replacement might be more economical.
- High Repair Costs: When the cost of repairs approaches or exceeds the price of a new ice maker, it’s often wiser to invest in a new one.
- Outdated Model: Older models may lack the efficiency and features of newer ones, making a new purchase more beneficial in the long run.
When shopping for a new portable ice maker, consider these features:
- Ice Production Capacity: Ensure the new machine meets your daily ice needs.
- Ice Type and Size Options: Some ice makers offer various ice sizes and types (e.g., nugget, cube, bullet).
- Energy Efficiency: Look for energy-efficient models to save on electricity costs.
- Ease of Use and Maintenance: User-friendly controls and easy cleaning features can enhance your experience.
- Additional Features: Modern machines might include features like self-cleaning, smart connectivity, and fast ice-making capabilities.
Sustainable Disposal of Old Machines
Disposing of your old countertop ice maker responsibly is crucial for environmental sustainability. Here are some tips for recycling and disposal: https://amzn.to/3WoePQf
- Check Local Regulations: Different areas have specific guidelines for disposing of electronic appliances. Check with your local waste management authority for proper disposal methods.
- Recycling Programs: Many manufacturers and retailers offer recycling programs for old appliances. Contact the brand or store where you purchased the machine to see if they provide such services.
- Donation: If the ice maker is still functional, consider donating it to a local charity or community center. This extends the machine’s life and benefits others.
- E-Waste Collection Centers: Many communities have designated e-waste collection centers where you can drop off old appliances for proper recycling. These centers ensure that hazardous materials are handled safely.
By considering these options, you not only manage your old ice maker responsibly but also contribute to environmental sustainability.
Conclusion
Recap of Key Points
- We’ve explored the common issues that can cause your countertop ice maker not working, such as power supply problems, water supply issues, and mechanical failures.
- Troubleshooting steps were provided to help you diagnose these problems, from checking the power cord to inspecting internal components.
- Detailed repair instructions were included to guide you through cleaning and replacing faulty parts.
- Maintenance tips were shared to help you keep your ice maker in top condition and prevent future issues.
- We discussed when it might be necessary to seek professional help or consider replacing your ice maker.
Encouragement to Perform Regular Maintenance Regular maintenance is crucial for the longevity and performance of your ice maker. By following a consistent cleaning schedule, using proper usage tips, and preparing your machine for seasonal changes, you can avoid many common problems. Regular care ensures your ice maker remains reliable, saving you time and frustration in the long run.
Invitation to Share Personal Experiences or Tips in the Comments We hope this guide has been helpful in resolving issues with your countertop ice maker. Your experiences and tips can provide valuable insights to others facing similar problems. Please share your stories, additional tips, or questions in the comments below. Together, we can create a supportive community for everyone who relies on these convenient appliances.
Key Maintenance Tips for Your Countertop Ice Maker
- Regular Cleaning: Clean your ice maker at least once a month to prevent build-up of minerals and mold.
- Proper Usage: Follow the manufacturer’s instructions for filling the water reservoir and avoid overloading the machine.
- Seasonal Maintenance: Winterize your ice maker if you live in an area with cold winters to prevent damage.
When to Seek Professional Help
- Persistent issues despite thorough troubleshooting
- Electrical or complex mechanical failures
- Choosing a reliable repair service involves looking for certified technicians and considering cost and warranty.
Alternatives to Repair
- Considering Replacement: Evaluate if buying a new machine is more cost-effective.
- Sustainable Disposal: Recycle old machines responsibly to reduce environmental impact.
By maintaining your ice maker and troubleshooting effectively, you can ensure it remains a reliable source of ice for all your needs. Don’t forget to engage with our community by sharing your experiences and tips in the comments. Together, we can help each other keep our ice makers in perfect working order.

