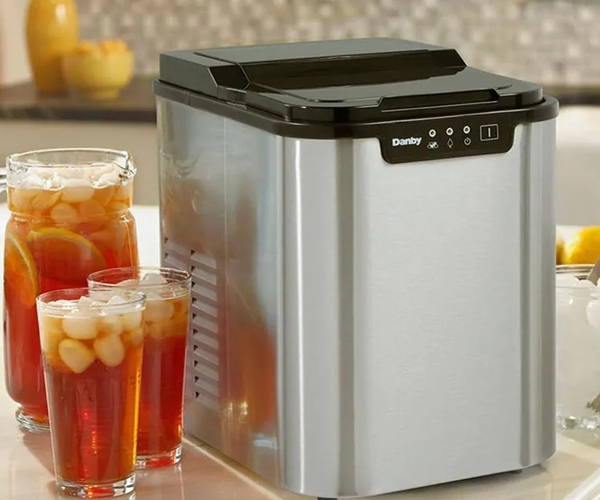
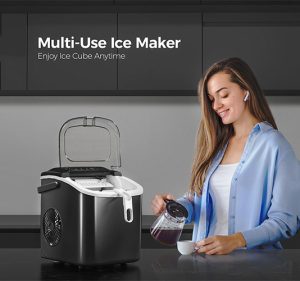
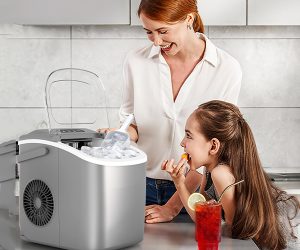
Installing your new nugget ice maker can seem daunting, but with the right guidance, it’s a straightforward process that will have you enjoying perfectly chilled drinks in no time. This guide is designed to simplify the installation, ensuring you can start using your appliance quickly and efficiently. By following these steps, you’ll ensure your countertop ice maker is set up correctly, providing you with fresh, high-quality ice whenever you need it.https://amzn.to/4cMf4KO
Introduction
Imagine unboxing your brand-new nugget ice maker, a sleek addition to your kitchen appliances. The excitement is palpable as you envision the endless possibilities: perfectly chilled drinks for your summer parties, the satisfying crunch of nugget ice in your favorite beverages, and the convenience of having fresh ice on demand. This guide will walk you through the simple steps to install your countertop ice maker, ensuring you can start enjoying these benefits right away.
Installing a nugget ice maker is a straightforward process, but there are a few key steps to follow to ensure optimal performance and longevity of your new appliance. Here’s a step-by-step guide to help you get your ice maker up and running in no time.
1. Unboxing and Placement
- Unboxing: Carefully remove the ice maker from its packaging. Check to ensure all parts and accessories are included.
- Placement: Choose a suitable location on a flat, stable surface. Ensure there is at least 5-6 inches of clearance on all sides for proper ventilation. This is crucial for preventing overheating and ensuring efficient operation.
2. Initial Cleaning
- Why Clean First: Cleaning your ice maker before first use removes any factory residues and ensures the ice produced is clean and safe.
- Cleaning Steps:
- Fill the water reservoir with a mixture of water and a small amount of vinegar or lemon juice.
- Run the machine for a few cycles, discarding the ice produced to clean the internal components .
3. Setting Up the Water Supply
- Filling the Reservoir: Use clean, filtered water to fill the reservoir. This not only improves ice quality but also extends the life of your appliance by reducing mineral build-up.
- Avoid Overfilling: Ensure not to exceed the maximum fill line indicated in the reservoir to prevent water overflow and potential damage.
4. Powering the Ice Maker
- Electrical Connection: Plug the ice maker into a nearby power outlet. Ensure the outlet is capable of handling the appliance’s power requirements, though most ice makers have low power consumption.
- Safety Tip: Avoid placing the ice maker near heat sources like stoves or ovens, as this can affect its performance and efficiency .
5. Running Initial Cycles
- First Cycles: Run the ice maker for at least three cycles, discarding the ice each time. This helps clean out any remaining impurities and prepares the machine for regular use.
- Regular Maintenance: Schedule regular cleanings every few weeks to maintain ice quality and ensure the machine’s longevity .
6. Troubleshooting Common Issues
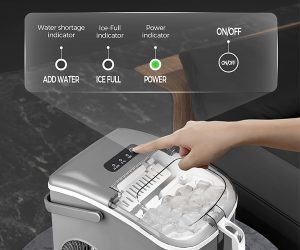
- No Ice Production: Ensure the machine is properly plugged in and the water reservoir is filled. Also, check if the machine is placed in a cool environment to prevent overheating.
- Unusual Noises: Inspect for possible obstructions or mechanical issues. Refer to the user manual or contact customer service for persistent problems.
7. Enjoying Your Ice Maker
- Usage Tips: Once properly set up, use the ice maker as needed. Regularly refill the reservoir with clean water and enjoy fresh ice within minutes.
- Versatility: Highlight the portability of countertop ice makers, making them ideal for various settings, from kitchen counters to outdoor parties .
By following these simple steps, you can ensure that your nugget ice maker is set up correctly and efficiently. Regular maintenance and proper use will keep your appliance running smoothly, providing you with a steady supply of fresh, high-quality ice. Whether you’re hosting a summer barbecue or enjoying a refreshing drink at home, your countertop ice maker will become an indispensable part of your kitchen.
Unboxing and Placement
Unboxing your new nugget ice maker is the first step towards enjoying fresh, high-quality ice at your convenience. Here’s how to do it right:
- Inspect the Packaging:
- Carefully inspect the packaging for any signs of damage. This is crucial as it helps ensure that your nugget ice maker hasn’t been compromised during transit.
- Remove the Ice Maker:
- Gently remove the ice maker from the box. Be mindful of the unit’s weight and size, and enlist help if necessary to avoid any accidents.
- Check for Accessories:
- Ensure that all included accessories and components, such as the ice scoop, water reservoir, and user manual, are present. These items are essential for the proper setup and operation of your machine (source: Ice Making Hub).
- Select the Right Spot:
- Location: Place your nugget ice maker on a flat, stable surface. Ideal locations include kitchen counters, bar tops, or any flat area near an electrical outlet. Ensure the surface is perfectly level to prevent any operational issues.
- Ventilation: Maintain at least 5-6 inches of clearance around the unit to ensure proper air circulation. Adequate ventilation is crucial to prevent overheating and ensure efficient ice production (source: Favored Stone Guides).
- Avoid Heat Sources: Do not place the ice maker near heat sources like stoves or ovens, as this can adversely affect its performance and efficiency (source: DIYHouseSkills).
- Initial Setup:
- Power Connection: Plug the ice maker into a reliable power outlet. Ensure the outlet is easily accessible and can handle the additional electrical load.
- Safety Precautions: To ensure safety, avoid using extension cords. Direct connection to a power outlet is recommended to prevent electrical hazards (source: Ice Making Hub).
- Leveling the Ice Maker:
- Adjust the feet of the ice maker to ensure it is perfectly level. This is important as an uneven surface can cause noise and operational inefficiencies. Use a spirit level if necessary to check the balance.
- Preparing for First Use:
- Before using your nugget ice maker for the first time, it is advisable to clean it. Fill the water reservoir with a mixture of water and a small amount of vinegar or lemon juice. Run the machine for a few cycles and discard the ice produced to eliminate any residual factory impurities (source: Ice Making Hub).
- Final Rinse: After the initial cleaning cycles, drain the reservoir and refill it with clean, filtered water. This ensures that the first batch of ice you produce is fresh and clean.
- Final Placement Check:
- Once the initial cleaning is done, place the ice maker in its final spot. Ensure that it remains easily accessible for refilling and maintenance.
By carefully following these steps, you can ensure that your nugget ice maker is set up correctly, ready to provide you with high-quality ice for all your needs. Proper unboxing and placement not only enhance the machine’s performance but also extend its lifespan, giving you the best value for your investment.
Initial Cleaning
Initial cleaning of your nugget ice maker is crucial to ensure the production of high-quality ice and to extend the life of your machine. Here’s a detailed guide to get your ice maker ready for use:
- Unplug the Ice Maker
- Before starting, make sure the machine is unplugged to avoid any electrical hazards.
- Remove and Clean Components
- Take out removable parts such as ice baskets and trays.
- Soak these parts in warm water mixed with mild detergent.
- Use a soft brush to scrub the ice nozzle and other hard-to-reach areas to remove any residues.
- Rinse all components thoroughly to ensure no detergent is left behind.
- Clean the Interior
- Prepare a cleaning solution by mixing equal parts of water and vinegar or use a specific ice maker cleaner.
- Fill the water reservoir with this solution.
- Run the ice maker for a few cycles, discarding the ice produced during this process.
- This helps to clean the internal components and removes any manufacturing residues.
- Sanitize the Machine
- For thorough sanitization, you can use a mild bleach solution (1 teaspoon of bleach in 5 cups of water).
- Spray or wipe this solution on all interior surfaces.
- Let it sit for 15 minutes to ensure effective sanitization.
- Rinse thoroughly with clean water to remove any bleach residue.
- Run Multiple Cycles
- Fill the reservoir with clean, filtered water and run the ice maker for 5-6 cycles.
- Discard the ice produced in these cycles to ensure any remaining cleaning solution is flushed out.
- This step ensures that your ice maker is clean and ready to produce fresh, odorless ice.
- Final Rinse and Dry
- Drain any remaining water from the machine.
- Use a soft cloth to wipe the interior dry.
- Ensure all components are dry before reassembling.
By following these steps, your nugget ice maker will be clean, sanitized, and ready to deliver high-quality ice. Regular cleaning, ideally every few weeks, will maintain the performance and longevity of your machine. Remember, a well-maintained ice maker not only produces better ice but also operates more efficiently.
Setting Up the Water Supply
Setting up the water supply for your nugget ice maker is a crucial step to ensure optimal performance and high-quality ice production. Here’s a detailed guide to help you through the process:
1. Choosing the Right Water Source
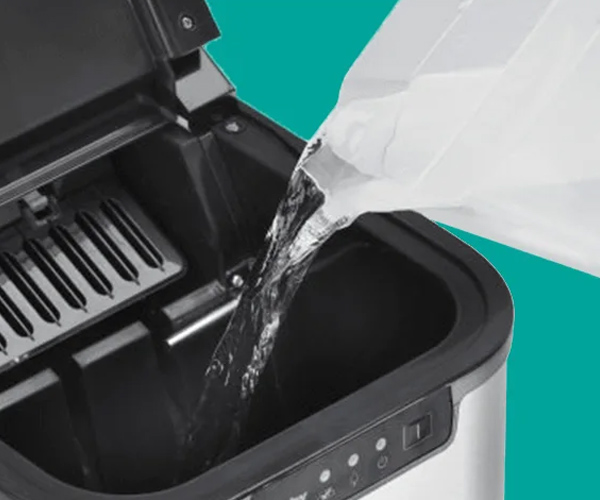
- Filtered Water: Always use clean, filtered water for the best-tasting ice and to prolong the lifespan of your ice maker. Tap water can be used, but filtering it can significantly improve ice quality by reducing impurities that can affect taste and machine performance.
- Cold Water: Using cold water can help the machine produce ice faster. Fill the reservoir up to the marked line, but avoid overfilling to prevent malfunctions .
2. Connecting the Water Supply
- Manual Fill Models: Most countertop nugget ice makers are designed for manual filling, where you simply pour water into the reservoir. This method is straightforward and doesn’t require any special plumbing .
- Plumbed Models: If your model supports a direct water line connection, ensure you use the appropriate tubing and connectors. Securely attach the water line to the inlet valve on the ice maker, ensuring there are no leaks.
3. Initial Cleaning
- First Run with Cleaning Solution: Before making your first batch of ice, run the ice maker with a mixture of water and a small amount of lemon juice or vinegar. This helps to clean the internal components and remove any manufacturing residues .
- Discard Initial Batches: Run at least three cycles and discard the ice produced. This step ensures that any residual cleaning solution or impurities are flushed out of the system .
4. Regular Maintenance
- Cleaning Frequency: To maintain the quality of your nugget ice maker, clean it every few weeks. Regular cleaning prevents mold and mineral buildup, which can affect ice quality and machine efficiency .
- Draining Water: Regularly drain any standing water in the reservoir if the machine will not be used for an extended period. This practice helps prevent bacterial growth and keeps the ice maker sanitary .
5. Troubleshooting Tips
- No Ice Production: If the ice maker is not producing ice, check if it’s properly plugged in and that the water reservoir is filled. Ensure the machine is not placed in a warm environment, as this can affect its performance .
- Strange Noises: If the machine emits unusual noises, check for obstructions or mechanical issues. Refer to the user manual for troubleshooting or contact customer support for assistance .
By following these steps, you can ensure that your nugget ice maker operates efficiently, providing you with high-quality, chewable ice perfect for any occasion. Regular maintenance and proper setup will not only improve ice quality but also extend the lifespan of your appliance.
Powering the Ice Maker
When it comes to powering your nugget ice maker, ensuring proper setup and electrical considerations are key to efficient and safe operation. Here are detailed steps and tips to ensure you get the most out of your countertop ice maker:
- Electrical Connection:
- Plug the ice maker into a nearby power outlet. Ensure that the outlet can handle the additional load, as most ice makers, including nugget ice makers like the GE Profile Opal, require a stable power source but typically have low power consumption .
- For optimal performance, make sure there is at least 3 inches of clearance around the sides and back of the machine. This helps in proper air circulation and prevents overheating.
- Safety Considerations:
- Avoid placing the ice maker near heat sources such as stoves or ovens. Heat can affect the ice-making efficiency and potentially cause the machine to overheat.
- Ensure that the power cord is not frayed and is securely connected to the ice maker and the outlet. This prevents electrical hazards and ensures consistent power supply .
- Initial Setup:
- Once plugged in, it is recommended to run the ice maker for a few initial cycles, discarding the ice produced. This process helps clean the internal components and ensures that any residues from manufacturing are removed .
- Fill the water reservoir with clean, filtered water up to the indicated level. Using cold water can speed up the ice production process and result in better quality ice .
- Regular Maintenance:
- Regular cleaning and maintenance are crucial for the longevity and efficiency of your nugget ice maker. Most models, like the GE Profile Opal, come with self-cleaning functions. Running this cycle periodically helps prevent mold and mineral buildup, keeping your ice fresh and the machine running smoothly .
- If your ice maker does not have a self-cleaning function, manually clean the interior with a mixture of water and vinegar or a specialized ice machine cleaner. This should be done every few weeks to maintain optimal performance and ice quality .
- Troubleshooting:
- If the ice maker is not producing ice, check to ensure it is properly plugged in and the water reservoir is filled. Sometimes, resetting the machine can resolve minor issues.
- Unusual noises or malfunctioning could indicate that the machine needs cleaning or that there are obstructions. Consult the user manual for specific troubleshooting steps or contact customer support if needed .
By following these steps, you can ensure your nugget ice maker operates efficiently, providing you with high-quality ice for all your needs. Regular maintenance and proper setup are essential to enjoy the full benefits of your countertop ice maker.https://amzn.to/4cMf4KO
Running Initial Cycles
When setting up your nugget ice maker for the first time, it’s crucial to run several initial cycles to ensure the machine is clean and ready for use. This step helps eliminate any residual manufacturing dust or particles that could affect the taste and quality of your ice.

Steps to Run Initial Cycles:
- Fill the Reservoir with Cleaning Solution:
- Prepare a cleaning solution using a mixture of water and a small amount of vinegar or lemon juice. This helps to clean the internal components thoroughly.
- Fill the water reservoir up to the maximum fill line with this solution
- Run Cleaning Cycles:
- Power on your nugget ice maker and activate the cleaning mode if available. For models like the GE Profile Opal, press and hold the “Clean” button for 3 seconds to start the cleaning cycle (source: MachineLounge).
- Let the machine run for at least three cleaning cycles. Each cycle may take about 15-20 minutes to complete. Discard the ice produced during these cycles.
- Drain and Rinse:
- After the cleaning cycles, drain the cleaning solution from the reservoir. This may involve removing a drain plug or using a drain hose, depending on your model.
- Refill the reservoir with fresh water and run at least two more cycles to rinse out any remaining cleaning solution .
- Inspect and Wipe Down:
- While the machine is running its rinse cycles, take the opportunity to wipe down any removable parts, such as the ice bin and scoop, with warm soapy water. Rinse and dry these parts thoroughly before reinserting them into the machine .
- Final Rinse and Setup:
- Once the rinse cycles are complete, ensure the water reservoir is filled with clean, cold water. This will help the machine produce ice more efficiently.
- Run a few more cycles and discard the ice to ensure the machine is fully cleaned and ready for regular use.
- Regular Maintenance:
- To keep your nugget ice maker in top condition, perform regular cleaning and descaling. Use a mixture of vinegar and water or a recommended descaling solution to prevent mineral build-up and maintain the quality of your ice
Benefits of Proper Initial Setup:
- Ensures High-Quality Ice: Running initial cycles removes any impurities, ensuring your nugget ice is clean and fresh.
- Extends Machine Lifespan: Regular cleaning and maintenance help prevent scale build-up, which can clog the machine and reduce its efficiency .
- Optimal Performance: Proper setup and maintenance ensure that your ice maker produces the right amount of ice efficiently and consistently.
By following these steps, you can enjoy the best performance from your nugget ice maker, ensuring a steady supply of delicious, chewable ice for all your beverages and culinary needs.
Troubleshooting Common Issues
If your nugget ice maker is not functioning as expected, here are some common problems and their solutions:
- No Ice Production:
- Check Power Supply: Ensure that the ice maker is properly plugged into a functioning electrical outlet. Test the outlet with another device to confirm it is working.
- Water Supply: Verify that there is sufficient water in the reservoir. A low water level can prevent the machine from producing ice. Refill as necessary.
- Temperature: If the ambient temperature is too high, it may affect the ice production. Move the ice maker to a cooler location, away from heat sources like stoves or direct sunlight
- Slow Ice Production:
- Cleaning: Mineral build-up can slow down the ice-making process. Run a cleaning cycle using a mixture of water and vinegar or lemon juice to descale the machine. Clean the water reservoir and all accessible parts thoroughly
- Water Quality: Use filtered or distilled water to improve the efficiency of the ice maker. Tap water with high mineral content can affect the machine’s performance
- Unusual Noises:
- Fan Issues: If the machine is making loud or unusual noises, it could be a problem with the fan. Ensure the ice maker is placed on a flat, stable surface and is not in contact with any objects that could cause vibrations.
- Mechanical Problems: Persistent noise might indicate a mechanical issue. Unplug the machine, inspect for any visible problems, and consult the user manual or customer support if necessary .
- Cloudy Ice:
- Cleaning Cycles: Run multiple cleaning cycles to remove impurities. Use a mild detergent mix or a cleaning solution designed for ice makers.
- Water Source: Switch to filtered water to reduce the presence of minerals and other impurities that cause cloudy ice .
- Leaking Water:
- Seal and Gasket: Check the seals and gaskets for any damage or wear. Replace them if they are not sealing properly.
- Drainage System: Ensure that the drainage system is not clogged and that the water is flowing correctly. Clean the drain pipes and check for blockages .
- Machine Overheating:
- Ventilation: Make sure there is adequate ventilation around the ice maker. It should have at least 5-6 inches of clearance on all sides to allow proper airflow and prevent overheating.
- Ambient Temperature: Keep the machine in a cool area, away from direct sunlight or heat sources. High ambient temperatures can strain the cooling system
- Mold Growth:
- Regular Cleaning: Prevent mold by cleaning the ice maker regularly. Use a mixture of water and vinegar to wipe down the interior and exterior.
- Drying: After cleaning, dry the ice maker thoroughly before using it again to prevent mold growth
By addressing these common issues, you can ensure your nugget ice maker operates smoothly and efficiently, providing you with fresh ice whenever you need it. Regular maintenance and proper usage are key to extending the lifespan of your appliance and keeping it in optimal condition.
Enjoying Your Ice Maker
Using your nugget ice maker can be a delight, offering not just convenience but also a fun addition to your kitchen routine. Here’s how you can maximize its benefits:
- Versatility in Use: Nugget ice makers are perfect for more than just cooling drinks. Their chewable, crunchy ice is ideal for cocktails, smoothies, and even for use in food presentation. The soft texture of nugget ice makes it preferable for many culinary applications, from blending into smoothies to keeping seafood chilled at dinner parties .
- Health Benefits: Using a countertop nugget ice maker can help you stay hydrated, especially during hot summer months. The accessibility of ice encourages more water intake, which is essential for maintaining good health. Additionally, the compacted ice flakes are easier to chew, making them a favorite for people who prefer softer ice .
- Easy Maintenance: Regular maintenance ensures your ice maker produces the best quality ice. Most nugget ice makers feature user-friendly cleaning cycles. For instance, models like the GE Profile Opal 2.0 come with a simple touch-button cleaning function that runs a mixture of water and a cleaning solution through the machine, keeping it in top condition
- Quiet Operation: Despite being powerful, many modern nugget ice makers are designed to operate quietly. This is particularly beneficial in a home setting where noise can be disruptive. The GE Profile Opal, for instance, is known for its whisper-quiet operation, making it suitable for both kitchen and living room use .
- User-Friendly Design: These machines are typically straightforward to set up and use. For example, with the GE Profile Opal, you simply plug it in, fill the side tank with water, and within minutes, you have a batch of chewable nugget ice ready to go. The simplicity of operation makes it accessible for users of all ages .
- High Production Capacity: Many countertop nugget ice makers are capable of producing large quantities of ice quickly. Some models can produce up to 24 pounds of ice per day, ensuring that you always have enough ice on hand for parties, family gatherings, or everyday use .
- Space Efficiency: Compact design is a key feature of many countertop ice makers, allowing them to fit seamlessly into any kitchen layout without taking up excessive space. This makes them an excellent addition even in kitchens with limited counter space .
Troubleshooting Common Issues
- No Ice Production: Ensure the water reservoir is filled and the machine is plugged in. Sometimes, a frozen water line or an overheated machine can be the issue. Moving the unit to a cooler location or allowing it to defrost might resolve the problem.
- Unusual Noises: If your ice maker is making strange sounds, check for obstructions and ensure the machine is level on the counter. Persistent issues might require consulting the user manual or contacting customer service
By following these guidelines, you can ensure your nugget ice maker operates smoothly, providing you with endless batches of delicious, chewable ice. This not only enhances your beverages but also adds a touch of convenience and luxury to your daily routine.
FAQs
1. How do I clean my countertop nugget ice maker?
Cleaning your nugget ice maker is crucial for maintaining ice quality and machine performance. Most models come with a self-cleaning cycle. For example, the GE Profile Opal requires you to mix water and a cleaning solution, run the cleaning cycle, and then rinse the machine with fresh water. Regular cleaning helps prevent mold and mildew build-up .
2. Why is my nugget ice maker not producing ice?
If your ice maker is not producing ice, check the following:
- Ensure the machine is plugged in and turned on.
- Verify that the water reservoir is filled.
- Make sure the machine is not overheated or placed near a heat source.
- Check for any blockages in the water line. Sometimes, a simple reset or defrosting the machine can resolve the issue.
3. What type of water should I use in my nugget ice maker?
For the best results, use clean, filtered water. Using filtered water helps prevent mineral build-up inside the machine and improves the taste and clarity of the ice. While you can use tap water, filtered water is recommended for optimal performance and ice quality .
4. How long does it take for a countertop nugget ice maker to make ice?
The time it takes to produce ice varies by model, but most countertop nugget ice makers can produce their first batch of ice in about 10-15 minutes. Continuous production will depend on the machine’s capacity, but many can produce up to 24 pounds of ice per day, ensuring you have a steady supply for your needs .
5. Can I use my nugget ice maker outdoors?
While most countertop nugget ice makers are designed for indoor use, some models can be used outdoors as long as they are protected from the elements. Ensure the machine is placed in a shaded, dry area and avoid exposure to direct sunlight or rain to maintain its performance and longevity
Conclusion
In conclusion, installing a home countertop ice maker is a straightforward process that can greatly enhance your kitchen’s functionality and your daily convenience. By following the outlined steps, you ensure that your appliance operates efficiently and produces high-quality ice for all your needs. Regular maintenance and proper setup will guarantee the longevity and optimal performance of your ice maker, allowing you to enjoy fresh ice whenever you need it.
- Easy Setup: Most countertop ice makers require no special installation, just a flat surface and a power outlet.
- Quick Cleaning: Initial and regular cleanings are crucial to maintaining the machine’s efficiency and ice quality.
- Versatile Placement: These portable units can be placed in various locations, from kitchen counters to outdoor patios, offering flexibility and convenience.
By investing in a countertop nugget ice maker, you can enjoy the benefits of nugget ice, which is known for its soft, chewable texture and quick cooling properties. Nugget ice is perfect for a variety of drinks, from cocktails to smoothies, and enhances the overall beverage experience by retaining flavors better than traditional ice cubes .
Call to Action
For more insightful tips and comprehensive guides on enhancing your home and kitchen, visit our blog at www.homesolutionzone.com. Stay updated with the latest trends, product reviews, and practical advice to make your home a better place. Don’t miss out on expert recommendations and innovative solutions tailored to meet your needs!https://amzn.to/4cMf4KO

