Introduction
There’s nothing more frustrating than getting ready for a party only to find your countertop ice maker has decided to take the night off. Picture this: You’re all set to serve up some chilled drinks when you realize the ice bin is empty. Panic sets in, but fear not! This guide is here to save the day.
The goal of this post is to provide you with comprehensive troubleshooting steps that will get your ice maker back up and running in no time. By the end of this article, you’ll have a clear understanding of common issues, how to fix them, and when it’s time to call in a professional. So, let’s dive in and get your ice maker back to producing those perfect ice cubes! https://amzn.to/3WoePQf
Understanding Your Countertop Ice Maker
When it comes to countertop ice maker troubleshooting, it’s crucial to first understand the different types of ice makers and the common issues they encounter. This knowledge will set the foundation for effective repairs and maintenance.
Types of Ice Makers:
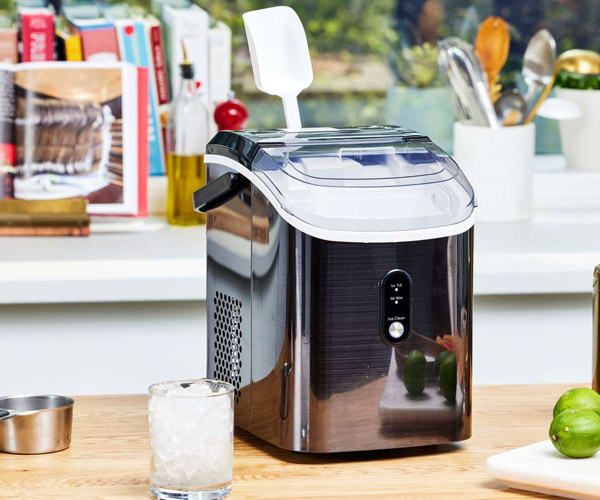
- Portable Ice Makers: These are compact and designed for easy movement and storage. Ideal for homes and small gatherings, they produce ice quickly but in smaller quantities.
- Built-In Ice Makers: Integrated into kitchen cabinets, these ice makers are larger and produce more ice. They are more complex and typically require professional installation and maintenance.
Common Issues:
- Not Making Ice:
- Power Supply Problems: Ensure the ice maker is properly plugged in and the outlet is functional.
- Water Supply Issues: Check for adequate water supply and clear any blockages in the water line.
- Temperature Settings: Incorrect settings can prevent ice production. Make sure the ice maker is set to the right temperature.
- Leaking:
- Source of Leak: Identify where the leak is coming from. It could be from the water inlet valve or the tubing connections.
- Cracks in Mold: Inspect the ice maker mold for any cracks that could be causing leaks.
- Strange Noises:
- Type of Noise: Determine if the noise is rattling, humming, or another type. Each can indicate different issues.
- Fan and Motor: Check for obstructions or damage in the fan and motor. Loose parts can also cause noise.
By understanding these basics, you’re well on your way to mastering countertop ice maker troubleshooting. Let’s dive deeper into the specific steps for diagnosing and fixing these common problems in the next sections.
Initial Troubleshooting Steps
When your countertop ice maker stops working, it’s crucial to start with the basics. Countertop ice maker troubleshooting can often resolve issues without needing professional help. Here are some essential steps to get you started:
- Safety First: Before you begin any inspection or repair, always unplug your ice maker. This is a critical step to avoid any electrical hazards or injuries. Ensuring safety first is non-negotiable.
- Check the Power Supply: Sometimes, the problem might be as simple as the device not receiving power. Ensure that the ice maker is properly plugged in and that the outlet is functioning correctly. You can test the outlet by plugging in another appliance to see if it works.
- Inspect the Water Supply: A common issue with ice makers is a disrupted water supply. Make sure there’s sufficient water in the reservoir. Additionally, check for any blockages in the water line that might be preventing water from reaching the ice maker.
These initial steps can often pinpoint simple issues that can be easily fixed, setting the stage for more detailed troubleshooting if necessary. By ensuring the basics are covered, you’ll save time and possibly avoid more complex repairs.
Continuing with countertop ice maker troubleshooting, remember that these simple checks can solve many problems quickly and safely. If these steps don’t resolve the issue, it may be time to delve into more detailed problem analysis.
Detailed Problem Analysis
When initial troubleshooting doesn’t resolve the issue, a deeper dive is needed. This section will cover common problems in more detail and provide specific solutions.
No Ice Production
- Check the Water Line for Blockages: Ensure that the water line is clear and water is flowing freely to the ice maker.
- Inspect the Water Filter for Clogs: Over time, the water filter can become clogged, reducing water flow. Regularly checking and replacing the filter can prevent this.
- Assess the Ice-Making Cycle and Temperature Settings: Verify that the ice maker is set to the correct temperature and the ice-making cycle is functioning properly.
Ice Maker Leaks
- Identify the Source of the Leak: Leaks can occur at various points in the ice maker. Carefully inspect the unit to determine where the leak is originating.
- Check Water Inlet Valve and Tubing Connections: Ensure that the water inlet valve and tubing are securely connected and not damaged.
- Look for Cracks in the Ice Maker Mold: Over time, the mold can develop cracks that lead to leaks. Inspect the mold and replace it if necessary.
Strange Noises
- Determine the Type of Noise: Identifying whether the noise is a rattle, hum, or something else can help diagnose the issue.
- Inspect the Fan and Motor for Obstructions or Damage: Fans and motors can become obstructed by debris or damaged over time. Regular cleaning and maintenance can prevent this.
- Check for Loose Parts or Panels: Loose components can cause noise and should be tightened or repaired as needed.
These detailed steps will guide you through the process of diagnosing and fixing more specific issues with your countertop ice maker. Countertop ice maker troubleshooting is often a matter of systematically checking each part of the machine until the problem is identified and resolved.
By following these guidelines, you’ll be well-equipped to handle most issues that arise, ensuring your ice maker is always ready to serve up perfectly chilled ice cubes. Remember, thoroughness and attention to detail are key in effective troubleshooting. https://amzn.to/3WoePQf
Detailed Problem Analysis
No Ice Production
If your countertop ice maker isn’t producing ice, several common issues could be at play. Here’s a step-by-step guide to troubleshoot:
- Check the water line for blockages: Ensure that the water supply line is clear and free from any obstructions. A blocked water line can prevent water from reaching the ice maker.
- Inspect the water filter for clogs: Over time, filters can become clogged with debris. Replace or clean the filter regularly to maintain proper water flow.
- Assess the ice-making cycle and temperature settings: Verify that the ice maker is set to the correct temperature. An ice maker that is too warm won’t produce ice efficiently. Adjust the settings according to the manufacturer’s recommendations.
Ice Maker Leaks
Leaks can be a major issue for countertop ice makers. Here’s how to identify and fix them:
- Identify the source of the leak: Examine the ice maker carefully to locate where the water is coming from. This can help you pinpoint the exact problem area.
- Check water inlet valve and tubing connections: Ensure that all connections are tight and secure. Loose connections can lead to leaks.
- Look for cracks in the ice maker mold: Inspect the ice mold for any cracks or damage. A damaged mold can cause water to leak out during the ice-making process.
Strange Noises
Unusual noises can indicate a problem with your ice maker. Here’s what to check:
- Determine the type of noise (e.g., rattling, humming): Identify the specific noise your ice maker is making. This can help you diagnose the problem more accurately.
- Inspect the fan and motor for obstructions or damage: Sometimes, debris can get caught in the fan or motor. Clear any obstructions and check for signs of wear and tear.
- Check for loose parts or panels: Ensure all parts and panels are securely fastened. Loose components can cause rattling noises during operation.
By following these troubleshooting steps, you can address common issues with your countertop ice maker and get it back to producing ice efficiently. Remember, regular maintenance and prompt attention to problems can extend the lifespan of your appliance and keep it running smoothly. If these steps don’t resolve the issue, it may be time to call a professional for further assistance.
Testing Electrical Components
When your countertop ice maker is not making ice, the problem might lie within its electrical components. Testing these components requires a bit of technical know-how, but with the right tools and safety measures, you can diagnose and fix the issue.
Using a Multimeter to Check Electrical Parts
- Thermostat Testing:
- Step 1: Unplug your ice maker to ensure safety.
- Step 2: Locate the thermostat. Refer to your manual if necessary.
- Step 3: Set your multimeter to the ohms setting.
- Step 4: Connect the multimeter probes to the thermostat terminals. A reading of zero or close to zero indicates a functioning thermostat. Any other reading suggests it needs replacement.
- Testing Other Electrical Parts:
- Step 1: Identify the component you need to test (e.g., motor, control board).
- Step 2: Set the multimeter to the appropriate setting (voltage or resistance).
- Step 3: Follow the same probing method as the thermostat to check for continuity or proper voltage.
Guidelines for Safely Handling and Testing Components
- Safety First: Always unplug your ice maker before starting any inspection.
- Wear Protective Gear: Use gloves and safety goggles to protect against electric shock or debris.
- Use Insulated Tools: Ensure your tools are designed to handle electrical components safely.
- Follow Manufacturer’s Instructions: Refer to the user manual for specific details on your model.
Replacing Faulty Parts
If you’ve identified a faulty component, the next step is to replace it. Here’s how you can do it:
- Step-by-Step Guide for Common Replacements:
- Water Inlet Valve:
- Step 1: Unplug the ice maker and turn off the water supply.
- Step 2: Locate the valve, usually at the back of the unit.
- Step 3: Disconnect the water line and electrical connectors.
- Step 4: Remove the old valve by unscrewing it from the frame.
- Step 5: Install the new valve by reversing these steps. Ensure all connections are tight to prevent leaks.
- Motor Replacement:
- Step 1: Unplug the ice maker.
- Step 2: Access the motor by removing the back panel.
- Step 3: Disconnect the electrical wiring and mounting screws.
- Step 4: Remove the old motor and replace it with the new one.
- Step 5: Reassemble the unit and test for functionality.
- Water Inlet Valve:
- Importance of Using Manufacturer-Approved Parts:
- Using parts specified by the manufacturer ensures compatibility and safety. These parts are designed to work seamlessly with your model, reducing the risk of further issues.
By following these steps, you can address the common issues that cause a countertop ice maker to stop making ice. Not only will this save you time and money, but it will also extend the life of your appliance. Remember, thorough troubleshooting and careful replacement of parts are key to keeping your ice maker in top condition.
Maintenance Tips
Maintaining your countertop ice maker is crucial to ensure it functions properly and lasts longer. Regular cleaning, timely water filter replacements, and descaling are essential steps. Here’s how you can keep your ice maker in top shape:
- Regular Cleaning:
- Unplug the ice maker and remove all ice and water from the machine.
- Use a soft cloth and mild detergent to clean the interior and exterior surfaces.
- Rinse thoroughly with clean water and dry all parts completely before reassembling.
- Clean the ice storage bin with warm soapy water and rinse well.
- Regular cleaning prevents the buildup of bacteria and mold, ensuring the ice remains hygienic.
- Water Filter Replacement:
- Replacing the water filter is crucial for maintaining the quality and taste of your ice.
- Check the manufacturer’s guidelines for the recommended replacement schedule, typically every 3-6 months.
- Turn off the water supply and remove the old filter.
- Install the new filter by following the instructions provided by the manufacturer.
- Run a couple of ice-making cycles to flush out any impurities from the new filter.
- Descaling:
- Descaling is essential to remove mineral buildup that can affect the efficiency of your ice maker.
- Prepare a descaling solution by mixing equal parts of water and white vinegar or using a commercial descaler.
- Pour the solution into the water reservoir and run a cleaning cycle.
- Allow the solution to sit for about 15-30 minutes to break down the mineral deposits.
- Run a few cycles with clean water to rinse out the descaling solution thoroughly.
- Regular descaling prevents clogs and keeps the ice maker running smoothly.
By following these maintenance tips, you can avoid common problems like your countertop ice maker not making ice. Regular care ensures your ice maker remains in good condition, providing you with a steady supply of ice whenever you need it.
These simple steps can help extend the life of your ice maker and ensure it operates efficiently. Remember, consistent maintenance is key to preventing issues and keeping your ice maker in top performance.
When to Call a Professional
Even with the best troubleshooting efforts, some issues with your countertop ice maker not making ice may require professional help. Here are some signs that indicate it’s time to call in a pro:
Identifying Serious Issues:
- Electrical Problems: If you suspect electrical issues, such as a burnt smell or the ice maker tripping the circuit breaker, it’s best to seek professional help.
- Persistent Leaks: Continuous leaking that you can’t resolve might indicate a more serious internal problem.
- Complete Malfunction: If the ice maker doesn’t turn on at all after checking the power supply and internal components, a professional diagnosis is needed.
Finding a Reliable Technician:
- Look for Certifications: Choose a technician with certifications from reputable organizations.
- Read Reviews: Check online reviews and ratings to gauge the reliability and quality of the repair service.
- Ask for References: Request references from the technician to ensure they have a history of satisfied customers.
- Get Multiple Quotes: Don’t settle for the first quote. Get estimates from several technicians to compare prices and services.
By following these tips, you can find a qualified repair service to fix your countertop ice maker and get it back to making ice efficiently. Remember, sometimes professional intervention is the best way to ensure the longevity and functionality of your appliance.
Keywords: countertop ice maker not making ice
Encouraging readers to seek professional help when necessary ensures safety and prevents further damage to their appliances. Keep these tips in mind to make an informed decision and restore your ice maker’s performance effectively. https://amzn.to/3WoePQf
Conclusion
Let’s wrap up what we’ve learned today:
- Recap: We’ve covered the common issues that can affect your countertop ice maker, including why your countertop ice maker not making ice might be a recurring problem. From checking the power supply and water line to advanced troubleshooting steps like testing electrical components and replacing faulty parts, you’ve got a comprehensive guide to tackle these problems.
- Encouragement: Don’t be intimidated by your countertop ice maker not making ice. With the right tools and this step-by-step guide, you can troubleshoot and fix many issues on your own. Remember, regular maintenance can prevent a lot of these problems from happening in the first place.
- Call to Action: Did you find this guide helpful? Share it with your friends and family who might be dealing with a stubborn ice maker. And if you’ve got your own tips or questions about countertop ice maker troubleshooting, drop them in the comments below. Your insights could help others facing the same issues.
By following these steps and maintaining your ice maker, you’ll ensure it stays in top shape, ready to provide you with plenty of ice for all your needs. Keep this guide handy, and happy troubleshooting!
FAQs About How to Repair a Countertop Ice Maker
1. Why is my countertop ice maker not making ice?
There could be several reasons why your countertop ice maker not making ice. Common issues include:
- Power supply problems.
- Blocked or insufficient water supply.
- Faulty water filter.
- Incorrect temperature settings.
- Mechanical failures like a broken motor or fan.
2. How can I check if my ice maker’s power supply is the issue?
First, ensure the ice maker is properly plugged into a working outlet. Test the outlet by plugging in another device. If the ice maker still doesn’t power on, check the power cord for any visible damage and consider replacing it if necessary.
3. What should I do if my ice maker is leaking?
If your countertop ice maker is leaking, follow these steps:
- Identify the source of the leak.
- Check the water inlet valve and tubing connections for tightness.
- Inspect the ice maker mold for any cracks.
- Replace any damaged parts to prevent further leakage.
4. Why is my ice maker making strange noises?
Strange noises can be caused by:
- Obstructions in the fan or motor.
- Loose parts or panels.
- Mechanical issues within the ice maker.
To address this, unplug the machine and inspect it for any loose or damaged parts. Tighten or replace as necessary.
5. How often should I clean my countertop ice maker?
Regular cleaning is crucial to maintaining your ice maker’s performance. It’s recommended to clean your ice maker every 3-6 months. This includes descaling, sanitizing the water reservoir, and wiping down the exterior and interior surfaces.
6. What should I do if my ice maker’s water line is blocked?
A blocked water line can prevent your countertop ice maker from making ice. To fix this:
- Unplug the ice maker and turn off the water supply.
- Detach the water line and inspect it for blockages or kinks.
- Clean or replace the water line if necessary.
7. How can I test the electrical components of my ice maker?
To test electrical components:
- Unplug the ice maker.
- Use a multimeter to check continuity in the thermostat, sensors, and other electrical parts.
- If you find any faulty components, consult the manufacturer’s manual for replacement parts and procedures.
8. When should I call a professional to repair my ice maker?
Call a professional if:
- You’ve followed troubleshooting steps and the ice maker still doesn’t work.
- There are complex electrical issues.
- You’re uncomfortable performing repairs yourself.
A professional can ensure safe and effective repairs, particularly for more complicated issues.

