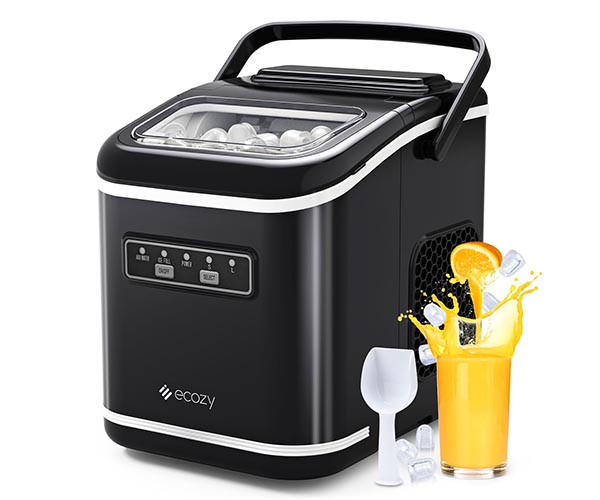
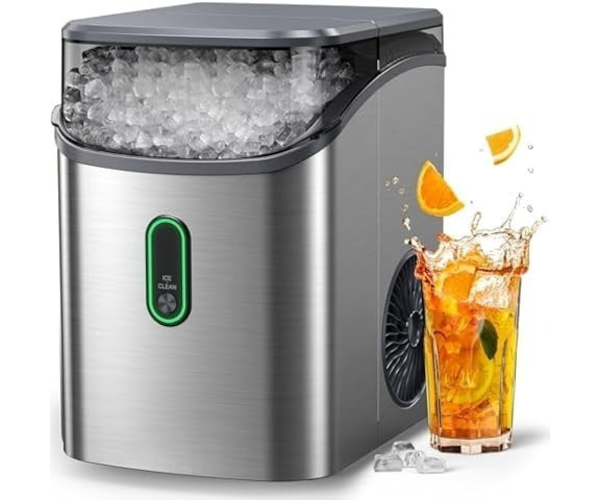
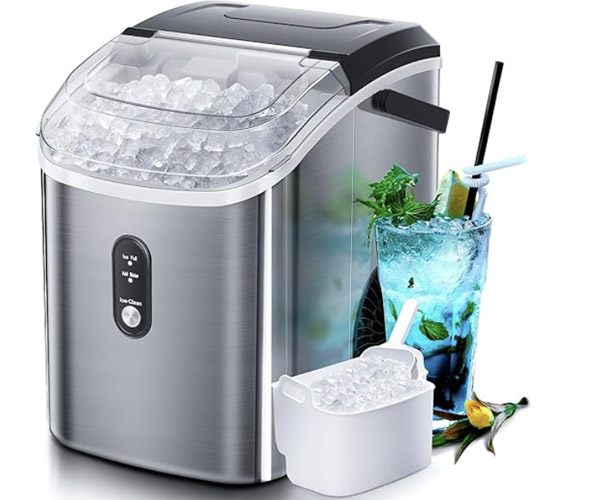
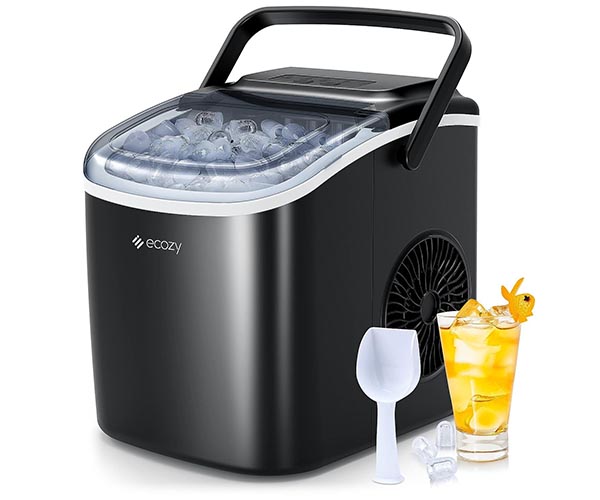
Having a countertop ice maker at home can be incredibly convenient, especially during hot summer days or for entertaining guests. However, like any appliance, ice makers can run into issues that require maintenance or repair. In this comprehensive guide, we’ll explore everything you need to know about diagnosing, fixing, and maintaining your countertop ice maker. Whether you’re dealing with a machine that’s not making ice, producing strange noises, or simply not working as efficiently as it used to, this guide will help you troubleshoot and address common problems. Let’s dive in! https://amzn.to/3WoePQf
Understanding Your Countertop Ice Maker
Before jumping into the repair tips, it’s crucial to have a basic understanding of how countertop ice makers work. Knowing the components and their functions can help you diagnose issues more accurately and perform effective repairs.
Basic Components and How They Work
Countertop ice makers, despite their compact size, are sophisticated machines with several key components working together to produce ice. Here’s a breakdown of the main parts:
- Ice-Making Mechanism: This is the core of the ice maker. It includes the water tray, freezing elements, and the ice mold. The process begins with water being pumped into the ice mold, where it is frozen. The freezing elements rapidly cool the water, forming ice.
- Water Reservoir: This component stores the water that will be converted into ice. Most countertop models require manual filling, although some can be connected to a water supply. The reservoir’s capacity directly affects how much ice the machine can produce in one cycle.
- Control Panel and Sensors: The control panel allows users to set preferences, such as the size of the ice cubes. Sensors play a critical role in monitoring water levels, ice production, and temperature. They ensure the machine operates smoothly and alerts users when something needs attention, such as an empty reservoir or a full ice bin.
- Condenser and Evaporator: These components work together to cool the air inside the ice maker, allowing the water to freeze. The condenser dissipates heat generated during the cooling process, while the evaporator absorbs heat from the water, causing it to freeze.
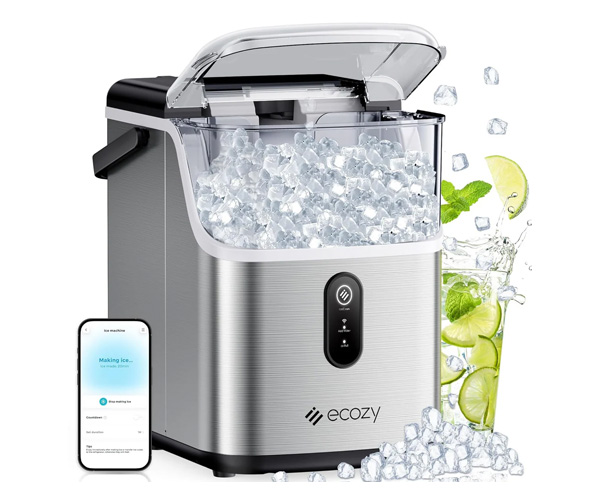
Common Features in Different Models
Countertop ice makers come in various models, each with unique features that cater to different needs. Understanding these features can help you choose the right model and troubleshoot specific issues.
- Size and Capacity: The size of a countertop ice maker affects its ice production capacity. Smaller models are ideal for occasional use, while larger units are suitable for frequent use or large gatherings.
- Ice Shape and Size Options: Many models offer options for different ice shapes, such as bullet, nugget, or cube. Some machines also allow users to select the size of the ice cubes, providing versatility depending on the occasion.
- Energy Efficiency Ratings: Energy-efficient models consume less power, reducing electricity bills and environmental impact. Look for machines with Energy Star ratings or similar certifications to ensure efficiency.
Understanding these components and features is essential for effective countertop ice maker repair. It provides the foundation for diagnosing and addressing issues, ensuring your appliance remains in good working condition.
Diagnosing Common Problems
When your countertop ice maker isn’t working correctly, the first step is to diagnose the problem. This section will guide you through the most common issues, their potential causes, and how to identify them.
No Ice Production
A countertop ice maker not producing ice is a common problem that can be frustrating, especially when you need ice immediately. Several factors could cause this issue:
- Power Issues: One of the first things to check is whether the ice maker is receiving power. Ensure the power cord is securely plugged in and the outlet is functioning. If the machine isn’t turning on, it could be due to a blown fuse or a tripped circuit breaker.
- Water Supply Problems: Another common cause is a lack of water. Check the water reservoir and ensure it’s filled to the appropriate level. If your machine is connected to a water supply, inspect the water line for kinks or blockages that may restrict water flow.
- Malfunctioning Thermostat: The thermostat controls the freezing cycle. If it’s not working correctly, the machine may not freeze the water properly, resulting in no ice production. You may need to adjust or replace the thermostat if it’s faulty.
- Clogged Filters: Water filters can become clogged with impurities over time, restricting water flow. Regularly cleaning or replacing the filter can prevent this issue.
Slow Ice Production
If your ice maker is producing ice but at a slower rate than usual, several factors could be at play:
- Dirty Condenser Coils: The condenser coils are responsible for dissipating heat. If they are dirty or covered in dust, the machine will struggle to cool the water efficiently, slowing down ice production. Regularly cleaning the coils can improve performance.
- Low Water Pressure: Insufficient water pressure can lead to slow water flow into the machine, affecting ice production. Check your home’s water pressure and ensure it’s adequate for the ice maker.
- High Ambient Temperature: The temperature of the room where the ice maker is located can also impact its efficiency. If the room is too warm, the machine may take longer to produce ice. Try to keep the ice maker in a cool, well-ventilated area.
Ice Quality Issues
Ice quality can also be a concern, with issues ranging from cloudy ice to small or misshapen cubes.
- Cloudy Ice: Cloudy ice is often caused by impurities in the water. This can be resolved by using filtered water or replacing the machine’s water filter. Additionally, air bubbles trapped in the ice can cause cloudiness. Running a self-cleaning cycle can help eliminate these bubbles.
- Small or Misshapen Ice: If the ice cubes are smaller than usual or have irregular shapes, it could indicate a problem with the water flow or the ice mold. Ensure the water reservoir is filled to the proper level and that the ice mold is clean and free of debris.
- Ice Sticking Together: Ice cubes sticking together can be caused by improper storage or a malfunctioning thermostat. Ensure the ice bin isn’t overfilled and consider lowering the storage bin’s temperature.
Strange Noises
Unusual noises from your countertop ice maker can be alarming. Here’s how to identify and address them:
- Grinding Sounds: Grinding noises may indicate a problem with the ice maker’s motor or the ice mold. It could be due to ice jamming the mechanism or worn-out parts. Inspect the machine for any obstructions and consider lubricating the moving parts.
- Humming: A humming sound is typically normal, indicating the compressor is running. However, if the sound is unusually loud, it could signal an issue with the compressor or a refrigerant leak. Professional diagnosis may be necessary in such cases.
- Clunking or Banging: These noises often occur when the ice cubes are being ejected from the mold into the storage bin. However, if the noise is excessive, it could indicate an issue with the ejection mechanism or the ice bin’s alignment.
By understanding these common problems and their symptoms, you can better diagnose and fix issues with your countertop ice maker. In the next sections, we’ll explore DIY repair tips and when to seek professional help.
DIY Repair Tips
Once you’ve identified the problem with your countertop ice maker, you may be able to fix it yourself. This section will provide detailed instructions for common DIY repairs, from basic cleaning to replacing worn-out parts.
Basic Cleaning and Maintenance
Regular cleaning and maintenance are crucial for the optimal performance of your countertop ice maker. Not only does it help prevent issues, but it also extends the machine’s lifespan.
- Safety First: Before starting any maintenance work, ensure the ice maker is unplugged from the power source. This prevents accidental electric shocks and protects the machine from damage.
- Disassembly for Cleaning: To clean the ice maker, you’ll need to disassemble some parts. Start by removing the ice bin and any detachable trays. Wipe down the interior with a mixture of warm water and mild detergent. Avoid using harsh chemicals that could damage the machine.
- Cleaning the Water Reservoir: The water reservoir should be cleaned regularly to prevent mineral buildup and bacterial growth. Use a vinegar solution (one part vinegar to one part water) to sanitize the reservoir. Rinse thoroughly to remove any vinegar residue.
- Descaling the Ice Mold: Over time, mineral deposits can form on the ice mold, affecting the quality of the ice. Use a descaling solution specifically designed for ice makers to clean the mold. Follow the manufacturer’s instructions for the best results.
- Replacing the Water Filter: If your ice maker has a water filter, it should be replaced periodically. A clogged filter can restrict water flow and affect ice quality. Refer to the user manual for the recommended replacement schedule.
- Final Rinse and Reassembly: After cleaning, rinse all parts with clean water and dry them thoroughly. Reassemble the machine, ensuring all components are correctly aligned.
Troubleshooting Power Issues
Power issues are common with countertop ice makers and can usually be resolved with a few simple checks:
- Power Cord and Outlet: Start by inspecting the power cord for any signs of damage, such as fraying or exposed wires. If the cord appears intact, check the outlet by plugging in another appliance to ensure it’s working.
- Resetting the Ice Maker: Some issues can be resolved by simply resetting the machine. Unplug the ice maker, wait for a few minutes, and then plug it back in. This can help reset the internal electronics and resolve minor glitches.
- Checking Fuses and Circuit Breakers: If the machine still doesn’t power on, check the fuse box or circuit breaker panel. A blown fuse or tripped breaker could be the culprit. Replace the fuse or reset the breaker as necessary.
Fixing Water Supply Problems
Proper water flow is essential for ice production. If your ice maker isn’t getting enough water, follow these steps:
- Inspecting the Water Line: If your machine is connected to a water supply, check the water line for kinks, blockages, or leaks. Straighten out any kinks and clean out any debris that may be obstructing the flow.
- Cleaning or Replacing the Water Filter: A clogged water filter can restrict water flow and should be cleaned or replaced regularly. Follow the manufacturer’s guidelines for the correct procedure.
- Checking for Leaks: Leaks can occur in the water line or within the machine itself. Inspect the area around the ice maker for any signs of water. If you find a leak, determine its source and repair or replace the damaged component. https://amzn.to/3WoePQf
Dealing with Temperature Problems
Temperature issues can significantly impact the performance of your ice maker. Here’s how to address them:
- Adjusting the Thermostat: If the ice isn’t freezing properly, the thermostat may need adjustment. Refer to the user manual for instructions on how to access and adjust the thermostat settings.
- Ensuring Proper Ventilation: Countertop ice makers require adequate ventilation to dissipate heat. Make sure the machine is placed in a well-ventilated area, away from heat sources. Avoid placing it in enclosed spaces or against walls.
- Cleaning the Condenser Coils: Dirty condenser coils can reduce cooling efficiency. Use a soft brush or vacuum cleaner to remove dust and debris from the coils. This simple maintenance task can improve the machine’s performance and prevent overheating.
Replacing Worn-Out Parts
Sometimes, components in your ice maker may wear out and need replacement. Here’s a guide to replacing common parts:
- Identifying the Part: Determine which part needs replacement. Commonly replaced parts include the ice mold, fan motor, and water pump. Refer to the user manual or an online parts diagram for guidance.
- Sourcing the Replacement: Purchase the replacement part from a reputable supplier. Make sure to provide the model number of your ice maker to ensure compatibility.
- Installation: Follow the manufacturer’s instructions for installing the new part. This typically involves disassembling the machine, removing the faulty part, and installing the new one. Take care to reassemble the machine correctly to avoid further issues.
These DIY repair tips cover most common issues you may encounter with a countertop ice maker. However, if you’re unsure about any repair or if the problem persists, it may be time to call in a professional. In the next section, we’ll discuss when it’s appropriate to seek expert help and how to choose a reliable repair service.
When to Call a Professional
While many issues with countertop ice makers can be resolved through DIY repairs, some problems require professional intervention. Knowing when to call a professional can save you time, money, and prevent further damage to your appliance. Here are some scenarios where professional help is warranted:
Signs You Need Expert Help
- Persistent Issues Despite DIY Efforts: If you’ve tried all the DIY fixes and the problem persists, it’s time to seek professional assistance. Persistent issues could indicate a more complex problem that requires specialized tools and expertise.
- Complex Electrical or Mechanical Problems: Issues such as electrical malfunctions, refrigerant leaks, or compressor failures are best handled by trained technicians. These problems can be dangerous to repair without the proper knowledge and equipment.
- Unusual Odors or Smoke: If you notice unusual odors, smoke, or burning smells coming from your ice maker, immediately unplug the appliance and call a professional. These signs could indicate a serious electrical issue or overheating.
- Frequent Breakdowns: If your ice maker frequently breaks down or requires constant repairs, it may be more cost-effective to have a professional evaluate the machine. They can determine whether it’s worth repairing or if it’s time to consider a replacement.
Choosing a Repair Service
Selecting a reliable repair service is crucial to ensuring that your ice maker is fixed properly. Here are some tips for choosing the right technician:
- Research and Recommendations: Start by asking for recommendations from friends, family, or neighbors. Online reviews and ratings can also provide valuable insights into the quality of local repair services. Look for technicians with experience in repairing countertop ice makers specifically.
- Verify Credentials: Ensure the repair service is licensed, insured, and has certified technicians. This provides peace of mind that you’re working with qualified professionals who can safely handle repairs.
- Ask About Warranties and Guarantees: A reputable repair service should offer warranties or guarantees on their work. This means they stand by their repairs and will address any issues that arise after the service.
- Cost Considerations: Get a detailed estimate before agreeing to any repairs. The estimate should include parts, labor, and any additional fees. Compare estimates from different services to ensure you’re getting a fair price. However, be cautious of prices that seem too good to be true, as they may indicate subpar service or the use of low-quality parts.
- Communication and Customer Service: Choose a repair service that communicates clearly and promptly. Good customer service is a sign of professionalism and can make the repair process smoother.
Calling a professional when needed can save you from the frustration of dealing with unresolved issues and ensure that your ice maker is repaired correctly. In some cases, it might also be a safer option, particularly when dealing with electrical components.
Preventive Maintenance Tips
Preventive maintenance is key to keeping your countertop ice maker running smoothly and efficiently. By following a regular maintenance schedule, you can prevent common issues and extend the lifespan of your appliance. Here are some essential maintenance tips:
Regular Cleaning Schedule
- Daily Maintenance: After each use, empty the ice bin and wipe it down with a clean cloth. This helps prevent the buildup of ice or water that can lead to mold and bacteria growth. Additionally, leave the lid open to allow any residual moisture to evaporate.
- Weekly Cleaning: Once a week, clean the interior of the ice maker, including the ice mold and water reservoir. Use a mild detergent and warm water, and rinse thoroughly to remove any soap residue. This regular cleaning prevents the buildup of minerals and other contaminants.
- Monthly Deep Cleaning: At least once a month, perform a deep cleaning using a vinegar solution or a descaling agent. This helps remove any mineral deposits and ensures the ice maker continues to produce clear, high-quality ice. Be sure to follow the manufacturer’s instructions for the best results.
Seasonal Checks
- Preparing for Different Seasons: The efficiency of your ice maker can be affected by seasonal changes. In the summer, the machine may need to work harder due to higher ambient temperatures. Ensure the ice maker is well-ventilated and not exposed to direct sunlight.
- Storing the Ice Maker During Non-Use: If you plan to store the ice maker for an extended period, such as during the winter, ensure it is thoroughly cleaned and dried. Remove any residual water to prevent mold growth or freezing damage. Store the appliance in a cool, dry place, and cover it to protect it from dust.
Tips for Prolonging the Life of Your Ice Maker
- Use High-Quality Water: Using filtered or bottled water can prevent the buildup of minerals that can damage the ice maker. This is especially important if you live in an area with hard water, which contains high levels of calcium and magnesium.
- Avoid Overloading the Ice Maker: Overloading the ice bin or water reservoir can strain the machine and lead to mechanical issues. Always follow the manufacturer’s guidelines regarding the maximum capacity.
- Regular Inspections: Periodically inspect the ice maker for any signs of wear and tear, such as cracks, leaks, or unusual noises. Early detection of issues can prevent more serious problems and costly repairs.
- Replace Worn-Out Parts: Parts such as the water filter, ice mold, and fan motor can wear out over time. Regularly replacing these parts can ensure optimal performance and prevent breakdowns.
By following these preventive maintenance tips, you can keep your countertop ice maker in top condition, ensuring it continues to provide you with ice when you need it. Regular maintenance not only improves performance but also extends the life of your appliance, saving you money in the long run. https://amzn.to/3WoePQf
Conclusion
Countertop ice makers are convenient and valuable appliances, especially for those who enjoy cold beverages or entertain guests frequently. However, like all appliances, they require proper care and maintenance to function efficiently. This comprehensive guide has covered everything from understanding the basic components of your ice maker to diagnosing common issues, performing DIY repairs, and knowing when to call a professional.
Regular cleaning and maintenance, combined with a good understanding of how your ice maker works, can help prevent many common problems. Additionally, being able to diagnose and fix minor issues can save you time and money. However, for more complex problems, it’s essential to seek professional help to ensure safe and effective repairs.
Remember, a well-maintained ice maker not only works better but also lasts longer. So, take the time to care for your appliance, and you’ll enjoy reliable ice production for years to come.
If you found this guide helpful, don’t hesitate to share it with friends or family who may also have a countertop ice maker. And if you have any questions or additional tips to share, please leave a comment below. We love hearing from our readers and are always here to help with any appliance-related queries!

