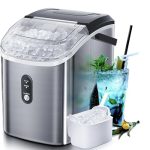
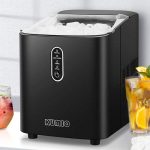
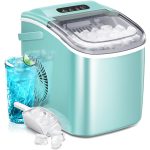
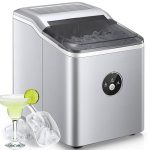
Introduction
Maintaining your countertop ice maker with a water line is crucial for ensuring its optimal performance, longevity, and the consistent quality of ice it produces. Regular maintenance helps prevent common issues such as poor ice quality, reduced ice production, and mechanical failures. This comprehensive guide will provide you with detailed maintenance tips, troubleshooting advice, and best practices to keep your countertop ice maker in excellent condition. By following these guidelines, you can enjoy the convenience of a continuous supply of high-quality ice for years to come.
Section 1: Understanding Your Countertop Ice Maker
1.1 Key Components
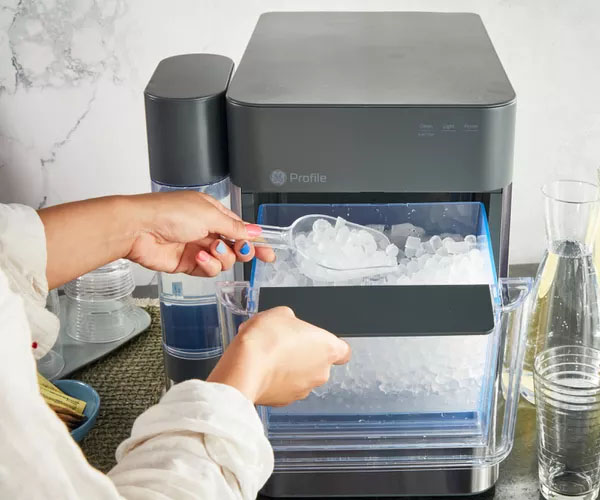
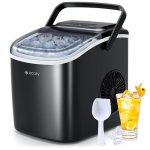
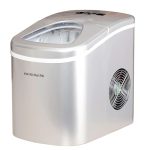
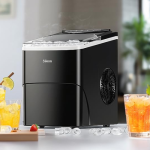
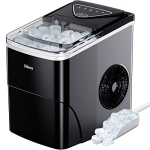
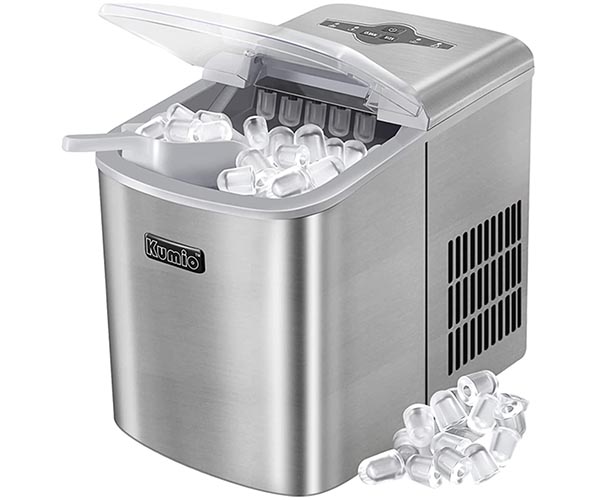
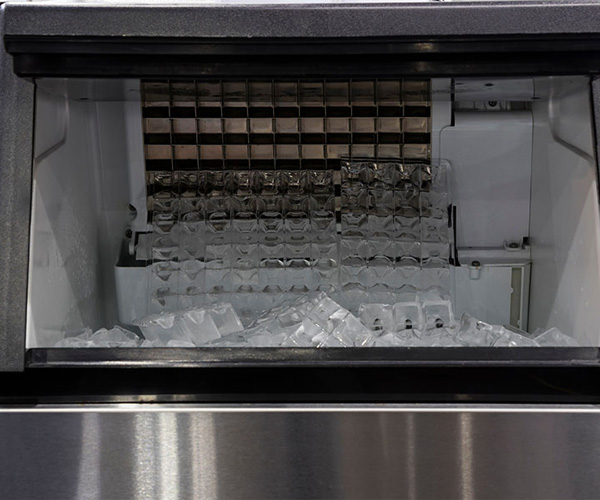
A countertop ice maker with a water line consists of several key components that work together to produce ice efficiently. Understanding these components is essential for effective maintenance.
- Water Line: The water line connects the ice maker to your home’s water supply, providing a continuous source of water for ice production. This connection eliminates the need for manual refilling and ensures consistent ice production.
- Compressor: The compressor is responsible for compressing the refrigerant, which then flows through the system to cool the water and form ice. A well-maintained compressor is vital for efficient ice production.
- Evaporator: The evaporator is where the water freezes to form ice. It needs to be clean and free of mineral deposits to function correctly.
- Condenser: The condenser releases the heat absorbed during the refrigeration process. Keeping the condenser clean ensures efficient heat exchange and optimal performance.
- Thermostat: The thermostat regulates the temperature inside the ice maker, ensuring that the water freezes at the right temperature to form ice.
- Ice Bin: The ice bin stores the ice produced by the machine until it is needed. Regular cleaning prevents mold and bacteria buildup.
- Filters: Filters remove impurities from the water, ensuring that the ice produced is clean and safe to consume. Regular filter replacement is essential for maintaining ice quality.
1.2 How a Water Line Connection Works
A water line connection provides a continuous supply of water to the ice maker, ensuring uninterrupted ice production. Here’s how it works:
- Water Supply Connection: The ice maker is connected to a cold water pipe using a saddle valve or a similar fitting. This connection provides a steady flow of water to the ice maker.
- Water Inlet Valve: The water flows through the water inlet valve into the ice maker. The valve opens and closes automatically to control the flow of water based on the ice maker’s requirements.
- Ice Production: The water is then directed to the evaporator, where it is cooled and frozen into ice cubes. The thermostat ensures the water reaches the right temperature for freezing.
- Storage: The ice is harvested and stored in the ice bin until it is needed.
A water line connection offers several benefits, including convenience, consistent ice production, and improved efficiency. However, it also requires regular maintenance to prevent issues such as leaks, blockages, and water quality problems. https://amzn.to/4fzlD5j
Section 2: Daily Maintenance Tasks
2.1 Checking the Water Supply
Ensuring that the water supply to your countertop ice maker is functioning properly is a crucial daily maintenance task. Here are the steps to follow:
- Inspect for Leaks: Regularly check the water line connections for any signs of leaks. Tighten any loose connections and replace damaged hoses to prevent water damage and ensure efficient ice production.
- Ensure Adequate Water Pressure: Verify that the water supply has adequate pressure. Low water pressure can affect the ice maker’s performance, resulting in slow ice production or no ice at all. If you notice low water pressure, check for blockages in the water line or consult a plumber.
- Use Clean, Filtered Water: Ensure that the water supply is clean and filtered. Using filtered water helps prevent mineral deposits and improves the quality of the ice produced. If your ice maker has a built-in filter, check it regularly and replace it as needed.
2.2 Emptying the Ice Bin
Regularly emptying the ice bin is essential to prevent overflow and maintain the quality of the ice. Here’s how to do it:
- Monitor Ice Levels: Keep an eye on the ice levels in the bin. When the bin is full, the ice maker will stop producing ice. Regularly emptying the bin ensures continuous ice production.
- Proper Storage of Excess Ice: If you produce more ice than you need, store the excess ice in a freezer. Use airtight containers to prevent the ice from absorbing odors and flavors from other foods.
- Cleaning the Ice Bin: Clean the ice bin regularly to prevent mold and bacteria growth. Use a mixture of warm water and mild detergent to clean the bin, and rinse it thoroughly before replacing it in the ice maker.
Section 3: Weekly Maintenance Tasks
3.1 Cleaning the Exterior
Keeping the exterior of your countertop ice maker clean not only improves its appearance but also prevents dust and dirt buildup that can affect its performance. Here’s how to clean the exterior:
- Wipe Down the Surfaces: Use a damp cloth to wipe down the exterior surfaces of the ice maker. Pay special attention to the control panel and any crevices where dirt can accumulate.
- Use Mild Detergent for Tough Stains: For tougher stains, use a mild detergent diluted in water. Avoid using abrasive cleaners or solvents, as they can damage the surface of the ice maker.
- Dry Thoroughly: After cleaning, dry the exterior thoroughly with a clean, dry cloth to prevent water spots and streaks.
3.2 Inspecting for Visible Issues
Regularly inspecting your countertop ice maker for visible issues can help you identify and address minor problems before they become major ones. Here are the steps to follow:
- Check for Wear and Tear: Look for any signs of wear and tear on the components, such as cracks, rust, or loose parts. Address these issues promptly to prevent further damage.
- Ensure Secure Connections: Make sure all components, including the water line, are securely connected. Tighten any loose connections to ensure the ice maker operates efficiently.
- Address Minor Issues Early: If you notice any minor issues, such as unusual noises or reduced ice production, address them immediately. This can prevent more significant problems and extend the lifespan of your ice maker.
Section 4: Monthly Maintenance Tasks
4.1 Deep Cleaning the Interior
Performing a deep clean of the interior components of your countertop ice maker on a monthly basis is essential for maintaining its performance and ensuring the quality of the ice. Here’s how to do it:
- Unplug the Ice Maker: Before cleaning, unplug the ice maker to ensure safety.
- Remove and Clean the Ice Bin: Take out the ice bin and wash it with a mixture of warm water and mild detergent. Rinse it thoroughly and let it dry completely before reinserting it.
- Clean the Ice Mold and Water Reservoir: Use a mixture of water and vinegar or a commercial ice maker cleaner to clean the ice mold and water reservoir. This helps remove any mineral deposits or buildup that can affect ice quality.
- Wipe Down the Interior Surfaces: Use a soft cloth or sponge to wipe down the interior surfaces, ensuring all areas are clean and free of debris.
- Rinse Thoroughly: Rinse all cleaned components with clean water to remove any cleaning solution residue.
4.2 Descaling the Water System
Descaling the water system is crucial to remove mineral deposits that can build up over time and affect the ice maker’s performance. Here’s how to descale your ice maker:
- Use a Descaling Solution: Choose a descaling solution recommended by the manufacturer or use a mixture of water and vinegar.
- Run the Descaling Cycle: Fill the water reservoir with the descaling solution and run a descaling cycle according to the manufacturer’s instructions.
- Rinse Thoroughly: After the descaling cycle, rinse the water system thoroughly with clean water to remove any remaining descaling solution.
- Inspect for Mineral Deposits: Check for any remaining mineral deposits and clean them manually if necessary.
Section 5: Bi-Annual Maintenance Tasks
5.1 Replacing the Water Filter
Replacing the water filter every six months is essential for maintaining the quality of the ice and the efficiency of your countertop ice maker. Here’s how to replace the water filter:
- Turn Off the Water Supply: Before replacing the filter, turn off the water supply to the ice maker.
- Remove the Old Filter: Locate the water filter, usually at the back of the ice maker or inside the water reservoir. Remove the old filter by twisting it counterclockwise.
- Install the New Filter: Insert the new filter and twist it clockwise to secure it in place. Ensure it is properly aligned and sealed.
- Turn On the Water Supply: Turn the water supply back on and check for any leaks. Run a few cycles of ice to flush out any air or impurities from the new filter.
- Benefits of Using a High-Quality Filter: Using a high-quality filter ensures the water used for ice production is clean and free of impurities, resulting in better-tasting and clearer ice.
5.2 Checking the Compressor and Fan
Inspecting and cleaning the compressor and fan every six months helps maintain the efficiency of your countertop ice maker. Here’s how to do it:
- Unplug the Ice Maker: Ensure the ice maker is unplugged before performing any maintenance on the compressor and fan.
- Clean the Condenser Coils: Use a vacuum or a brush to clean the condenser coils, removing any dust and debris that may have accumulated. Clean coils ensure efficient heat exchange and prevent the compressor from overheating.
- Inspect the Fan: Check the fan for dust and debris. Clean the fan blades with a soft cloth or brush to ensure proper airflow. Make sure the fan is functioning correctly and is not obstructed.
- Check for Unusual Noises: Listen for any unusual noises coming from the compressor or fan. If you hear any rattling or grinding sounds, it may indicate a problem that needs professional attention.
Section 6: Troubleshooting Common Issues
6.1 Ice Maker Not Producing Ice
If your countertop ice maker is not producing ice, several common causes could be responsible. Here’s how to troubleshoot and resolve this issue:
- Check Power Supply: Ensure the ice maker is properly plugged in and the power switch is turned on. Check the circuit breaker and reset it if necessary.
- Verify Water Supply: Ensure the water supply is turned on and the water line is not blocked or kinked. Check the water inlet valve for any issues.
- Inspect Thermostat Settings: Make sure the thermostat is set to the correct temperature. If the thermostat is faulty, replace it.
- Look for Frost Buildup: Check the evaporator for any frost buildup that may be hindering ice production. Defrost the evaporator if needed.
6.2 Slow Ice Production
If your countertop ice maker is producing ice slowly, consider the following potential causes and solutions:
- Check Freezer Temperature: Ensure the freezer temperature is set between 0 and 5 degrees Fahrenheit (-18 to -15 degrees Celsius) for optimal ice production.
- Clean Condenser Coils: Dirty condenser coils can reduce the efficiency of the ice maker. Clean the coils regularly to maintain optimal performance.
- Inspect Water Line: Check for blockages or kinks in the water line that may be restricting water flow. Replace any damaged sections of the water line.
- Replace Water Filter: A clogged water filter can slow down ice production. Replace the filter if it appears dirty or clogged.
6.3 Poor Ice Quality
Poor ice quality can affect the taste and appearance of your drinks. Here are some steps to improve the quality of the ice produced by your countertop ice maker:
- Clean the Water Line: Flush the water line to remove any impurities or contaminants that may affect ice quality.
- Replace the Water Filter: Regularly replace the water filter to ensure the ice maker uses clean, filtered water.
- Descale the Ice Maker: Remove any mineral deposits that may be affecting ice quality by descaling the ice maker.
- Check Water Supply: Ensure the water supply is free of contaminants and has adequate pressure.
6.4 Water Leaks
Water leaks can cause significant damage if not addressed promptly. Here’s how to identify and fix water leaks in your countertop ice maker:
- Inspect Connections: Check all water line connections for tightness and signs of wear. Tighten any loose connections and replace damaged hoses.
- Check Water Pressure: Ensure the water pressure is not too high, as excessive pressure can cause leaks. Use a pressure regulator if necessary.
- Clear Drain Line: Inspect the drain line for blockages that may be causing water to back up and leak. Clear any blockages and ensure the drain line is properly positioned.
6.5 Strange Noises
Unusual noises from your countertop ice maker can indicate various issues. Here’s how to troubleshoot and address these noises:
- Identify Noise Source: Determine whether the noise is coming from the compressor, fan, or water line.
- Clean Moving Parts: Clean the condenser fan and other moving parts to remove dust and debris that may be causing the noise.
- Tighten Loose Components: Tighten any loose screws or components to reduce vibrations and noise.
- Seek Professional Help: If the noise persists, it may indicate a more serious issue with the compressor or other internal components. Consult a professional technician for further diagnosis and repair.
Section 7: Seasonal Maintenance Tips
7.1 Preparing for Summer
Summer months often see increased demand for ice, making it essential to ensure your countertop ice maker is in optimal condition. Here are some tips for preparing your ice maker for summer:
- Perform a Thorough Cleaning: Clean the interior and exterior of the ice maker, including the ice mold, water reservoir, and ice bin.
- Check the Water Filter: Replace the water filter to ensure clean, filtered water for ice production.
- Inspect the Water Line: Ensure the water line is free of blockages and leaks.
- Increase Maintenance Frequency: Consider increasing the frequency of maintenance tasks, such as cleaning and descaling, during the summer months to keep up with higher demand.
7.2 Winter Maintenance
During the winter months, it’s important to take steps to prevent freezing in the water line and ensure consistent performance. Here are some winter maintenance tips:
- Prevent Freezing: Insulate the water line to prevent freezing, especially if the ice maker is located in a colder area of your home.
- Adjust Thermostat Settings: Monitor the thermostat settings to ensure the ice maker maintains the correct temperature for ice production.
- Regular Use: Use the ice maker regularly to prevent the water from freezing in the lines and maintain consistent performance.
- Storage Tips: If you plan to store the ice maker during the winter, follow the manufacturer’s instructions for proper storage to prevent damage.
Section 8: Professional Maintenance and Repairs
8.1 When to Call a Professional
While many maintenance tasks can be performed at home, some issues require professional attention. Here are signs that indicate the need for professional maintenance:
- Persistent Leaks: If you are unable to fix a leak after tightening connections and replacing parts, it may be time to call a plumber.
- Electrical Problems: If you suspect any electrical problems with your ice maker, contact a qualified electrician.
- Major Malfunctions: If the ice maker stops working despite all troubleshooting efforts, it may indicate a more serious internal problem that requires professional diagnosis.
8.2 Finding a Reliable Technician
When seeking professional assistance, it’s essential to find a qualified and reliable technician. Here are some tips for finding a reliable technician:
- Ask for Recommendations: Ask friends, family, or neighbors for recommendations.
- Check Online Reviews: Look for online reviews and ratings of local technicians to find a reputable service provider.
- Verify Credentials: Ensure the technician has the necessary certifications and experience to repair countertop ice makers.
- Ask Questions: Before hiring a technician, ask about their experience, warranty on repairs, and whether they use genuine replacement parts.
Conclusion
Maintaining your countertop ice maker with a water line is essential for ensuring its optimal performance, longevity, and consistent ice quality. By following the comprehensive maintenance tips and troubleshooting advice provided in this guide, you can keep your ice maker in excellent condition and enjoy a reliable supply of high-quality ice for years to come. Regular maintenance, proper installation, and knowing when to call a professional are key to ensuring your countertop ice maker continues to operate efficiently and effectively. https://amzn.to/4fzlD5j
FAQs
FAQ 1: How often should I clean my countertop ice maker with a water line?
It is recommended to clean your countertop ice maker with a water line every six months or more frequently if you notice a decline in ice quality or performance. Regular cleaning prevents mold and bacteria growth and ensures the ice maker produces clean, high-quality ice.
FAQ 2: What type of water filter should I use for my ice maker?
The best water filter for your ice maker depends on your water quality and the manufacturer’s recommendations. Generally, a high-quality carbon filter or reverse osmosis system can effectively remove impurities and improve ice quality. Refer to the ice maker’s manual for specific filter recommendations.
FAQ 3: How can I tell if my water line is clogged?
Signs of a clogged water line include reduced water flow, no ice production, or slow ice production. Inspect the water line for visible blockages and check the water filter for clogs. Flushing the water line can help remove minor blockages and restore proper water flow.
FAQ 4: What should I do if my ice maker is making a loud noise?
Loud noises from your ice maker can indicate several issues, including loose components, dirty condenser coils, or a malfunctioning compressor or fan. Identify the source of the noise and address it by cleaning the components, tightening connections, or seeking professional repair if necessary.
FAQ 5: When should I replace the water inlet valve on my ice maker?
Replace the water inlet valve if it shows signs of damage, leaks, or if the ice maker is not receiving an adequate water supply. Regularly inspect the valve during maintenance checks and replace it as needed to ensure optimal ice maker performance.
By following these guidelines and maintaining your countertop ice maker with a water line, you can ensure a continuous supply of high-quality ice and extend the lifespan of your appliance. Regular maintenance, troubleshooting, and professional assistance when needed will keep your ice maker running smoothly and efficiently for years to come.
References
- GE Profile Opal Nugget Ice Maker Product Page
- NewAir Countertop Ice Maker Product Page
- Igloo ICEB26HNBK Portable Electric Countertop Ice Maker Product Page
- Scotsman SCN60PA-1SS
- EUHOMY Nugget Ice Maker Countertop
- Silonn Ice Maker Countertop
Additional Resources
[Which countertop ice maker with freezer is best?]
[How often should you clean your countertop ice maker?]
[What happens if you don’t clean your countertop ice maker regularly?]
[How does a countertop ice maker work?]
[How to install a countertop ice maker?]
[How often to descale a countertop ice maker?]
[Buying Guide: Countertop Ice Makers with Water Line Connection]
[Kitchen Upgrade Ideas: Countertop Ice Makers with Water Line]

