Introduction
Hello there! If you’re anything like me, you probably enjoy having a countertop ice maker at home. However, like any other appliance, it requires occasional maintenance to stay in good working order. If you neglect to clean your ice maker, it can develop mold, become less efficient, or even pose a health risk. For this reason, I’ve put together this thorough guide to help you deep clean your countertop ice maker, making sure it stays in top shape and consistently produces clean, fresh ice. Are you ready to get started? https://amzn.to/3WoePQf
Understanding Your Countertop Ice Maker
When it comes to choosing a countertop ice maker, there are several types to consider, each with its own unique features and benefits. Understanding these differences is crucial for effective maintenance and cleaning your countertop ice maker.
Types of Countertop Ice Makers
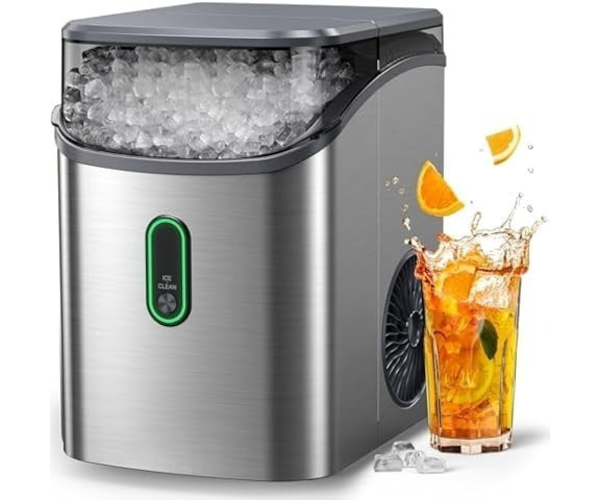
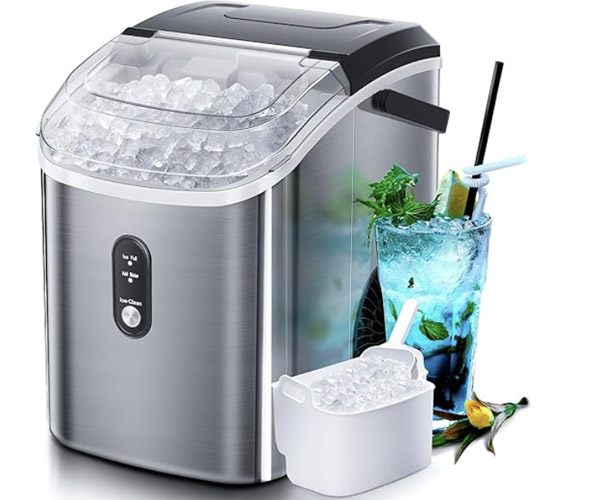
Nugget Ice Makers
- Description: Nugget ice makers produce soft, chewable ice nuggets, often referred to as “Sonic ice” or “pellet ice.”
- Uses: Perfect for cocktails, soft drinks, and smoothies due to their easy-to-chew texture.
- Maintenance Tip: Regularly clean the ice bin and water reservoir to prevent buildup of mold and bacteria.
Bullet Ice Makers
- Description: These ice makers produce cylindrical ice with a hollow center, resembling bullets.
- Uses: Ideal for quick chilling of beverages and maintaining the flavor of drinks without diluting them too quickly.
- Maintenance Tip: Ensure the freezing element is free from mineral deposits for optimal performance.
Flake Ice Makers
- Description: Flake ice makers produce soft, flaky ice, similar to snow.
- Uses: Commonly used in seafood displays, salad bars, and for therapeutic purposes in healthcare settings.
- Maintenance Tip: Clean the ice storage area frequently to avoid cross-contamination, especially in commercial settings.
Importance of Model-Specific Cleaning Instructions
Each ice maker model comes with its own set of cleaning instructions, tailored to its design and functionality. Adhering to these guidelines is essential for several reasons:
- Optimal Performance: Following the manufacturer’s cleaning procedures ensures that your ice maker operates at peak efficiency, producing high-quality ice consistently.
- Longevity: Proper maintenance according to model-specific instructions can significantly extend the lifespan of your ice maker.
- Warranty Compliance: Ignoring the specified cleaning methods can void warranties, leaving you unprotected in case of malfunctions or breakdowns.
Basic Components of an Ice Maker and Their Functions
To effectively clean your countertop ice maker, it’s important to understand its key components and their functions:
- Water Reservoir: The starting point of the ice-making process where water is stored before being frozen.
- Cleaning Tip: Regularly empty and clean the reservoir to prevent mold and mineral buildup.
- Ice Tray: The area where water is frozen into ice. Different models may have various designs, such as traditional ice trays or continuous freezing elements.
- Cleaning Tip: Remove and clean the ice tray to avoid scaling and ensure smooth ice production.
- Ice Bin: The storage compartment for the produced ice, keeping it ready for use.
- Cleaning Tip: Clean the bin frequently to maintain ice quality and prevent unpleasant odors.
- Evaporator: The component responsible for freezing the water into ice. It’s typically coated with a non-stick surface to facilitate easy release of the ice.
- Cleaning Tip: Descale the evaporator as recommended to prevent mineral deposits from affecting its efficiency.
- Condenser and Fan: These parts work together to remove heat from the refrigeration cycle, essential for maintaining the correct freezing temperatures.
- Cleaning Tip: Ensure the condenser and fan are free from dust and debris to maintain efficient cooling.
By understanding these components and how they work, you can tailor your cleaning routine to address the specific needs of your ice maker, ensuring it remains in top condition. Regular maintenance and cleaning your countertop ice maker not only improve its performance but also enhance the quality of the ice produced, making your beverages more enjoyable and safe to consume.
Taking the time to clean and maintain your ice maker can save you from future headaches and costly repairs, ensuring you always have fresh, clean ice at your fingertips.
Tools and Materials Needed
Before diving into the step-by-step cleaning process, it’s essential to gather all the necessary tools and materials. Having everything prepared will make the process smoother and more efficient. Here’s a comprehensive list of what you’ll need:
Essential Cleaning Supplies
To thoroughly clean your countertop ice maker, you’ll need a few basic supplies. These items are crucial for removing grime, scale, and bacteria, ensuring your ice maker stays in top condition:
- Mild Detergent: A gentle detergent is perfect for cleaning surfaces without causing damage. Look for one that is non-abrasive and safe for use on kitchen appliances.
- Vinegar: Vinegar is a natural descaling agent that effectively removes mineral deposits. It’s an eco-friendly choice that’s tough on limescale.
- Bleach: Use bleach for sanitizing your ice maker. It kills mold, mildew, and bacteria, ensuring your ice is safe and clean. Remember to dilute the bleach appropriately.
- Soft Cloths: Soft, non-abrasive cloths are ideal for wiping down surfaces. They won’t scratch the interior or exterior of your machine.
- Brushes: Various brushes can help clean hard-to-reach areas. Small, soft-bristled brushes are particularly useful for cleaning tiny crevices and corners.
Optional Specialized Cleaning Products
While the basic supplies are sufficient for most cleaning tasks, there are specialized products designed to make the job even easier and more effective. Consider adding these to your cleaning arsenal:
- Descaling Solutions: These products are specifically formulated to tackle mineral buildup. They can be more effective than vinegar in severe cases.
- Sanitizing Sprays: Pre-mixed sanitizing sprays can save time and ensure an even application of disinfectant.
- Cleaning Tablets: Some manufacturers offer cleaning tablets designed for their machines. These tablets can simplify the descaling and sanitizing processes.
Safety Gear
Safety is paramount when working with cleaning agents, especially bleach. Ensure you have the necessary gear to protect yourself:
- Gloves: Wear gloves to protect your hands from harsh chemicals. Nitrile or latex gloves are good options that offer a snug fit and excellent protection.
- Protective Eyewear: If you’re using strong chemicals or working in confined spaces, protective eyewear can prevent splashes from reaching your eyes.
- Ventilation: Ensure the area is well-ventilated. Open windows or use fans to disperse fumes from cleaning agents.
Step-by-Step Cleaning Process
Now that you have all the tools and materials needed for the job, let’s move on to the step-by-step cleaning process. By following these detailed instructions, you’ll be able to maintain a countertop ice maker that produces fresh, clean ice every time.
Preparation:
- Unplug the Machine: Always start by unplugging your ice maker to ensure safety.
- Empty the Ice Bin: Remove any ice and water from the bin to prevent contamination.
- Disassemble Detachable Parts: Take out any removable parts, such as the ice bin and water reservoir, for separate cleaning.
Initial Cleaning:
- Wipe Down Exterior Surfaces: Use a mild detergent and a soft cloth to clean the outside of the machine.
- Clean the Ice Bin and Removable Parts: Wash these parts with warm soapy water, rinse thoroughly, and allow them to dry completely before reassembly.
Descaling:
- Prepare a Vinegar Solution: Mix one part vinegar with one part water to create a descaling solution.
- Run the Descaling Cycle or Manually Clean: Follow the manufacturer’s instructions for running a descaling cycle or manually clean the internal parts using the vinegar solution.
Sanitizing:
- Mix a Bleach Solution: Combine one tablespoon of bleach with one gallon of water to create a sanitizing solution.
- Disinfect the Ice Maker: Use this solution to sanitize the ice maker, focusing on areas prone to mold and bacteria.
Final Rinse:
- Thoroughly Rinse All Parts: Use clean water to rinse away any remaining cleaning agents. Ensure all parts are completely dry before reassembling the machine.
- Reassemble the Ice Maker: Put all the parts back together and plug in the machine.
By following these steps and using the appropriate tools and materials, you can ensure your countertop ice maker remains in excellent condition, producing high-quality ice. Regular cleaning not only extends the life of your appliance but also ensures the ice it produces is safe and fresh.
Step-by-Step Cleaning Process for Your Countertop Ice Maker
1. Preparation
Unplug the machine: Safety first! Always start by unplugging your countertop ice maker to avoid any electrical hazards. https://amzn.to/3WoePQf
Empty the ice bin: Remove all ice from the bin. This ensures that you’re starting with a clean slate and prevents any old ice from contaminating the freshly cleaned parts.
Disassemble detachable parts: Carefully take out all removable parts, such as the ice bin, water reservoir, and any other detachable components. This will allow you to clean each part thoroughly.
2. Initial Cleaning
Wipe down exterior surfaces: Use a soft cloth dampened with mild detergent to gently clean the exterior of your ice maker. This removes dust, grime, and any surface contaminants.
Clean the ice bin and removable parts with mild detergent: Wash all the detachable parts with warm soapy water. Use a brush to scrub away any stubborn spots, ensuring all surfaces are clean. Rinse these parts thoroughly and let them air dry.
3. Descaling
Prepare a vinegar solution: Mix equal parts of water and vinegar. Vinegar is a natural descaler that effectively removes mineral deposits.
Run the descaling cycle or manually clean internal parts: Follow your machine’s manual for running a descaling cycle, or if your machine doesn’t have this feature, manually clean the internal parts with the vinegar solution. Pour the solution into the water reservoir and run the machine as if making ice. Discard the ice made during this process as it will contain the cleaning solution.
4. Sanitizing
Mix a bleach solution for disinfecting: Combine one tablespoon of bleach with one gallon of water. This solution will disinfect and kill any lingering bacteria or mold.
Focus on areas prone to mold and bacteria buildup: Use the bleach solution to wipe down all surfaces, paying special attention to the ice bin, water reservoir, and any areas where water is likely to sit. Allow the solution to sit for a few minutes to ensure thorough disinfection.
5. Final Rinse
Thoroughly rinse all parts to remove cleaning agents: After sanitizing, it’s crucial to rinse all parts with clean water to remove any residual bleach or vinegar. This step ensures that no cleaning agents are left behind that could affect the taste of your ice or pose a health risk.
Reassemble the ice maker: Once all parts are clean and dry, reassemble your ice maker. Make sure everything is securely in place and that there are no remaining moisture pockets.
By following these detailed steps, you ensure that your cleaning countertop ice maker process is thorough and effective. Regular maintenance like this not only extends the life of your appliance but also guarantees the production of fresh, clean ice.
Conclusion
Regular deep cleaning of your countertop ice maker is essential for maintaining its performance and ensuring the ice produced is safe and fresh. By incorporating these steps into your routine, you can enjoy the benefits of your ice maker for years to come. Don’t forget to share these tips with friends and family, and feel free to leave any additional tips or questions in the comments below.
For further reading, check out the manufacturer’s cleaning instructions and consider using recommended cleaning products for optimal results. Happy cleaning!
Maintaining Your Ice Maker
Maintaining your countertop ice maker is essential to ensure its longevity and optimal performance. Here are some recommended cleaning frequencies, daily maintenance tips, and long-term maintenance strategies to keep your ice maker in top shape.
Recommended Cleaning Frequency
Keeping your countertop ice maker clean on a regular schedule is crucial. Here’s a suggested cleaning timeline:
- Monthly: Perform a comprehensive deep clean. This includes descaling, sanitizing, and thoroughly rinsing the machine to remove any mineral deposits and bacterial buildup.
- Bi-weekly: Wipe down the exterior and clean the ice bin. This helps prevent the accumulation of dust and grime that could affect the machine’s performance.
- Weekly: Inspect the water reservoir and ice bin for any signs of mold or mildew and clean if necessary.
Daily Maintenance Tips
Incorporate these simple daily tasks into your routine to ensure your countertop ice maker remains clean and functional:
- Wipe Down Surfaces: Use a damp cloth to wipe down the exterior surfaces of the ice maker daily. This prevents dust and grime from building up and keeps the machine looking fresh.
- Check for Mold: Quickly inspect the interior components, such as the ice bin and water reservoir, for any signs of mold or mildew. Early detection can prevent larger cleaning issues down the line.
- Empty and Dry: At the end of each day, empty the ice bin and allow it to dry completely. This prevents water from stagnating and reduces the risk of mold growth.
Long-term Maintenance Tips
To prolong the life of your countertop ice maker and ensure it continues to produce high-quality ice, follow these long-term maintenance tips:
- Regular Descaling: Over time, mineral deposits from the water can build up inside your ice maker. Descale the machine regularly using a vinegar solution or a commercial descaling product to remove these deposits. This should be done at least once a month.
- Replacing Filters: If your ice maker has a water filter, replace it according to the manufacturer’s instructions. This ensures the water used to make ice is clean and free from impurities.
- Check Seals and Gaskets: Periodically inspect the seals and gaskets on your ice maker. If they appear worn or cracked, replace them to maintain a proper seal and prevent leaks.
- Store Properly: If you need to store your ice maker for an extended period, clean it thoroughly and ensure it is completely dry before storing. Store it in a cool, dry place to prevent any damage from humidity or temperature fluctuations.
By adhering to these maintenance tips, you’ll keep your countertop ice maker running efficiently and extend its lifespan. Regular maintenance not only ensures the production of clean, high-quality ice but also helps avoid costly repairs and replacements. Remember, a little effort in maintaining your appliance goes a long way in ensuring it continues to serve you well for years to come.
Troubleshooting Common Issues
Even with regular maintenance, you might encounter a few problems with your countertop ice maker. Here’s how to identify and solve some common issues, ensuring your ice maker stays in top condition.
Identifying and Solving Problems
Odd Smells
- Cause: Odd smells usually indicate mold or mildew buildup inside your ice maker.
- Solution:
- Deep clean countertop ice maker: Perform a thorough cleaning and sanitization using a vinegar solution for descaling and a bleach solution for sanitizing.
- Check water quality: Ensure you’re using clean, filtered water. Contaminants in the water can lead to unpleasant odors.
- Frequent cleaning: Regularly clean the water reservoir and ice bin to prevent mold growth.
Slow Ice Production
- Cause: Slow ice production can result from a variety of factors, including clogged filters, mineral buildup, or mechanical issues.
- Solution:
- Descale regularly: Mineral buildup can slow down the ice-making process. Regularly run a descaling cycle with a vinegar solution.
- Clean filters: Check and clean the water filter if your ice maker has one. Replace it according to the manufacturer’s recommendations.
- Ensure adequate ventilation: Make sure your ice maker has sufficient airflow around it to prevent overheating.
- Check water supply: Ensure the water reservoir is full and the water is flowing correctly.
Ice Quality Issues
- Cause: Issues with ice quality, such as cloudy or misshapen ice, are often due to impurities in the water or poor maintenance.
- Solution:
- Use filtered water: Ensure you’re using high-quality, filtered water to produce clear, clean ice.
- Regular cleaning: Perform regular deep cleanings to remove any debris or contaminants that could affect the ice quality.
- Check for leaks: Ensure there are no leaks in the water lines, which can introduce air bubbles into the ice.
When to Seek Professional Help
Sometimes, despite your best efforts, your ice maker might require professional attention. Here are a few signs that it’s time to call in the experts:
- Persistent issues: If you’ve performed a deep clean and followed all maintenance steps, but issues like odd smells, slow ice production, or poor ice quality persist, it’s time to seek professional help.
- Mechanical problems: Unusual noises, frequent breakdowns, or any mechanical malfunctions should be addressed by a professional technician to avoid further damage.
- Electrical issues: If you experience any electrical problems, such as the ice maker not powering on or electrical shorts, contact a professional immediately for safety reasons.
By staying on top of maintenance and knowing when to call in the pros, you can ensure your countertop ice maker remains in excellent working condition for years to come. Regularly performing a deep clean countertop ice maker routine not only extends its lifespan but also ensures you have a continuous supply of clean, high-quality ice.
Remember, consistent care and timely troubleshooting can make all the difference in keeping your appliance running smoothly. If you have any personal tips or questions, feel free to share them in the comments below. Happy cleaning!
Tips for Prolonging the Life of Your Ice Maker
To ensure your countertop ice maker continues to produce high-quality ice and operates efficiently, it’s essential to follow proper usage guidelines, take preventative measures to avoid common issues, and store the machine correctly when not in use. Here are some detailed tips to help you achieve that:
Proper Usage Guidelines
- Use Clean, Filtered Water: Always fill your ice maker with clean, filtered water to prevent mineral buildup and ensure the ice tastes fresh. Unfiltered water can lead to scaling and affect the machine’s performance.
- Avoid Overloading: Don’t overload the ice bin or the water reservoir. Follow the manufacturer’s recommended capacity to avoid straining the machine and causing potential damage.
- Regular Operation: Run your ice maker regularly, even if you don’t need ice frequently. Regular use helps keep the internal components in good working condition and prevents stagnation of water, which can lead to mold and bacteria growth.
Preventative Measures to Avoid Common Issues
- Regular Deep Cleaning: Perform a deep clean countertop ice maker process monthly. This includes descaling, sanitizing, and thoroughly rinsing all parts. Regular deep cleaning helps prevent mold, mildew, and mineral buildup, which can affect ice quality and machine performance.
- Routine Inspections: Check your ice maker regularly for any signs of wear, damage, or buildup. Look for mold, rust, or mineral deposits and address them promptly to prevent bigger issues.
- Replace Filters: If your ice maker has a water filter, replace it as recommended by the manufacturer. A clogged or dirty filter can reduce water flow and affect ice production and quality.
- Keep It Dry: After cleaning, ensure all parts are completely dry before reassembling the ice maker. Moisture can lead to mold and bacterial growth.
Storing Your Ice Maker When Not in Use
- Clean Thoroughly: Before storing your ice maker, perform a thorough cleaning. Ensure all components are free from mold, scale, and residue. This prevents any contaminants from festering while the machine is in storage.
- Dry Completely: After cleaning, let all parts air dry completely. Any remaining moisture can lead to mold and mildew during storage.
- Disassemble Parts: Store detachable parts separately. This prevents any parts from being damaged or misplaced and makes it easier to clean them again before reassembly.
- Cover the Machine: Use a cover or a plastic wrap to protect your ice maker from dust and debris while it’s in storage. This keeps the exterior clean and ready for use when you need it again.
- Store in a Cool, Dry Place: Choose a storage location that is cool, dry, and away from direct sunlight. Extreme temperatures and humidity can affect the machine’s components and lead to damage.
By following these tips and incorporating them into your routine, you can significantly prolong the life of your countertop ice maker and ensure it continues to produce high-quality ice. Regular maintenance, proper usage, and careful storage are key to keeping your ice maker in top condition. Remember, a well-maintained ice maker not only performs better but also saves you from potential repair costs in the long run. Keep your machine clean, follow the manufacturer’s guidelines, and enjoy the benefits of fresh, clean ice whenever you need it.
Conclusion
Incorporating a regular deep cleaning routine for your countertop ice maker brings numerous benefits. Here’s a quick recap:
- Improved Efficiency: A clean machine operates more efficiently, producing ice faster and maintaining consistent quality.
- Prolonged Lifespan: Regular maintenance helps prevent wear and tear, extending the life of your ice maker.
- Health and Safety: Removing mold, bacteria, and mineral buildup ensures that the ice you consume is clean and safe.
- Better Taste: Regular cleaning prevents any unpleasant tastes or odors from affecting your ice.
By incorporating these essential tips into your routine maintenance, you’ll enjoy fresh, high-quality ice and a reliable appliance. Make it a habit to:
- Perform Monthly Deep Cleans: Follow the detailed cleaning steps outlined in this guide at least once a month.
- Conduct Bi-Weekly Checks: Regularly inspect and wipe down your machine to prevent minor issues from becoming major problems.
- Address Issues Promptly: If you notice any performance issues, address them immediately to avoid further complications.
Remember, a little effort goes a long way. Maintaining your countertop ice maker doesn’t have to be a daunting task. With the right tools and a consistent schedule, you can ensure that your machine stays in top condition, providing you with clean, refreshing ice whenever you need it.
Final Thoughts and Call to Action
I hope you found this guide on how to deep clean your countertop ice maker helpful. Keeping your ice maker clean is crucial for its longevity and the quality of ice it produces. If you haven’t already, make a plan to incorporate these cleaning tips into your regular household routine. Your future self (and your taste buds) will thank you!
If you have any personal tips or experiences with cleaning your ice maker, feel free to share them in the comments below. Your insights could help others facing similar challenges. Also, if you found this guide useful, please share it with friends or family members who might benefit from it. Let’s help each other maintain our appliances in the best possible shape!
For further reading and additional resources, check out the links provided below. They include manufacturer-specific cleaning instructions, recommended cleaning products, and other related guides that can offer more tips and tricks.
By following these guidelines, you’ll not only ensure the deep clean of your countertop ice maker but also maintain its performance and longevity. Regular maintenance is key to enjoying fresh, clean ice, and a reliable appliance. Thank you for reading, and happy cleaning!
FAQs
1. How often should I deep clean my countertop ice maker?
Answer: Ideally, you should deep clean your countertop ice maker once a month. Regular cleaning helps maintain efficiency, prevents mold and bacteria buildup, and ensures the ice produced is clean and safe to consume.
2. What supplies do I need to clean my ice maker?
Answer: You’ll need mild detergent, vinegar, bleach, soft cloths, brushes, and optionally, specialized cleaning products. Safety gear like gloves is also recommended to protect your hands during the cleaning process.
3. Can I use vinegar to clean my ice maker?
Answer: Yes, vinegar is excellent for descaling and removing mineral buildup. Mix one part vinegar with one part water to create a cleaning solution. Run this solution through your ice maker to clean the internal components.
4. Is it safe to use bleach in my ice maker?
Answer: Yes, using a diluted bleach solution is safe for disinfecting your ice maker. Mix one tablespoon of bleach with one gallon of water. Ensure all parts are thoroughly rinsed after sanitizing to remove any bleach residue.
5. What are the steps to deep clean my countertop ice maker?
Answer:
- Unplug the machine and empty the ice bin.
- Disassemble removable parts and wash them with mild detergent.
- Use a vinegar solution for descaling.
- Sanitize with a bleach solution.
- Rinse all parts thoroughly and reassemble the ice maker.
6. How can I prevent mold and bacteria growth in my ice maker?
Answer: Regular cleaning is key. Wipe down the exterior daily, empty the ice bin frequently, and perform a deep clean at least once a month. Ensure your ice maker is dry when not in use, as moisture promotes mold growth.
7. What should I do if my ice maker has an odd smell?
Answer: If your ice maker smells odd, it likely needs a thorough cleaning. Follow the deep cleaning steps, paying extra attention to areas with visible mold or residue. Regularly descaling with vinegar and sanitizing with bleach can help prevent odors.
8. How can I maintain my ice maker between deep cleanings?
Answer:
- Daily: Wipe down the exterior and check for mold.
- Bi-Weekly: Clean the ice bin and removable parts.
- Monthly: Perform a full deep clean. Additionally, use filtered water if possible to reduce mineral buildup, and replace any filters according to the manufacturer’s instructions.
By following these tips and maintaining a regular cleaning schedule, you can ensure your countertop ice maker continues to produce fresh, clean ice efficiently. If you have any other questions or specific issues, consult your ice maker’s manual or contact the manufacturer for detailed guidance.

