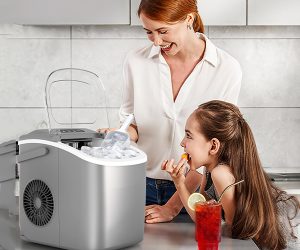
A countertop ice maker is a convenient appliance that can provide a steady supply of ice for your beverages, parties, and everyday needs. However, like any appliance, it can sometimes encounter issues that disrupt its performance. Understanding how to troubleshoot and fix your countertop ice maker can save you time, money, and the hassle of having to call in a professional. This guide will walk you through common problems, their causes, and step-by-step solutions to get your ice maker back in working order.
Understanding How Your Countertop Ice Maker Works
Before diving into how to fix your countertop ice maker, it’s important to understand how the machine operates. Knowing the basic functionality and key components of your ice maker will help you diagnose issues more effectively and apply the correct fixes.
Basic Functionality
A countertop ice maker operates through a relatively straightforward process. First, water is drawn from the reservoir into the ice-making area, where it is then cooled by the evaporator coils. The evaporator rapidly lowers the temperature of the water, causing it to freeze into ice cubes or nuggets. Once the ice is formed, it is released into the storage bin where it can be accessed when needed.
The machine continuously repeats this cycle as long as it is powered on and there is water in the reservoir. Some models allow you to select different sizes or types of ice, such as bullet-shaped or nugget ice. Understanding this process is key to troubleshooting, as many issues stem from disruptions in these basic functions.
Key Components
To fix your countertop ice maker effectively, it’s crucial to be familiar with its main components:
- Water Reservoir: Holds the water that will be converted into ice. If the reservoir is empty or improperly seated, the machine won’t function correctly.
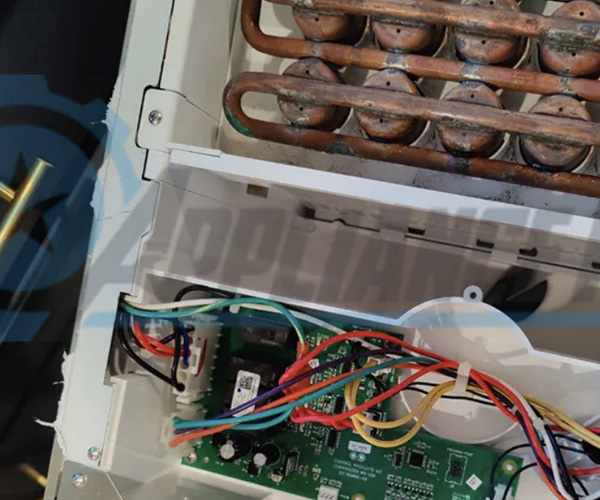
- Compressor: Powers the cooling system that freezes the water. Issues with the compressor can result in the machine not producing ice or taking too long to do so.
- Evaporator: The part that cools the water to the freezing point. If the evaporator is malfunctioning, it could lead to incomplete freezing or irregularly shaped ice.
- Ice Mold: The tray where water freezes into ice. Problems with the ice mold can cause ice to form improperly or not at all.
- Sensors: Detect when the ice bin is full or when water levels are low. Malfunctioning sensors can lead to overproduction of ice, or the machine stopping entirely.
- Control Panel: Allows you to control the ice maker’s settings. Issues with the control panel can prevent you from changing settings or even turning the machine on.https://amzn.to/46DZn6e
Why Understanding the Basics Helps with Troubleshooting
Understanding how these components work together will make it easier for you to identify what might be wrong with your machine. For example, if your portable ice maker is not working, knowing that the compressor and evaporator are responsible for cooling can help you narrow down potential causes. Similarly, if your machine is not producing any ice, checking the water reservoir should be one of your first steps.
In the following sections, we will explore common problems with countertop ice makers, the reasons they occur, and detailed instructions on how to fix them. By the end of this guide, you’ll have the knowledge you need to troubleshoot and resolve most issues that may arise with your countertop ice maker.
When you encounter an issue with your ice maker, it’s easy to feel frustrated, especially if you rely on it daily. However, with the right approach, many problems can be resolved without the need for professional intervention. Let’s begin by exploring the most common problems that can affect your countertop ice maker and how you can address them.
Common Problems with Countertop Ice Makers
Countertop ice makers are generally reliable, but like any appliance, they can encounter problems. These issues can range from minor annoyances to significant malfunctions. Understanding the most common problems can help you quickly diagnose and fix your countertop ice maker. In this section, we’ll cover some of the issues you might face, along with potential causes.
Ice Maker Not Turning On
One of the most basic and frustrating problems you can encounter is when your ice maker simply won’t turn on. This issue can stem from several causes, some of which are easy to fix, while others may require more in-depth troubleshooting.
- Power Supply Issues: The first thing to check when your ice maker doesn’t turn on is whether it’s properly connected to a power source. Ensure the machine is plugged into a functioning outlet. It’s also a good idea to check the circuit breaker or fuse box to make sure the circuit hasn’t been tripped. Power surges or overloading the outlet with multiple appliances can also cause the ice maker to stop working.
- Faulty Power Cord or Plug: Inspect the power cord for any visible signs of damage, such as fraying or cuts. A damaged cord can prevent electricity from reaching the machine, making it appear as though the machine is dead. If the power cord is damaged, it will need to be replaced. Similarly, check the plug for any issues, such as bent prongs or burn marks, which could indicate a short circuit.
- Internal Electrical Problems: If the machine is properly plugged in and the power cord is intact, the issue may lie within the machine’s internal electrical components. A faulty control board or blown fuse inside the machine can prevent it from turning on. This type of problem is more complex and might require professional repair, especially if the machine is under warranty.
Slow or No Ice Production
Another common issue with countertop ice makers is slow or completely halted ice production. This can be particularly frustrating if you need ice quickly or rely on your machine for events.
- Low Water Levels: One of the most common causes of slow or no ice production is a low water level in the reservoir. If the reservoir is empty or not filled to the appropriate level, the machine won’t have enough water to produce ice. Always check the water reservoir first if you notice a decrease in ice production.
- Clogged Filters: Over time, filters in your ice maker can become clogged with minerals, debris, or other impurities. This can restrict the flow of water into the ice-making area, leading to reduced ice production. Regularly cleaning or replacing filters can help maintain optimal performance.
- Ambient Temperature: The environment in which your ice maker operates can also affect its performance. If the room temperature is too high, the machine will have to work harder to cool the water, which can slow down ice production. Ideally, your ice maker should be placed in a cool, well-ventilated area away from direct sunlight and heat sources.
- Overheating: Continuous operation without breaks can cause your ice maker to overheat, leading to slower ice production. Allowing the machine to cool down between cycles can help prevent overheating and maintain consistent ice production.
Ice Maker Not Dispensing Ice
If your ice maker is producing ice but not dispensing it properly, there could be a mechanical or sensor issue at play.
- Ice Jam in the Bin: One of the most common reasons for dispensing issues is an ice jam in the bin. If the ice cubes clump together, they can block the chute, preventing new ice from being dispensed. To fix this, carefully remove the ice bin and break up any clumps of ice using a plastic utensil or the ice scoop that came with your machine.
- Faulty Motor or Dispenser Mechanism: If there is no ice jam but the machine still isn’t dispensing ice, the problem might lie with the motor or the dispenser mechanism. If the motor responsible for pushing the ice out of the bin is malfunctioning, it may need to be repaired or replaced. This is a more complex issue that might require professional assistance.
- Blocked Ice Chute: A blocked ice chute can also prevent ice from being dispensed. This can happen if ice partially melts and refreezes inside the chute, creating a blockage. Unplug the machine and carefully clear any blockages from the chute using a small, flexible tool.
Ice Quality Issues
If your ice cubes are cloudy, soft, or have an off taste, it can significantly impact your enjoyment of drinks. Several factors can affect the quality of the ice produced by your machine.
- Water Quality: The quality of the water you use in your ice maker directly impacts the quality of the ice. Tap water can contain minerals, chlorine, and other impurities that can cause cloudy or bad-tasting ice. Using filtered or bottled water can help produce clearer, better-tasting ice.
- Dirty Machine: Over time, mold, bacteria, and mineral deposits can accumulate inside the machine, affecting the taste and appearance of the ice. Regular cleaning and descaling are essential to maintaining high ice quality.
- Temperature Settings: The internal temperature of your ice maker also plays a role in the quality of the ice. If the machine is not cold enough, the ice may come out soft or melt quickly. Check the temperature settings and ensure they are within the manufacturer’s recommended range.
- Odor Issues: If your ice has an unusual smell, it could be due to food particles or other contaminants in the water reservoir or ice bin. Cleaning these areas regularly can help eliminate odors and improve the taste of the ice.
Leaking Water
Water leakage is a common issue that can cause messes and potentially damage your countertop or floors. It’s important to address leaks promptly to prevent further complications.
- Cracked or Loose Water Reservoir: A cracked water reservoir or loose connections can cause water to leak from the machine. Inspect the reservoir for any visible damage and ensure it is securely in place. If the reservoir is cracked, it will need to be replaced.
- Drainage Issues: Some ice makers have a drainage system to remove excess water. If this system becomes clogged or malfunctions, it can cause water to back up and leak from the machine. Clearing the drain line or checking the drainage system can resolve this issue.
- Gasket and Seal Problems: Worn or damaged gaskets and seals can also lead to water leaks. Over time, these components can wear out, allowing water to escape. Replacing worn gaskets and seals can stop the leaks.
Unusual Noises
Strange noises during operation can be alarming and may indicate that something is wrong with your ice maker. Identifying the source of the noise is key to resolving the issue.
- Rattling or Vibrating Sounds: Rattling or vibrating noises are often caused by loose components or an unstable placement of the machine. Ensure that the ice maker is on a level surface and that all parts are securely fastened.
- Buzzing or Humming Noises: These sounds are typically associated with electrical components like the compressor or fan. If the noise is consistent and loud, it may indicate an issue with the compressor or fan. Cleaning dust and debris from these components can sometimes reduce the noise, but persistent issues may require professional repair.
- Grinding or Clicking Sounds: Grinding or clicking noises can be more serious, often indicating a problem with the motor or ice-making components. These sounds may suggest that the machine’s internal parts are struggling to function properly, and professional inspection may be necessary.
Understanding these common problems and their potential causes is the first step in fixing your countertop ice maker. In the next section, we’ll provide a detailed troubleshooting guide to help you address these issues and get your ice maker back to optimal performance.
Step-by-Step Troubleshooting Guide
Once you’ve identified the potential cause of the problem with your countertop ice maker, it’s time to take action. The following step-by-step guide will help you troubleshoot and fix the most common issues that can occur with your ice maker. By following these instructions, you can often resolve problems without the need for professional repair.
Checking the Power Supply
The first thing you should check when your ice maker is not turning on or functioning properly is the power supply. Power-related issues are some of the most common problems with any appliance and are often easy to fix.
- Ensure Proper Connection: Make sure that the ice maker is securely plugged into a functioning outlet. If the outlet is controlled by a switch, ensure the switch is turned on. If you’re using an extension cord, make sure it is rated for the power requirements of the ice maker and that it’s in good condition.
- Test the Outlet: Plug another device, such as a lamp or phone charger, into the same outlet to check if it’s working. If the outlet isn’t providing power, try resetting the circuit breaker or using a different outlet. If the outlet is dead, you may need to contact an electrician.
- Inspect the Power Cord and Plug: Check the power cord for any visible signs of damage, such as fraying or cuts. A damaged power cord can prevent the ice maker from receiving power. If the cord is damaged, it should be replaced immediately to avoid any safety hazards.
Ensuring Proper Water Levels
If your ice maker isn’t producing ice or the ice is irregular, checking the water levels is crucial. Low or insufficient water levels can prevent the machine from operating correctly.
- Check the Water Reservoir: Open the ice maker and inspect the water reservoir to ensure it is filled to the appropriate level. An empty or low water tank is a common reason for the machine not producing ice. Refill the reservoir with clean, filtered water if necessary.
- Inspect Water Lines: For ice makers that are connected directly to a water line, check for any kinks, blockages, or leaks that might be restricting water flow. Make sure the line is securely connected to both the machine and the water source.
- Ensure Proper Placement of the Reservoir: Sometimes, the water reservoir might not be seated correctly in the machine, which can disrupt water flow. Make sure the reservoir is properly aligned and securely in place.
Cleaning and Maintenance
Regular cleaning and maintenance are essential for keeping your countertop ice maker in top condition. Over time, mineral deposits, mold, and bacteria can build up inside the machine, leading to poor ice quality and other issues.
- Descale the Machine: If you live in an area with hard water, mineral buildup can be a significant issue. Use a descaling solution recommended by the manufacturer to remove these deposits from the machine’s internal components. Run a few cycles with the solution, then follow up with clean water to rinse out any residue.
- Sanitize the Interior: Clean the interior of the ice maker, including the water reservoir, ice bin, and any removable parts. Use a mixture of water and vinegar or a mild bleach solution to sanitize these components. Rinse thoroughly with clean water to remove any cleaning solution.
- Replace Filters: If your ice maker has a water filter, it should be replaced regularly according to the manufacturer’s instructions. A clogged or dirty filter can reduce water flow and affect ice quality. Installing a new filter can improve both the taste and clarity of the ice.
Inspecting the Fan and Compressor
The fan and compressor are critical components of your ice maker, as they help regulate the temperature and ensure efficient ice production.
- Check for Dust and Debris: Over time, dust and debris can accumulate on the fan and compressor, reducing their efficiency. Unplug the machine and carefully clean these components using a soft brush or compressed air. Be sure to remove any obstructions that could be hindering their performance.
- Listen for Unusual Noises: If the fan or compressor is making unusual noises, it could indicate a problem. A buzzing or humming noise might suggest that the compressor is not working properly, while a grinding noise could point to an issue with the fan. In such cases, further inspection or professional repair may be necessary.
- Ensure Proper Ventilation: The fan and compressor need adequate ventilation to operate efficiently. Make sure the ice maker is placed in a location where there is sufficient airflow around the machine. Avoid placing it in confined spaces or near heat sources that could cause overheating.
Resetting the Machine
Sometimes, a simple reset is all that’s needed to resolve minor issues with your ice maker. Resetting the machine can clear minor errors and restore normal operation.
- Locate the Reset Button: Most countertop ice makers come with a reset button, usually located on the control panel or inside the machine near the power cord. Check your user manual if you’re unsure where to find it.
- Perform a Reset: To reset the machine, press and hold the reset button for a few seconds until the machine powers down. Release the button, wait a few moments, and then turn the machine back on. This can help clear any minor errors or glitches in the system.
- Power Cycle the Machine: If your machine doesn’t have a reset button, you can achieve a similar effect by unplugging the machine, waiting a few minutes, and then plugging it back in. This can help resolve issues like slow ice production or ice not ejecting properly.
By following these troubleshooting steps, you can address many of the common issues that might arise with your countertop ice maker. However, if these steps do not resolve the problem, it may be time to consider more in-depth repairs or professional assistance. In the next section, we’ll cover advanced fixes for more complex problems and preventative maintenance tips to keep your ice maker running smoothly.
Advanced Fixes for Common Ice Maker Problems
While many issues with countertop ice makers can be resolved with basic troubleshooting, some problems require more advanced fixes. In this section, we’ll cover how to handle more complex issues that may arise, such as replacing faulty components, dealing with electrical problems, and fixing persistent leaks. These fixes often require more time, tools, and technical knowledge, so proceed with caution.
Replacing Faulty Components
Over time, certain components in your countertop ice maker may wear out or fail, requiring replacement. This can include the water pump, fan, compressor, or sensors.
- Water Pump Replacement: If your ice maker is not producing ice or the ice production is slow, the water pump might be failing. Replacing the water pump involves accessing the internal components of the machine, disconnecting the old pump, and installing a new one. Be sure to follow the manufacturer’s instructions carefully and ensure that the new pump is compatible with your machine model.
- Fan Replacement: If the fan is not working properly, it can cause the machine to overheat or produce ice slowly. Replacing the fan requires removing the outer casing of the ice maker, disconnecting the old fan, and installing the new one. Make sure the new fan is securely fastened and properly aligned to ensure efficient airflow.
- Compressor Replacement: The compressor is a critical component that powers the cooling system of the ice maker. If the compressor fails, the machine will not be able to produce ice. Replacing a compressor is a complex task that involves discharging the refrigerant, removing the old compressor, and installing a new one. This is typically a job for a professional technician due to the technical expertise required and the need for specialized tools.
- Sensor Replacement: If the ice maker’s sensors are malfunctioning, it can lead to issues such as overproduction of ice or the machine stopping entirely. Replacing sensors involves accessing the control board, disconnecting the old sensors, and installing new ones. Be sure to follow the manufacturer’s instructions and test the machine after installation to ensure the new sensors are functioning correctly.
Dealing with Electrical Issues
Electrical problems are among the most challenging issues to diagnose and fix in a countertop ice maker. These problems can include blown fuses, faulty wiring, or a malfunctioning control board.https://amzn.to/46DZn6e

- Diagnosing Electrical Problems: Start by checking for any visible signs of electrical issues, such as burn marks on the control board or damaged wiring. If you suspect a blown fuse, use a multimeter to test the fuses in the machine. If a fuse is blown, it will need to be replaced with one of the same rating.
- Fixing Wiring Issues: If the wiring inside the machine is damaged or disconnected, it can prevent the machine from functioning properly. Carefully inspect the wiring for any signs of wear or damage. If you find damaged wires, they will need to be replaced or repaired. Make sure all connections are secure and properly insulated.
- Replacing the Control Board: The control board is the central hub that manages the operation of the ice maker. If the control board fails, the machine may not turn on or may operate erratically. Replacing the control board involves accessing the internal components of the machine, disconnecting the old board, and installing a new one. This is a complex task that may require professional assistance, especially if the machine is under warranty.
Handling Persistent Leaks
If your countertop ice maker is consistently leaking water, it’s important to address the issue promptly to prevent damage to your machine and surrounding surfaces.
- Locating the Source of the Leak: Start by identifying where the leak is coming from. Common sources of leaks include the water reservoir, water lines, or the drainage system. Inspect these areas carefully for any cracks, loose connections, or blockages.
- Fixing Leaks in the Water Reservoir or Lines: If the water reservoir is cracked or the water lines are damaged, they will need to be replaced. Ensure that all connections are tight and secure to prevent future leaks.
- Clearing the Drainage System: If the leak is coming from the drainage system, it may be due to a blockage in the drain line. Use a small brush or pipe cleaner to clear any debris from the drain line and ensure that water can flow freely.
- Replacing Gaskets and Seals: Worn or damaged gaskets and seals can allow water to escape from the machine. Inspect these components regularly and replace them if they show signs of wear. This will help prevent leaks and maintain the efficiency of the machine.
By addressing these more complex issues, you can fix your countertop ice maker and restore it to full functionality. However, if you are unsure about performing these advanced fixes yourself, it may be best to seek professional assistance to avoid causing further damage to the machine.
Preventative Maintenance Tips
Preventative maintenance is the key to keeping your countertop ice maker running smoothly and avoiding many of the common issues we’ve discussed. By regularly cleaning, inspecting, and caring for your machine, you can extend its lifespan and ensure that it continues to produce high-quality ice. In this section, we’ll cover essential maintenance tasks and best practices for keeping your ice maker in top condition.
Regular Cleaning and Descaling
Cleaning and descaling are two of the most important maintenance tasks for your countertop ice maker. These tasks help prevent the buildup of mold, bacteria, and mineral deposits that can affect the machine’s performance and the quality of the ice.
- Weekly Cleaning: Clean the interior of the ice maker, including the water reservoir, ice bin, and any removable parts, on a weekly basis. Use a mixture of warm water and vinegar or a mild bleach solution to sanitize the machine. Rinse thoroughly with clean water before using the machine again.
- Monthly Descaling: If you live in an area with hard water, descaling the machine monthly is essential. Use a descaling solution recommended by the manufacturer to remove mineral deposits from the machine’s internal components. This will help prevent clogs and ensure the machine operates efficiently.
Replacing Filters and Seals
Filters and seals play a vital role in maintaining the performance and efficiency of your ice maker. Regularly inspecting and replacing these components can help prevent many common issues.
- Filter Replacement: Replace water filters according to the manufacturer’s recommended schedule, usually every three to six months. A clogged or dirty filter can reduce water flow and lead to poor ice quality. Using high-quality filters can improve the taste and clarity of the ice and reduce the likelihood of clogs and other issues.
- Seal and Gasket Replacement: Inspect the seals and gaskets around the water reservoir, ice bin, and other components for any signs of wear or damage. Replacing worn seals can prevent leaks and improve the machine’s efficiency.
Proper Usage Practices
How you use your countertop ice maker can also affect its performance and lifespan. Following proper usage practices can help prevent many common problems.
- Avoid Overfilling the Water Reservoir: Overfilling the water reservoir can cause the machine to overflow or produce poor-quality ice. Always fill the reservoir to the appropriate level and avoid exceeding the maximum fill line.
- Ensure Proper Ventilation: Place the ice maker in a well-ventilated area where air can circulate freely. Avoid placing the machine in enclosed spaces or near heat sources that could increase the temperature and affect the machine’s performance.
- Use Filtered Water: Using filtered or bottled water can reduce the buildup of minerals and impurities in the machine, leading to clearer, better-tasting ice and fewer maintenance issues.
Seasonal Maintenance
Different seasons can affect the performance of your ice maker, especially if you live in an area with extreme temperatures or high humidity. Seasonal maintenance can help you prepare your machine for different conditions.
- Summer Maintenance: During the summer, the ambient temperature can rise, putting extra strain on your ice maker. Ensure the machine is placed in a cool, well-ventilated area and consider using a fan to help with airflow. Clean the machine more frequently to prevent mold and bacteria growth in the warm, humid conditions.
- Winter Maintenance: If you won’t be using your ice maker during the winter, it’s important to winterize the machine. Drain the water reservoir, clean the machine thoroughly, and store it in a cool, dry place. This will help prevent mold and bacteria from growing inside the machine during periods of inactivity.
By following these preventative maintenance tips, you can keep your countertop ice maker in top condition and avoid many of the common issues that can affect its performance. Regular cleaning, descaling, and proper usage practices are essential to ensuring that your ice maker continues to produce high-quality ice for years to come.
When to Call a Professional
While many issues with your countertop ice maker can be resolved with basic troubleshooting and maintenance, there are times when professional assistance is necessary. Knowing when to call a professional can save you time, money, and the frustration of dealing with a malfunctioning appliance. In this section, we’ll cover how to identify issues that require professional expertise, warranty considerations, and tips for finding a reliable repair service.
Identifying Issues Beyond DIY Fixes
Some problems with your ice maker may be too complex to handle on your own, especially if they involve the machine’s internal components. Knowing when to seek professional help is crucial to avoiding further damage to the machine.
- Electrical Issues: If you suspect that there is an internal electrical problem, such as a faulty control board or blown fuse, it’s best to contact a professional. Attempting to repair electrical components yourself can be dangerous and may void the machine’s warranty.
- Mechanical Failures: Issues with the compressor, motor, or other mechanical components often require specialized knowledge and tools to diagnose and repair. If your ice maker is making unusual noises, not cooling properly, or not producing ice, a professional repair service can help identify and fix the problem.
- Persistent Leaks: If you’ve tried to fix a water leak and the problem persists, it may indicate a more serious issue with the machine’s internal components or drainage system. A professional can thoroughly inspect the machine and make the necessary repairs.
Warranty Considerations
If your ice maker is still under warranty, it’s important to follow the manufacturer’s guidelines for repairs to avoid voiding the warranty.
- Check the Warranty Terms: Before attempting any repairs, check the terms of your warranty. Many warranties require that repairs be performed by an authorized technician to remain valid. Attempting to fix the machine yourself could void the warranty, leaving you responsible for the full cost of repairs.
- Contact the Manufacturer: If your machine is still under warranty, contact the manufacturer for assistance. They can provide guidance on troubleshooting steps and, if necessary, refer you to an authorized repair service. Some manufacturers may also offer free or discounted repairs for machines that are still under warranty.
Finding a Reliable Repair Service
When selecting a repair service for your ice maker, it’s important to choose a reliable and experienced technician. A reputable repair service can help you resolve complex issues quickly and effectively.
- Look for Certified Technicians: Choose a repair service that employs certified technicians with experience in repairing ice makers. Certification ensures that the technician has the necessary skills and knowledge to diagnose and fix the problem correctly.
- Check Reviews and References: Before hiring a repair service, check online reviews and ask for references. A reputable repair service will have positive reviews and be willing to provide references from satisfied customers.
- Get an Estimate: Before proceeding with any repairs, ask for an estimate of the cost. This will help you determine whether the repair is cost-effective compared to replacing the machine. If the repair is expensive and the ice maker is old or has had multiple issues, it may be more cost-effective to replace the machine.
Cost vs. Replacement
In some cases, the cost of repairing your ice maker may be close to or even exceed the cost of replacing it. Deciding whether to repair or replace the machine depends on several factors.
- Evaluate the Cost of Repairs: Get an estimate for the cost of repairs before proceeding. If the repair is expensive and the ice maker is old or has experienced multiple issues, it may be more cost-effective to replace the machine with a new one.
- Consider the Age of the Machine: If your ice maker is several years old and has experienced frequent problems, it may be nearing the end of its lifespan. In this case, investing in a new machine might be a better option than continuing to pay for repairs.
- Assess the Frequency of Issues: If your ice maker has been reliable up until a recent issue, repairing it may be worthwhile. However, if the machine has been plagued with problems, it may be time to consider a replacement.
By knowing when to call a professional and how to choose a reliable repair service, you can ensure that your countertop ice maker receives the care it needs to function properly. In some cases, replacing the machine may be the best option, especially if it has reached the end of its useful life.
Conclusion
Fixing your countertop ice maker doesn’t have to be a daunting task. By understanding how the machine works, identifying common problems, and following the troubleshooting steps outlined in this guide, you can often resolve issues on your own and keep your ice maker running smoothly. Regular maintenance is key to preventing many of these problems and ensuring that your machine continues to produce high-quality ice for years to come.
However, there are times when professional assistance is necessary. Knowing when to call a professional can save you time, money, and the frustration of dealing with a malfunctioning appliance. Whether you need help with electrical issues, mechanical failures, or deciding whether to repair or replace your ice maker, a certified technician can provide the expertise you need.
We hope this guide has provided you with the knowledge and confidence to fix your countertop ice maker. If you have any questions or need further assistance, don’t hesitate to contact a professional repair service or consult the manufacturer’s support resources. And remember, regular maintenance is the best way to keep your ice maker in top working condition, so be sure to follow the tips and recommendations provided in this article.https://amzn.to/46DZn6e
Call to Action: We invite you to share your own troubleshooting tips and experiences in the comments below, or visit homesolutionzone.com for more resources and advice on maintaining and repairing your countertop ice maker. Your insights could help others facing similar issues, and together, we can ensure that everyone enjoys the full benefits of their ice maker!

