Introduction
Imagine you’re hosting a party, and your countertop ice maker suddenly stops working. The drinks are getting warm, and the guests are starting to notice. This is a common scenario where an ice maker’s reliability is crucial. Countertop ice maker machines are designed to provide convenience and ease, but like any appliance, they can encounter issues. This guide aims to help you diagnose and fix common problems with your countertop ice maker, ensuring it functions smoothly whenever you need it.
Understanding how to troubleshoot your ice maker can save you time and money, and keep your gatherings stress-free. In this comprehensive guide, we will walk you through the basics of how countertop ice maker machines work, the initial steps to take when troubleshooting, and how to diagnose and fix specific problems. We’ll also cover preventative maintenance tips and when it’s time to seek professional help.
Understanding Your Countertop Ice Maker
How a Countertop Ice Maker Works
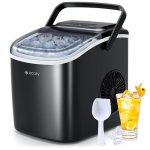
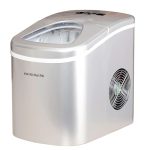
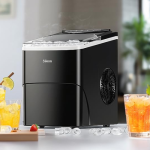
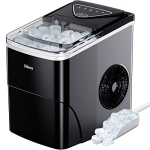
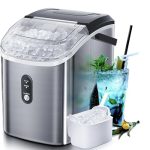
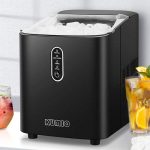
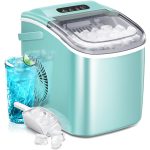
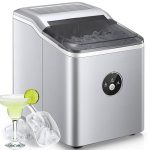
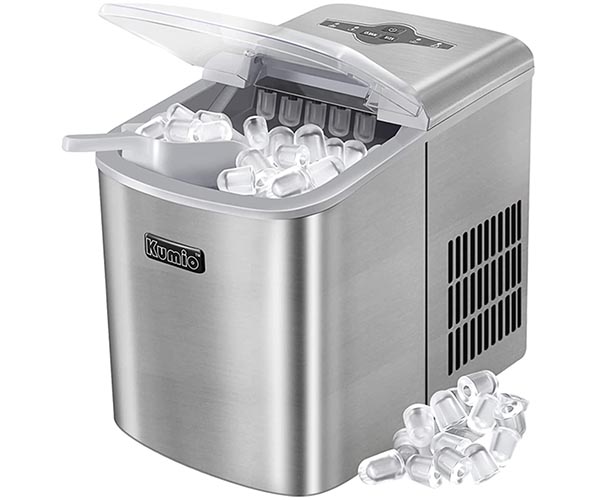
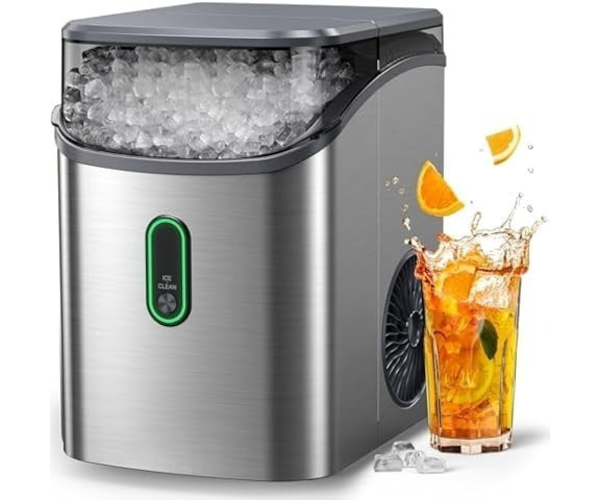
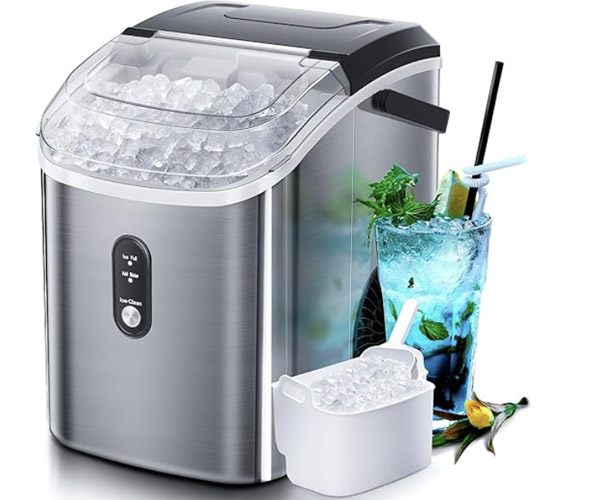
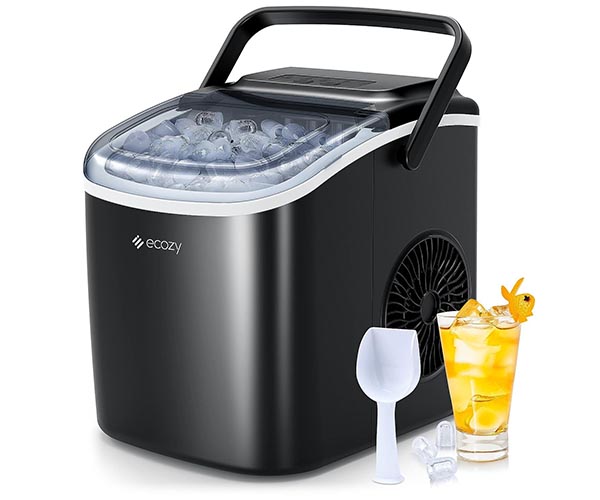
Countertop ice maker machines operate on a simple principle: converting water into ice through a refrigeration cycle. These machines typically consist of several key components: a water reservoir, a compressor, an evaporator, and an ice mold. Here’s a brief overview of how these parts work together to produce ice:
- Water Reservoir: This is where you add water. The reservoir holds the water that will be converted into ice.
- Compressor: The compressor circulates refrigerant through the system, which absorbs heat from the water and lowers its temperature.
- Evaporator: The evaporator freezes the water into ice. It typically consists of metal rods or plates that get very cold, causing the water to freeze on contact.
- Ice Mold: Once the water is frozen, the ice mold shapes the ice into the desired form, such as bullet, nugget, or cube ice.
The ice-making cycle begins with water being pumped from the reservoir onto the evaporator. As the evaporator gets cold, the water starts to freeze. Once the ice is formed, the machine’s heating element slightly warms the mold to release the ice, which then drops into the storage bin. This cycle repeats until the bin is full or the machine is turned off. https://amzn.to/3Asp6lS
Common Types of Countertop Ice Makers
Understanding the different types of countertop ice maker machines can help you troubleshoot issues more effectively. The three main types of ice produced by these machines are bullet ice, nugget ice, and cube ice. Each type has its own unique characteristics and uses:
- Bullet Ice Makers: These are the most common type of countertop ice makers. Bullet ice makers produce cylindrical ice with a hollow center. This type of ice is versatile and melts slowly, making it suitable for most beverages.
- Nugget Ice Makers: Also known as chewable ice or sonic ice, nugget ice is soft and easy to chew. It’s popular in restaurants and hospitals and is ideal for blended drinks and cocktails.
- Cube Ice Makers: These machines produce traditional square or rectangular ice cubes. Cube ice melts slowly and is perfect for drinks that need to stay cold for extended periods, such as whiskey or bourbon.
Each type of ice maker has its own set of troubleshooting requirements, but many of the basic principles are the same.

Importance of Regular Maintenance
Regular maintenance is essential for keeping your countertop ice maker in good working condition. Consistent upkeep not only ensures the machine produces clean, high-quality ice but also extends its lifespan. Here are some benefits of regular maintenance:
- Prevents Build-up: Regular cleaning prevents mineral build-up from hard water, which can clog the system and reduce efficiency.
- Improves Performance: A well-maintained ice maker works more efficiently, producing ice faster and using less energy.
- Ensures Safety: Cleaning the machine regularly ensures that the ice is safe to consume by preventing mold and bacteria growth.
To maintain your ice maker, follow the manufacturer’s instructions for cleaning and descaling. Typically, this involves using a mild detergent and warm water to clean the reservoir and ice mold, as well as running a descaling solution through the system to remove mineral deposits.
With a solid understanding of how your countertop ice maker works, the types available, and the importance of regular maintenance, you’re better prepared to tackle any issues that arise. In the next section, we’ll cover the initial steps to take when troubleshooting your ice maker.
Initial Troubleshooting Steps
When your countertop ice maker isn’t working correctly, the first step is to perform some basic checks. These initial troubleshooting steps can often resolve the issue quickly and get your machine back to producing ice.
Checking the Power Supply
One of the most common reasons a countertop ice maker machine stops working is a problem with the power supply. Here’s how to check if the power supply is the issue:
- Ensure the Machine is Plugged In: Verify that the ice maker is securely plugged into a working electrical outlet. Sometimes, the plug can become loose, causing the machine to lose power.
- Inspect the Power Cord: Check the power cord for any visible damage, such as cuts or frays. A damaged power cord can prevent the machine from receiving power.
- Check the Circuit Breaker or Fuse: If the ice maker is plugged in and the cord is intact, the problem might be with the circuit breaker or fuse. Check your home’s electrical panel to see if the breaker has tripped or the fuse has blown. If so, reset the breaker or replace the fuse.
Ensuring that your ice maker is properly connected to a power source can often resolve the issue and get the machine back to functioning normally.
Inspecting the Water Supply
Another common cause of ice maker problems is an issue with the water supply. If the machine isn’t getting enough water, it can’t produce ice. Here are some steps to check the water supply:
- Ensure the Water Reservoir is Filled: Check the water reservoir to make sure it’s filled to the appropriate level. Most countertop ice maker machines have a fill line indicating the maximum water level. If the water level is too low, the machine won’t be able to produce ice.
- Check for Water Leaks or Blockages: Inspect the water reservoir and the area around the machine for any signs of water leaks. A leak can prevent the machine from getting enough water. Also, check for any blockages in the water inlet or hose that could be restricting water flow.
- Use Filtered Water: Using filtered water can improve the performance of your ice maker and reduce the risk of mineral build-up. Tap water with high mineral content can clog the system and affect ice production.
By ensuring that your ice maker has a consistent and adequate water supply, you can often resolve issues related to ice production.
Resetting the Ice Maker
If checking the power and water supply doesn’t resolve the issue, the next step is to reset the ice maker. Resetting can often fix minor glitches and restore the machine to its normal operation. Here’s how to reset your countertop ice maker:
- Turn Off the Machine: Unplug the ice maker from the electrical outlet.
- Wait for a Few Minutes: Leave the machine unplugged for at least 10 minutes to allow it to reset.
- Plug the Machine Back In: Reconnect the ice maker to the power outlet and turn it on.
- Check the Settings: Ensure that all settings are correct and that the machine is set to produce ice.
Resetting the ice maker can often resolve issues like the machine not producing ice or not responding to commands.
These initial troubleshooting steps can help you quickly identify and fix common problems with your countertop ice maker. In the next section, we will dive deeper into diagnosing specific issues and providing detailed solutions.
Diagnosing Common Problems
Even with regular maintenance and initial troubleshooting, you may encounter specific issues with your countertop ice maker machine. This section will help you diagnose common problems and provide detailed solutions to get your machine back to working order.
Ice Maker Not Producing Ice
If your countertop ice maker isn’t producing ice, there could be several underlying causes. Here are some potential reasons and their solutions:
- Low Water Levels: Ensure that the water reservoir is filled to the appropriate level. Without enough water, the machine can’t produce ice.
- Faulty Water Pump: The water pump is responsible for moving water from the reservoir to the ice mold. If the pump is faulty or clogged, it can prevent ice production. Check for blockages and clean the pump if necessary. If the pump is defective, it may need to be replaced.
- Malfunctioning Thermostat: The thermostat regulates the temperature inside the ice maker. If it’s malfunctioning, the machine may not get cold enough to freeze water. Test the thermostat with a multimeter and replace it if it’s not working correctly.
- Blocked Water Inlet Valve: The water inlet valve controls the flow of water into the ice maker. If it’s blocked or defective, it can prevent water from reaching the ice mold. Inspect the valve for blockages and clean or replace it as needed.
By systematically checking these potential causes, you can identify the issue and take appropriate action to restore ice production.
Slow Ice Production
If your countertop ice maker is producing ice but at a slower rate than usual, several factors could be affecting its performance:
- Ambient Temperature: The temperature of the room where the ice maker is located can impact its efficiency. If the room is too warm, it can slow down the ice-making process. Ensure that the machine is in a cool, well-ventilated area.
- Dirty Condenser Coils: The condenser coils help remove heat from the ice maker. If they are dirty or clogged, it can reduce the machine’s efficiency. Clean the coils regularly to ensure optimal performance.
- Incorrect Settings: Check the machine’s settings to ensure that it’s configured for maximum ice production. Some models have adjustable settings for ice size and production speed.
- Mineral Build-Up: Over time, mineral deposits can build up inside the machine, affecting its performance. Run a descaling solution through the ice maker to remove any build-up and improve efficiency.
Addressing these factors can help increase the ice production rate and ensure a steady supply of ice.
Ice Maker Producing Small or Misshapen Ice
If your ice maker is producing small or misshapen ice, it may indicate a problem with the water flow or freezing process. Here are some possible causes and solutions:
- Insufficient Water Flow: Ensure that the water reservoir is filled to the appropriate level and that there are no blockages in the water inlet or hose. Clean any blockages to restore proper water flow.
- Dirty Ice Mold: A dirty ice mold can cause the ice to form irregularly. Clean the mold with a mild detergent and warm water to remove any dirt or residue.
- Temperature Issues: If the ice maker isn’t getting cold enough, it can affect the size and shape of the ice. Check the thermostat and ensure that the machine is in a cool environment.
- Water Quality: Using tap water with high mineral content can affect the ice’s shape and size. Use filtered water to improve ice quality and prevent build-up.
By addressing these issues, you can ensure that your ice maker produces properly formed ice.
Excessive Noise During Operation
While some noise is normal during ice production, excessive or unusual sounds can indicate a problem. Here’s how to identify and fix noise-related issues:
- Compressor Noise: The compressor is one of the loudest components of an ice maker. If it’s making more noise than usual, it could be due to wear and tear. Inspect the compressor and consider having it serviced or replaced if necessary.
- Fan Noise: The fan helps circulate air and keep the machine cool. If it’s noisy, it could be due to dust buildup or a loose part. Clean the fan and tighten any loose screws to reduce noise.
- Vibration Noise: If the ice maker is vibrating excessively, it could be due to an unstable surface or loose internal components. Ensure that the machine is on a stable, level surface and check for any loose parts.
Reducing excessive noise can make your ice maker more pleasant to use and indicate that the machine is functioning correctly.
Water Leakage
Water leakage is a common issue that can prevent your ice maker from working properly. Here’s how to identify and fix leaks:
- Inspect the Water Reservoir: Check the water reservoir for cracks or damage. If the reservoir is damaged, it may need to be replaced.
- Check Hose Connections: Ensure that all hose connections are secure and not leaking. Tighten any loose connections and replace any damaged hoses.
- Water Inlet Valve: Inspect the water inlet valve for leaks. If the valve is defective, it may need to be replaced.
Fixing leaks promptly can prevent water damage and ensure that your ice maker functions correctly.
Ice Tastes or Smells Bad
If the ice produced by your machine tastes or smells bad, it can be due to several factors:
- Dirty Water Reservoir: A dirty water reservoir can cause the ice to taste or smell bad. Clean the reservoir regularly with a mild detergent and warm water.
- Mold Buildup: Mold can grow in the water reservoir or ice mold, affecting the taste and smell of the ice. Clean and disinfect the machine to remove any mold.
- Using Tap Water: Tap water with high mineral content can affect the taste and smell of the ice. Use filtered water to improve ice quality.
By addressing these factors, you can ensure that your ice is clean and tastes fresh. https://amzn.to/3Asp6lS
In the next section, we will cover advanced troubleshooting techniques, including inspecting internal components and testing electrical parts, to address more complex issues with your countertop ice maker.
Advanced Troubleshooting
When basic troubleshooting steps don’t resolve the issue, it might be time to dive deeper into the workings of your countertop ice maker machine. This section will guide you through advanced troubleshooting techniques, including inspecting internal components and testing electrical parts.
Inspecting Internal Components
Before opening up your ice maker to inspect internal components, it’s important to follow safety precautions to prevent injury or damage to the machine. Always unplug the ice maker before beginning any internal inspection. Here’s how to inspect the key internal components:
- Compressor: The compressor is the heart of the ice maker, responsible for circulating refrigerant and cooling the water. If the compressor is not working properly, the ice maker won’t be able to produce ice. Listen for unusual noises that might indicate a failing compressor. If the compressor is hot to the touch or makes a humming or clicking noise, it may need professional repair or replacement.
- Evaporator: The evaporator freezes the water to form ice. Check for ice buildup or frost on the evaporator coils, which can indicate a malfunction. If the evaporator is dirty or covered in frost, it may need to be cleaned or defrosted. A faulty evaporator might require professional repair.
- Fan and Condenser Coils: The fan and condenser coils help dissipate heat from the ice maker. If the fan is not working or the coils are dirty, it can cause the machine to overheat and reduce its efficiency. Clean the condenser coils with a brush or vacuum to remove dust and debris. Ensure the fan is spinning freely and not obstructed by dirt or debris.
Inspecting these components can help identify issues that may not be apparent during basic troubleshooting. If any parts are damaged or worn out, they may need to be replaced.
Testing Electrical Components
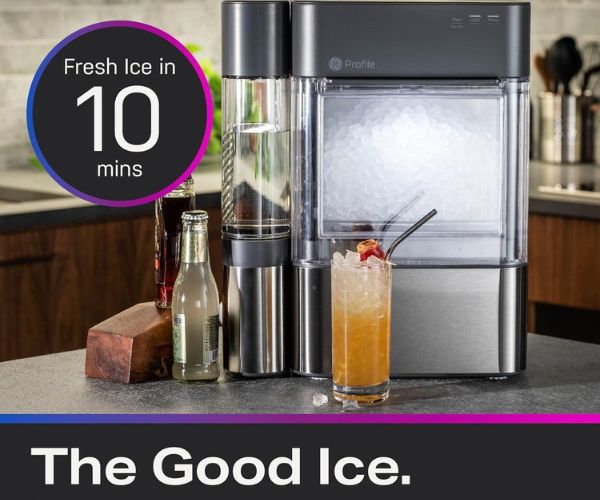
Testing the electrical components of your ice maker requires a multimeter, a tool used to measure electrical voltage, current, and resistance. Here’s how to test the key electrical components:
- Thermostat: The thermostat controls the temperature inside the ice maker. If it’s malfunctioning, the machine may not get cold enough to produce ice. To test the thermostat, disconnect it from the machine and use the multimeter to check for continuity. If the multimeter shows no continuity, the thermostat needs to be replaced.
- Sensors: Ice makers use various sensors to monitor temperature and water levels. If a sensor is faulty, it can cause the machine to malfunction. Test each sensor with the multimeter to ensure they are working correctly. Replace any sensors that fail the continuity test.
- Control Board: The control board manages the operation of the ice maker. If the machine isn’t responding to commands or is behaving erratically, the control board might be the issue. Inspect the control board for any visible damage, such as burnt components or loose connections. Testing the control board can be complex and may require professional assistance.
By testing these electrical components, you can identify faulty parts that need to be repaired or replaced to restore your ice maker’s functionality.
Replacing Faulty Parts
Once you’ve identified which parts are faulty, the next step is to replace them. Here’s how to approach replacing parts in your countertop ice maker:
- Identify the Part: Refer to the user manual or the manufacturer’s website to identify the correct part number for the component you need to replace.
- Sourcing Replacement Parts: Purchase replacement parts from the manufacturer or a reputable appliance parts retailer. Ensure that the parts are compatible with your specific model of ice maker.
- Installation: Follow the user manual or online tutorials to install the replacement part. If you’re not comfortable doing this yourself, consider hiring a professional technician.
Replacing faulty parts can restore your ice maker to full functionality, but it’s important to ensure that the replacement is done correctly to avoid further issues.
Preventative Maintenance Tips
Preventative maintenance is key to keeping your countertop ice maker machine running smoothly and avoiding future issues. Regular cleaning, descaling, and proper storage can significantly extend the life of your ice maker. Here are some tips for maintaining your machine:
Regular Cleaning Routine
Regular cleaning is essential to prevent mold, bacteria, and mineral buildup. Here’s a recommended cleaning routine:
- Daily Cleaning: After each use, empty the ice bin and wipe down the interior with a soft cloth. This prevents any residue from accumulating.
- Weekly Cleaning: Once a week, thoroughly clean the water reservoir, ice mold, and all removable parts with a mild detergent and warm water. Rinse thoroughly and dry before reassembling.
- Monthly Cleaning: Once a month, run a mixture of vinegar and water or a commercial ice maker cleaner through the machine. This helps remove mineral deposits and sanitize the internal components.
Descaling Your Ice Maker
Descaling is important for removing mineral buildup that can clog the machine and affect its performance. Here’s how to descale your ice maker:
- Prepare the Descaling Solution: Follow the instructions on the descaling product or use a mixture of vinegar and water.
- Run the Solution Through the Machine: Pour the descaling solution into the water reservoir and run a complete ice-making cycle. Discard the ice produced during this cycle as it will contain the descaling solution.
- Rinse Thoroughly: After descaling, run several cycles with clean water to rinse out any remaining descaling solution.
Regular descaling ensures that your ice maker operates efficiently and produces high-quality ice.
Proper Storage and Usage
Proper storage and usage practices can also extend the life of your countertop ice maker. Here are some tips:
- Store in a Cool, Dry Place: When not in use, store your ice maker in a cool, dry place to prevent moisture damage and corrosion.
- Avoid Overloading: Do not exceed the maximum fill line in the water reservoir, as overloading can strain the machine and reduce its efficiency.
- Use Filtered Water: Using filtered water can reduce mineral buildup and improve the taste and quality of the ice.
- Follow Manufacturer’s Instructions: Always refer to the user manual for specific instructions on setup, operation, and maintenance to ensure you’re using the machine correctly.
By following these preventative maintenance tips, you can keep your countertop ice maker in optimal condition and avoid common issues.
When to Seek Professional Help
While many issues with countertop ice makers can be resolved through basic troubleshooting and maintenance, some problems may require professional assistance. Here’s how to know when it’s time to seek help from a qualified technician:
Identifying Issues Beyond DIY Fixes
Some signs indicate that the problem with your ice maker may be beyond DIY fixes:
- Persistent Problems: If you’ve tried all troubleshooting steps and the machine still isn’t working correctly, it may require professional repair.
- Complex Electrical Issues: Electrical problems, such as a faulty control board or thermostat, can be complex and dangerous to fix without proper knowledge and tools.
- Significant Damage: Visible damage to critical components, such as the compressor or evaporator, often requires professional repair or replacement.
Finding a Qualified Technician
When seeking professional help, it’s important to find a reputable technician. Here’s how:
- Manufacturer’s Service Centers: Check if the manufacturer offers repair services or authorized service centers. They are likely to have technicians trained to work on your specific model.
- Online Reviews: Look for local appliance repair services with good reviews. Websites like Yelp or Google Reviews can provide insights into the quality of service.
- Ask for Recommendations: Ask friends or family for recommendations if they’ve had similar appliances repaired.
What to Expect During a Professional Repair
When you hire a technician, here’s what you can expect:
- Initial Assessment: The technician will assess the ice maker to diagnose the problem. This may involve inspecting internal components and testing electrical parts.
- Cost Estimate: After diagnosing the issue, the technician should provide a cost estimate for the repair, including parts and labor.
- Repair: Once you approve the estimate, the technician will perform the repair. This may involve replacing faulty parts or fixing electrical issues.
- Testing: After the repair, the technician should test the machine to ensure it’s working correctly.
By seeking professional help when needed, you can ensure that your countertop ice maker is repaired correctly and safely.
FAQs About Troubleshooting Countertop Ice Makers
How do I reset my countertop ice maker?
To reset your countertop ice maker, unplug the machine from the electrical outlet, wait for about 10 minutes, and then plug it back in. This can help resolve minor glitches and restore normal operation.
Why is my ice maker making a clicking noise?
A clicking noise from your ice maker can indicate a problem with the compressor or a relay switch. Inspect these components for any signs of wear or damage. If the noise persists, it may require professional repair.
Can I use tap water in my ice maker?
Yes, you can use tap water in your ice maker, but using filtered water is recommended to reduce mineral buildup and improve the quality of the ice.
How often should I clean my ice maker?
For optimal performance, clean your ice maker’s water reservoir, ice mold, and other removable parts weekly. Perform a thorough cleaning and descaling once a month.
What should I do if my ice maker is still under warranty?
If your ice maker is still under warranty and you encounter a problem, contact the manufacturer or the authorized service center for repair or replacement. Attempting DIY repairs may void the warranty.
Conclusion
In this comprehensive guide, we have covered various aspects of troubleshooting countertop ice maker machines. From understanding how these machines work to diagnosing common problems and performing advanced troubleshooting, we’ve provided detailed steps to help you keep your ice maker in good working condition. Regular maintenance and proper usage are key to extending the life of your machine and ensuring it produces high-quality ice. When in doubt, don’t hesitate to seek professional help to address more complex issues.
Recap
- Understanding Your Ice Maker: Knowing how your ice maker works and the different types available can help in diagnosing problems.
- Initial Troubleshooting Steps: Checking the power supply, water supply, and resetting the machine are essential first steps.
- Diagnosing Common Problems: Identifying issues such as no ice production, slow ice production, and excessive noise can help you find solutions.
- Advanced Troubleshooting: Inspecting internal components and testing electrical parts can resolve more complex issues.
- Preventative Maintenance: Regular cleaning, descaling, and proper storage can prevent future problems.
- When to Seek Professional Help: Knowing when to call a technician can ensure your ice maker is repaired correctly.
Encouragement
Many common issues with countertop ice makers can be resolved with basic troubleshooting and maintenance. By following the steps outlined in this guide, you can keep your machine running smoothly and enjoy a steady supply of ice whenever you need it. https://amzn.to/3Asp6lS
Call to Action
We hope this guide has been helpful. If you have any questions or experiences to share, please leave a comment below. For more insights and tips on kitchen appliances and home convenience, explore our other articles.
References
- GE Profile Opal Nugget Ice Maker Product Page
- NewAir Countertop Ice Maker Product Page
- Igloo ICEB26HNBK Portable Electric Countertop Ice Maker Product Page
- Scotsman SCN60PA-1SS
- EUHOMY Nugget Ice Maker Countertop
- Silonn Ice Maker Countertop
Additional Resources
- [How often should you clean your countertop ice maker?]
- [What happens if you don’t clean your countertop ice maker regularly?]
- [How does a countertop ice maker work?]
- [How to install a countertop ice maker?]
- [How often to descale a countertop ice maker?]
- [Buying Guide: Countertop Ice Makers with Water Line Connection]
- [Kitchen Upgrade Ideas: Countertop Ice Makers with Water Line]
- [Which countertop ice maker with freezer is best?]

