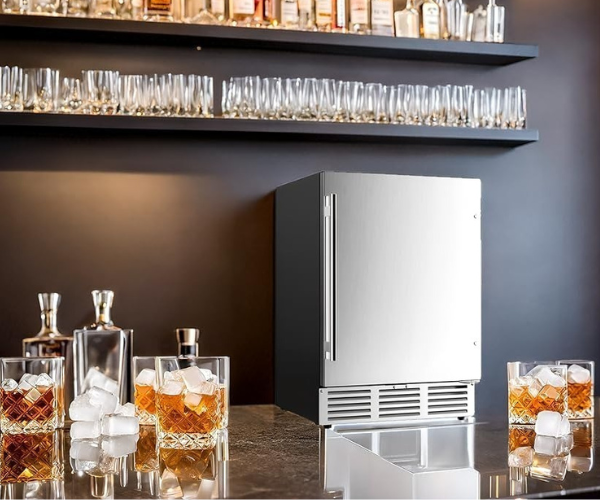
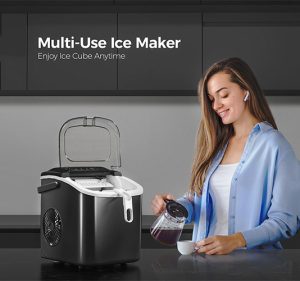
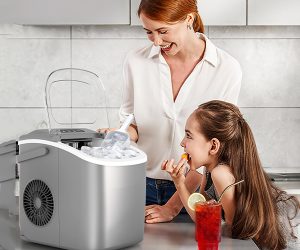
A countertop ice maker is an incredibly convenient appliance, providing a steady supply of ice whenever you need it. Whether you’re hosting a party, enjoying a refreshing drink on a hot day, or simply want the convenience of having ice on hand, a countertop ice maker can be a valuable addition to your kitchen. However, like any appliance, these machines can sometimes encounter problems that may affect their performance. Understanding how to troubleshoot common issues can save you time, money, and the hassle of unnecessary repairs.
In this comprehensive guide, we will walk you through the most common problems that can occur with a countertop ice maker with troubleshoot tips for each issue. From the ice maker not turning on to slow ice production and strange noises, this guide covers everything you need to know to keep your ice maker running smoothly. By the end of this article, you’ll be equipped with the knowledge to diagnose and fix many of the issues that can arise with your countertop ice maker.
Overview of Common Issues with Countertop Ice Makers
Countertop ice makers are designed to be reliable and efficient, but like any appliance, they can sometimes experience problems. Understanding the most common issues and their causes is the first step in troubleshooting and resolving these problems. Regular maintenance plays a crucial role in preventing many of these issues, ensuring that your ice maker continues to produce ice effectively and efficiently.https://amzn.to/4cwk6tP
Why Problems Occur
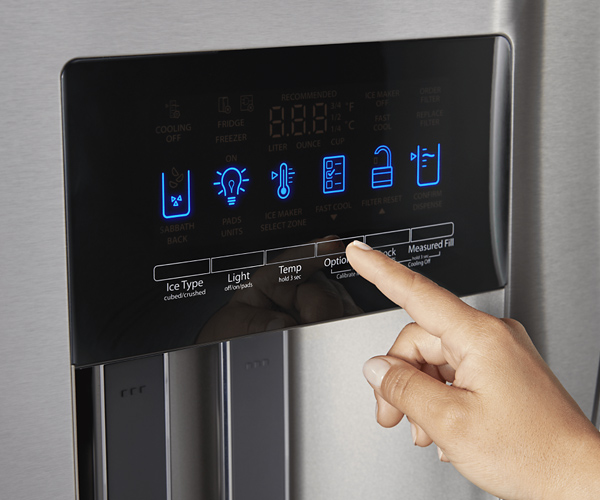
Several factors can contribute to problems with a countertop ice maker. These can range from simple issues like an empty water tank or a check power supply warning to more complex problems involving the compressor not working or the fan not working properly. Environmental factors such as the ambient temperature in the room, the quality of the water being used, and how often the machine is operated can also affect its performance.
In many cases, the issues that arise are due to a lack of regular maintenance. For example, failing to clean the ice maker regularly can lead to mineral buildup, which can affect the quality of the ice and the efficiency of the machine. Similarly, not replacing filters or failing to descale the machine can lead to blockages and reduced ice production.
Understanding these common problems and their causes is essential for effective ice maker troubleshooting. By being proactive about maintenance and knowing how to diagnose and fix issues as they arise, you can extend the lifespan of your countertop ice maker and ensure it continues to perform at its best.
Importance of Regular Maintenance
Regular maintenance is the key to keeping your countertop ice maker with troubleshoot options in peak condition. Many of the common issues that affect ice makers can be prevented through routine cleaning, descaling, and component checks. For instance, cleaning the water reservoir and replacing filters can prevent blockages that might otherwise cause slow ice production or poor ice quality.
Descaling the machine is another important maintenance task, particularly if you live in an area with hard water. Over time, minerals in the water can build up inside the machine, leading to inefficiencies and potentially causing the machine to stop working altogether. Regular descaling helps to remove these deposits and keeps the machine running smoothly.
Additionally, inspecting key components such as the compressor, fan, and seals can help you identify wear and tear before it leads to more serious problems. By performing these routine maintenance tasks, you can prevent many of the issues that commonly affect countertop ice makers and ensure that your machine continues to produce high-quality ice for years to come.
In the following sections, we will delve into specific common problems that you might encounter with your countertop ice maker, along with detailed troubleshooting steps for each issue. Whether your ice maker is not turning on, producing ice too slowly, or making strange noises, this guide will provide you with the knowledge and tools to address the problem effectively.
Let’s begin by exploring some of the most common problems that can occur with a countertop ice maker and the potential causes of these issues. Understanding the root of the problem is the first step in resolving it, so it’s important to diagnose the issue accurately before attempting any fixes.
Common Problems and Causes
When your countertop ice maker with troubleshoot options starts showing signs of trouble, it’s important to identify the root cause before diving into repairs. In this section, we will cover some of the most common issues that users experience with their countertop ice makers, along with potential causes. Understanding these causes will help you pinpoint the problem and take appropriate action.
Ice Maker Not Turning On
One of the most frustrating issues you can encounter with your countertop ice maker is when it simply won’t turn on. This issue can stem from several causes, ranging from minor power supply problems to more complex internal faults.
- Power Supply Issues: The first thing to check is whether the machine is properly plugged in. Sometimes, the cord might get accidentally unplugged or the outlet might not be supplying power. It’s also a good idea to check the circuit breaker in your home to ensure it hasn’t been tripped. If the breaker has tripped, resetting it might restore power to the outlet.
- Faulty Power Cord or Plug: Inspect the power cord for any visible damage, such as fraying or cuts, which could prevent the machine from turning on. If the power cord or plug is damaged, it will need to be replaced.
- Internal Electrical Problems: If the power supply and cord are in good condition, the issue might be internal. A faulty control board or blown fuse within the ice maker can prevent it from powering on. This is a more complex issue that may require professional repair, especially if the machine is still under warranty.
Slow or No Ice Production
Another common issue is when the ice maker produces ice slowly or not at all. This can be particularly frustrating when you’re relying on the machine for a party or other event.
- Low Water Levels: If the water reservoir is not adequately filled, the ice maker will struggle to produce ice. Always check that the reservoir is full before starting the machine.
- Dirty or Clogged Filters: Over time, filters can become clogged with minerals and impurities, reducing water flow and leading to slow ice production. Regularly cleaning or replacing the filters can resolve this issue.
- Ambient Temperature: The temperature of the room where the ice maker is located can also affect its performance. If the room is too warm, the machine will take longer to produce ice. Ideally, the ice maker should be placed in a cool, well-ventilated area away from direct sunlight and heat sources.
- Overuse and Overheating: Running the ice maker continuously without breaks can cause it to overheat, leading to slow or halted ice production. Giving the machine time to rest between cycles can prevent this problem.
Ice Cubes Are Too Small or Irregular
If your ice cubes are coming out smaller than usual or in irregular shapes, it could be a sign that something is amiss with the machine’s water supply or ice-making process.
- Water Flow Issues: Insufficient water flow can result in smaller or misshapen ice cubes. Check for blockages in the water line or filters that might be restricting water flow to the ice mold.
- Sensor Malfunction: Ice makers rely on sensors to detect when the ice mold is full and to regulate the water flow. If these sensors malfunction, they might not provide enough water for each ice cycle, leading to irregular ice shapes.
- Incorrect Temperature Settings: If the machine is set to a temperature that’s too low or too high, it can affect the size and shape of the ice cubes. Adjusting the temperature settings to the manufacturer’s recommended levels can help produce consistently sized ice cubes.
Water Leakage
Water leakage is a common problem that can lead to messes and potentially damage your countertop or floors. Addressing this issue promptly is important to prevent further complications.
- Cracked or Loose Water Reservoir: A cracked water reservoir or loose connections can cause water to leak from the machine. Inspect the reservoir for any visible damage and ensure it is securely in place.
- Drainage Issues: Some ice makers have a drainage system to remove excess water. If this system becomes clogged or malfunctions, it can cause water to back up and leak from the machine. Cleaning the drain line or checking the drainage system can resolve this issue.
- Gasket and Seal Problems: Worn or damaged gaskets and seals can also lead to water leaks. Over time, these components can wear out, allowing water to escape. Replacing worn gaskets and seals can stop the leaks.
Unusual Noises
Strange noises during operation can be alarming and may indicate that something is wrong with your ice maker. Identifying the source of the noise is key to resolving the issue.
- Rattling or Vibrating Sounds: Rattling or vibrating noises are often caused by loose components or an unstable placement of the machine. Check to ensure that the ice maker is on a level surface and that all parts are securely fastened.
- Buzzing or Humming Noises: These sounds are typically associated with electrical components like the compressor or fan. If the noise is consistent and loud, it may indicate an issue with the compressor not working efficiently or the fan not working properly. Cleaning dust and debris from these components can sometimes reduce the noise, but persistent issues may require professional repair.
- Grinding or Clicking Sounds: Grinding or clicking noises can be more serious, often indicating a problem with the motor or ice-making components. These sounds may suggest that the machine’s internal parts are struggling to function properly, and professional inspection may be necessary.
Understanding the potential causes of these common problems will help you diagnose the issue more effectively. In the next section, we’ll dive into specific troubleshooting steps you can take to resolve these issues and get your countertop ice maker back to working condition.
Troubleshooting Steps
Once you’ve identified the potential cause of the problem with your countertop ice maker with troubleshoot options, it’s time to take action. This section provides detailed troubleshooting steps for each of the common issues discussed earlier. By following these steps, you can often resolve the problem yourself without the need for professional repair.
Checking the Power Supply
Before delving into more complex troubleshooting, it’s always wise to start with the basics. A significant number of issues can be traced back to power supply problems.
- Ensure Proper Connection: Make sure that your ice maker is properly plugged into a functioning outlet. If the outlet is connected to a switch, ensure the switch is turned on. If you’re using an extension cord, check that it’s in good condition and rated for the power requirements of your ice maker.
- Check the Circuit Breaker: If your ice maker is not turning on and you’ve confirmed that it’s properly plugged in, check your home’s circuit breaker. A tripped breaker can cut power to the outlet. If the breaker has tripped, reset it and see if that restores power to the ice maker.
- Inspect the Power Cord and Plug: Look for any visible damage to the power cord or plug. If you notice any fraying, cuts, or other signs of wear, the power cord might need to be replaced. Using a damaged power cord can be dangerous, so it’s important to address this issue immediately.
Ensuring Proper Water Levels
If your ice maker isn’t producing ice or the ice is irregular, checking the water levels is a crucial step.
- Check the Water Reservoir: Open the ice maker and inspect the water reservoir to ensure it’s filled to the appropriate level. An empty water tank can prevent the machine from making ice. Refill the reservoir with clean, filtered water if it’s low.
- Inspect Water Lines: For ice makers connected directly to a water line, check the line for any blockages or kinks that might be restricting water flow. Ensure the water line is securely connected to both the machine and the water source.
- Ensure Proper Placement of the Reservoir: Sometimes, the water reservoir might not be seated correctly in the machine, which can disrupt water flow. Make sure the reservoir is placed securely and correctly within the machine.
Cleaning the Ice Maker
Regular cleaning is essential for maintaining the efficiency and performance of your ice maker. Over time, mineral deposits, mold, and bacteria can build up inside the machine, leading to poor ice quality and other issues.
- Descale the Machine: If you live in an area with hard water, mineral buildup can be a significant issue. Use a descaling solution recommended by the manufacturer to remove these deposits from the machine’s internal components. Run a few cycles with the solution, then follow up with clean water to rinse out any residue.
- Sanitize the Interior: Clean the interior of the ice maker, including the water reservoir, ice bin, and any removable parts. Use a mixture of water and vinegar or a mild bleach solution to sanitize these components. Rinse thoroughly with clean water to remove any cleaning solution.
- Replace Filters: If your ice maker has a water filter, it should be replaced regularly according to the manufacturer’s instructions. A clogged or dirty filter can reduce water flow and affect ice quality. Installing a new filter can improve both the taste and clarity of the ice.
Inspecting the Fan and Compressor
The fan and compressor are critical components of your ice maker, as they help regulate the temperature and ensure efficient ice production.
- Check for Dust and Debris: Over time, dust and debris can accumulate on the fan and compressor, reducing their efficiency. Unplug the machine and carefully clean these components using a soft brush or compressed air. Be sure to remove any obstructions that could be hindering their performance.
- Listen for Unusual Noises: If the fan or compressor is making unusual noises, it could indicate a problem. A buzzing or humming noise might suggest that the compressor is not working properly, while a grinding noise could point to an issue with the fan. In such cases, further inspection or professional repair may be necessary.
- Ensure Proper Ventilation: The fan and compressor need adequate ventilation to operate efficiently. Make sure the ice maker is placed in a location where there is sufficient airflow around the machine. Avoid placing it in confined spaces or near heat sources that could cause overheating.
Resetting the Machine
Sometimes, a simple reset is all that’s needed to resolve minor issues with your ice maker.
- Locate the Reset Button: Most countertop ice makers come with a reset button, usually located on the control panel or inside the machine near the power cord. Check your user manual if you’re unsure where to find it.
- Perform a Reset: To reset the machine, press and hold the reset button for a few seconds until the machine powers down. Release the button, wait a few moments, and then turn the machine back on. This can help clear any minor errors or glitches in the system.
- Power Cycle the Machine: If your machine doesn’t have a reset button, you can achieve a similar effect by unplugging the machine, waiting a few minutes, and then plugging it back in. This can help resolve issues like slow ice production or a stoppage indicator on.
By following these troubleshooting steps, you can address many of the common issues that might arise with your countertop ice maker with troubleshoot options. However, if these steps do not resolve the problem, it may be time to consider more in-depth repairs or professional assistance. In the next section, we’ll discuss how to handle specific issues like no ice production, leaking water, and unusual noises, with additional troubleshooting tips to ensure your ice maker stays in top working condition.
Troubleshooting No Ice Production
One of the most common issues users face with their countertop ice maker is when the machine stops producing ice altogether. This problem can be particularly frustrating, especially if you rely on the machine for daily use. Fortunately, there are several steps you can take to diagnose and resolve the issue.
Water Supply Issues
The most common reason for an ice maker to stop producing ice is a problem with the water supply. Without a steady flow of water, the machine cannot create ice.
- Check the Water Reservoir: Start by checking the water reservoir to ensure it is filled with water. An empty water tank is the simplest and most common reason for no ice production. If the reservoir is empty, refill it with clean, filtered water.
- Inspect Water Lines: If your ice maker is connected to a water line, ensure the line is not kinked, blocked, or disconnected. A restricted water line can prevent water from reaching the machine, stopping ice production. Clear any blockages and ensure the line is securely connected.
- Test the Water Pump: The water pump is responsible for moving water from the reservoir to the ice-making components. If the pump is malfunctioning, water may not be delivered to the ice tray. Listen for the sound of the pump operating when the machine is running. If you don’t hear it, the pump may need to be repaired or replaced.
Power Supply Problems
Even if your ice maker appears to be on, a power supply issue could still be preventing it from making ice.
- Check the Power Cord and Outlet: Ensure that the power cord is securely plugged into a functioning outlet. If you’re using an extension cord, make sure it is properly rated for the appliance. Test the outlet with another device to ensure it’s working.
- Inspect the Circuit Breaker: If the outlet is not supplying power, check your home’s circuit breaker. A tripped breaker can cut power to the ice maker, preventing it from operating. Reset the breaker if necessary and see if this restores power to the machine.
- Examine the Control Board: If the ice maker is receiving power but still not producing ice, there could be an issue with the control board. This is a more complex problem that may require professional repair, as the control board manages the machine’s operations, including ice production.
Blocked or Clogged Water Lines
Another common cause of no ice production is blocked or clogged water lines. This issue is especially likely if you live in an area with hard water, which can lead to mineral buildup in the lines.
- Inspect the Water Lines: Carefully inspect the water lines for any visible blockages or kinks. Even a small blockage can prevent water from reaching the ice tray. If you find a blockage, gently clear it using a thin wire or pipe cleaner.
- Clean or Replace the Filters: If your ice maker has a water filter, it may be clogged with impurities, restricting water flow. Clean or replace the filter according to the manufacturer’s instructions to restore proper water flow.
- Flush the System: If you suspect mineral buildup is causing the blockage, consider flushing the system with a mixture of water and vinegar. This can help dissolve mineral deposits and clear the water lines, allowing water to flow freely to the ice-making components.
Faulty Sensors or Thermostats
Ice makers rely on sensors and thermostats to regulate the ice production process. If these components malfunction, they can prevent the machine from making ice.
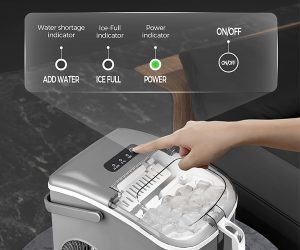
- Check the Ice Full Sensor: The ice full sensor detects when the ice bin is full and stops production to prevent overflow. If this sensor is malfunctioning, it may mistakenly signal that the bin is full even when it’s empty, halting ice production. Clean the sensor to remove any debris that might be causing it to malfunction.
- Test the Thermostat: The thermostat controls the temperature inside the ice maker. If the thermostat is not working correctly, the machine may not reach the necessary temperature to produce ice. Use a thermometer to check the internal temperature of the machine. If it’s too warm, the thermostat may need to be adjusted or replaced.
- Reset the Sensors: Sometimes, a simple reset can resolve sensor issues. Unplug the machine for a few minutes to reset the sensors, then plug it back in and see if ice production resumes.
By following these troubleshooting steps, you can often resolve issues with no ice production and get your countertop ice maker back to producing ice. However, if these steps do not resolve the issue, it may be necessary to consult the manufacturer or a professional repair service for further assistance.
Troubleshooting Slow Ice Production
If your countertop ice maker is producing ice more slowly than usual, it can be a sign that something is wrong. Slow ice production can be frustrating, especially if you’re hosting an event or need a large quantity of ice. Fortunately, there are several troubleshooting steps you can take to address this issue.
Ambient Temperature
The ambient temperature in the room where your ice maker is located can have a significant impact on its performance. If the room is too warm, the machine will have to work harder to produce ice, leading to slower production times.
- Optimize the Environment: Place your ice maker in a cool, well-ventilated area away from direct sunlight and heat sources like stoves or ovens. Ideally, the room temperature should be between 50°F and 90°F for optimal ice production.
- Avoid Confined Spaces: Ensure that the ice maker is not placed in a confined space, such as inside a cabinet or against a wall, where airflow is restricted. Adequate ventilation is essential for the machine to dissipate heat and operate efficiently.
Dirty or Clogged Filters
As with many appliances, filters play a crucial role in the operation of your ice maker. Over time, filters can become clogged with impurities, reducing water flow and slowing down ice production.
- Clean the Filters: If your ice maker has a reusable filter, remove it and clean it according to the manufacturer’s instructions. Use warm water and a mild detergent to remove any dirt or debris, then rinse it thoroughly before reinstalling it.
- Replace Disposable Filters: If your ice maker uses disposable filters, check how long it has been since the last replacement. Filters should typically be replaced every three to six months, depending on usage and water quality. Replacing an old, clogged filter can restore proper water flow and improve ice production speed.
Low Water Levels
Low water levels can also slow down the ice-making process, as the machine may not have enough water to complete a full ice cycle.
- Check the Water Reservoir: Ensure that the water reservoir is filled to the appropriate level. If the reservoir is low, refill it with clean, filtered water. An empty water tank is a common cause of slow ice production.
- Inspect Water Lines: If the machine is connected to a water line, check for any kinks or blockages that might be restricting water flow. Ensure the line is securely connected and free of obstructions.
Overuse and Overheating
Running the ice maker continuously without giving it time to cool down can lead to overheating, which in turn slows down ice production.
- Give the Machine a Break: If you’ve been running the ice maker non-stop, it may need some time to cool down. Turn off the machine and allow it to rest for 30 minutes to an hour before restarting it. This can help prevent overheating and allow the machine to operate more efficiently.
- Use Ice in Batches: To avoid overworking the machine, consider producing ice in batches and transferring it to a freezer for storage. This allows the ice maker to cool down between cycles and reduces the risk of overheating.
By addressing these factors, you can often resolve issues with slow ice production and ensure that your countertop ice maker produces ice quickly and efficiently. If the problem persists despite these troubleshooting efforts, it may indicate a more serious issue that requires professional inspection.
Troubleshooting Ice Maker Not Dispensing Ice
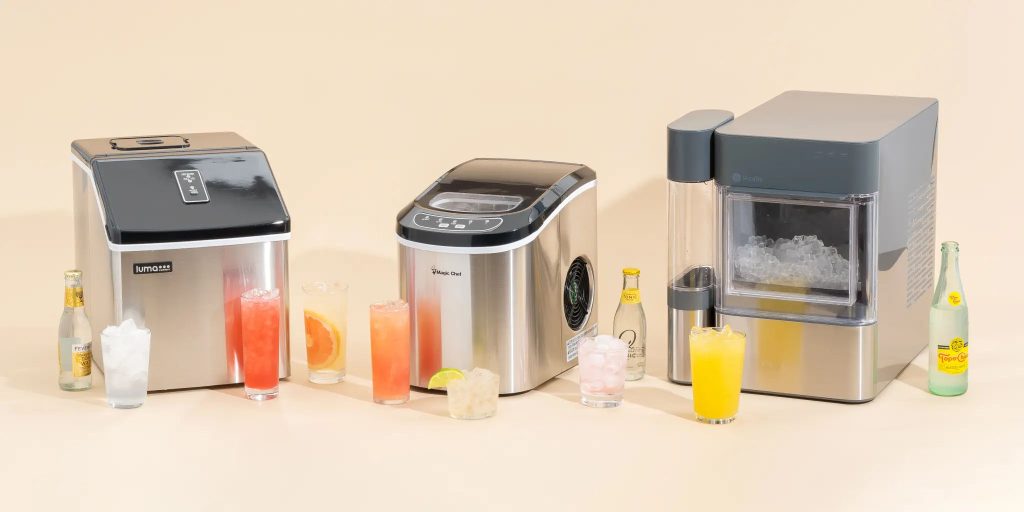
Another common issue with countertop ice makers is when the machine produces ice but fails to dispense it properly. This can be due to several factors, including mechanical problems or blockages in the ice chute.https://amzn.to/4cwk6tP
Ice Jam in the Bin
One of the most common causes of dispensing issues is an ice jam in the bin. When ice cubes clump together, they can block the chute and prevent new ice from being dispensed.
- Break Up the Ice Jam: Carefully remove the ice bin and use a plastic utensil or the ice scoop that came with your machine to break up any clumps of ice. Avoid using metal tools, as they can damage the bin or the machine. Once the clumps are broken up, replace the bin and try dispensing the ice again.
- Prevent Future Ice Jams: To prevent ice jams from occurring in the future, regularly remove ice from the bin and store it in a separate container or freezer. This ensures that the bin does not become overfilled and reduces the likelihood of ice clumping together.
Faulty Motor or Dispenser Mechanism
If the ice is not dispensing despite the bin being clear, there may be an issue with the motor or the dispenser mechanism.
- Check for Obstructions: First, check the dispenser mechanism for any visible obstructions that might be preventing it from operating correctly. Remove any debris or ice that might be blocking the dispenser.
- Listen for the Motor: When you press the button or lever to dispense ice, listen for the sound of the motor running. If you don’t hear the motor, it may be malfunctioning. A faulty motor can prevent the dispenser from operating, and in this case, it may need to be repaired or replaced.
Blocked Ice Chute
A blocked ice chute can also prevent ice from being dispensed properly. The chute can become blocked by ice that has melted slightly and then refrozen, creating a barrier that prevents new ice from passing through.
- Clear the Chute: Unplug the machine and carefully inspect the ice chute for any blockages. Use a small, flexible tool to gently remove any ice that might be stuck in the chute. Be sure not to force the ice out, as this could damage the chute or the surrounding components.
- Regular Maintenance: To prevent blockages from occurring in the future, regularly clean the ice chute and ensure that it is clear of any debris or ice buildup. This will help maintain smooth ice dispensing.
Sensor Malfunction
Ice makers often use sensors to detect when the bin is full or when ice is ready to be dispensed. If these sensors malfunction, they can prevent the machine from dispensing ice correctly.
- Clean the Sensors: Over time, sensors can become dirty or covered with ice, leading to inaccurate readings. Use a soft cloth or a cotton swab to gently clean the sensors and remove any debris or moisture that might be affecting their performance.
- Reset the Machine: If cleaning the sensors does not resolve the issue, try resetting the machine. Unplug the ice maker for a few minutes, then plug it back in and test the dispenser again. This can sometimes clear sensor errors and restore normal operation.
By addressing these issues, you can often resolve problems with ice not dispensing and ensure that your countertop ice maker functions smoothly. However, if the problem persists, it may indicate a more serious mechanical issue that requires professional repair.
Troubleshooting Ice Quality Issues: Cloudy, Soft, or Bad-Tasting Ice
The quality of the ice produced by your countertop ice maker is just as important as the quantity. If your ice is coming out cloudy, soft, or has an off taste, it can detract from the enjoyment of your beverages. Fortunately, many ice quality issues can be resolved with some simple troubleshooting.
Water Quality Concerns
The quality of the water you use in your ice maker directly affects the quality of the ice it produces. Impurities in the water can lead to cloudy or bad-tasting ice.
- Use Filtered Water: Always use clean, filtered water in your ice maker. Tap water can contain minerals, chlorine, and other impurities that can affect the taste and appearance of the ice. Using a water filter or bottled water can help produce clearer, better-tasting ice.
- Replace Water Filters: If your ice maker has a built-in water filter, it’s important to replace it regularly. A clogged or dirty filter can introduce impurities into the water, leading to poor ice quality. Follow the manufacturer’s recommendations for how often to replace the filter.
Cleaning the Machine
Mineral buildup, mold, and bacteria can accumulate inside the ice maker over time, affecting the quality of the ice.
- Regular Cleaning: Clean the interior of the ice maker regularly, including the water reservoir, ice bin, and ice-making components. Use a mixture of water and vinegar or a mild bleach solution to sanitize the machine and remove any buildup. Rinse thoroughly with clean water before using the machine again.
- Descale the Machine: If you live in an area with hard water, descaling the machine is essential. Mineral deposits can build up inside the ice maker, leading to cloudy or off-tasting ice. Use a descaling solution to remove these deposits and keep the machine running smoothly.
Ice Temperature Settings
The temperature inside the ice maker can affect the texture and clarity of the ice. If the machine is set too warm, the ice may come out soft or cloudy.
- Adjust the Temperature: Check the machine’s temperature settings and adjust them according to the manufacturer’s recommendations. Lowering the temperature can help produce harder, clearer ice. If the machine does not have adjustable temperature settings, ensure that it is placed in a cool environment where it can operate efficiently.
Dealing with Odors
If your ice has an off smell or taste, it could be due to food particles, mold, or stagnant water inside the machine.
- Identify the Source of the Odor: Check the water reservoir, ice bin, and surrounding area for any sources of odor, such as food particles or mold. Remove any debris and clean the affected areas thoroughly.
- Flush the System: To remove odors from the ice maker, flush the system with a mixture of water and vinegar. Run several cycles with this solution, then follow up with clean water to rinse out any remaining residue. This can help eliminate any lingering odors and improve the taste of the ice.
By addressing these factors, you can significantly improve the quality of the ice produced by your countertop ice maker. Clear, hard, and great-tasting ice enhances the overall experience of using the machine and ensures that your beverages are always refreshing.
Troubleshooting Leaking Water or Excessive Condensation
Water leaks and excessive condensation are common issues that can lead to messes and potential damage to your countertop or floors. Addressing these problems promptly is important to maintain the functionality of your countertop ice maker.
Inspecting the Water Reservoir and Lines
Leaks often originate from the water reservoir or the lines that supply water to the machine. A thorough inspection can help you identify the source of the leak.
- Check the Water Reservoir: Inspect the water reservoir for any cracks, leaks, or loose connections. Ensure that the reservoir is securely in place and that there are no visible signs of damage. If the reservoir is cracked, it will need to be replaced.
- Inspect Water Lines: If your ice maker is connected to a water line, check the line for any kinks, blockages, or leaks. Make sure the connections are tight and secure. If the line is damaged, it may need to be repaired or replaced.
Drainage Issues
Some ice makers have a drainage system to remove excess water. If this system becomes clogged or malfunctions, it can cause water to back up and leak from the machine.
- Clear the Drain Line: Check the drain line for any blockages that might be preventing water from draining properly. Use a small brush or pipe cleaner to clear any debris from the line. Ensuring the drain line is clear will help prevent leaks and water buildup.
- Ensure Proper Drainage: Make sure the ice maker is positioned correctly so that water can drain properly. The machine should be placed on a level surface, and the drain line should be free of obstructions.
Gasket and Seal Problems
Worn or damaged gaskets and seals can lead to water leaks and excessive condensation. Over time, these components can wear out, allowing water to escape.
- Inspect Gaskets and Seals: Check the gaskets and seals around the water reservoir, ice bin, and other components for any signs of wear or damage. If they are cracked or deteriorating, they should be replaced to prevent leaks.
- Replace Worn Components: If the gaskets or seals are beyond repair, replacing them with new ones can stop leaks and improve the overall efficiency of the machine.
Condensation Management
Excessive condensation can occur if the ice maker is placed in a humid environment or if the machine is not ventilated properly. While some condensation is normal, excessive moisture can lead to water leaks and other issues.
- Improve Ventilation: Ensure that the ice maker is placed in a well-ventilated area where air can circulate freely. Avoid placing the machine in enclosed spaces or near heat sources that could increase humidity.
- Use a Dehumidifier: If you live in a particularly humid area, using a dehumidifier in the room where the ice maker is located can help reduce condensation. This will help prevent excess moisture from accumulating on the machine and leading to leaks.
By following these steps, you can address water leaks and excessive condensation issues with your countertop ice maker. Proper maintenance and inspection of the machine’s components will help prevent these problems from occurring in the future, ensuring that your ice maker continues to operate smoothly.
Troubleshooting Ice Maker Won’t Turn On
When your countertop ice maker refuses to turn on, it can be a cause for concern. However, before you assume the worst, there are several troubleshooting steps you can take to identify and resolve the issue.
Power Supply Check
The first thing to check when your ice maker won’t turn on is the power supply. Often, the issue is as simple as a loose plug or a tripped circuit breaker.
- Ensure Proper Connection: Make sure that the ice maker is properly plugged into a functioning outlet. If the outlet is connected to a switch, ensure that the switch is turned on. If you’re using an extension cord, check that it’s rated for the power requirements of the ice maker and that it’s in good condition.
- Test the Outlet: Plug another device into the same outlet to see if it’s working. If the device doesn’t work either, the problem might be with the outlet itself. In this case, you may need to reset the circuit breaker or contact an electrician.
Circuit Breaker Issues
A tripped circuit breaker is a common cause of power issues with appliances, including ice makers.
- Check the Circuit Breaker: Locate your home’s circuit breaker panel and check if the breaker that controls the outlet for the ice maker has tripped. If it has, reset the breaker by flipping it off and then back on. This should restore power to the outlet and, in turn, to your ice maker.
- Prevent Future Trips: If the breaker continues to trip, it could be a sign that the circuit is overloaded. Avoid plugging too many high-wattage appliances into the same outlet or circuit. If the problem persists, you may need to have an electrician inspect the circuit for any underlying issues.
Faulty Power Cord or Plug
If the ice maker is still not turning on after checking the outlet and circuit breaker, the problem might lie with the power cord or plug.
- Inspect for Damage: Carefully inspect the power cord for any signs of damage, such as fraying, cuts, or exposed wires. Also, check the plug for any visible defects. If you notice any damage, the power cord or plug will need to be replaced.
- Test with a New Cord: If possible, test the ice maker with a new power cord that is compatible with the machine. If the machine turns on with the new cord, then the old cord was likely the issue.
Internal Electrical Problems
If the power supply, outlet, and power cord are all in good condition but the ice maker still won’t turn on, there may be an internal electrical issue.
- Control Board Inspection: The control board is the brain of the ice maker, managing all of its functions. If the control board is faulty, the machine may not turn on at all. This issue is more complex and usually requires professional repair or replacement of the control board.
- Blown Fuse: Some ice makers have internal fuses that protect the machine from electrical surges. If the fuse is blown, the machine won’t receive power. Replacing the fuse can sometimes resolve the issue, but this should be done by a professional to avoid voiding any warranties or causing further damage.
By systematically checking these potential causes, you can often resolve the issue of your countertop ice maker not turning on. However, if none of these troubleshooting steps work, it may be time to contact the manufacturer or a professional repair service for further assistance.
Regular Maintenance Tips to Prevent Common Issues
Preventing issues with your countertop ice maker is always better than dealing with them after they arise. Regular maintenance is key to keeping your ice maker running smoothly and efficiently. In this section, we’ll cover some essential maintenance tasks that can help prevent common problems and extend the lifespan of your machine.
Cleaning and Descaling
Regular cleaning and descaling are crucial to maintaining the performance of your ice maker. Over time, mineral deposits, mold, and bacteria can build up inside the machine, leading to a host of issues.
- Weekly Cleaning: Clean the interior of the ice maker, including the water reservoir, ice bin, and any removable parts, on a weekly basis. Use a mixture of warm water and vinegar or a mild bleach solution to sanitize the machine. Rinse thoroughly with clean water before using the machine again.
- Monthly Descaling: If you live in an area with hard water, descaling the machine monthly is essential. Use a descaling solution recommended by the manufacturer to remove mineral deposits from the machine’s internal components. This will help prevent clogs and ensure the machine operates efficiently.
Replacing Filters
Filters play a vital role in maintaining the quality of the water used in your ice maker, which in turn affects the quality of the ice.
- Follow Manufacturer’s Guidelines: Replace water filters according to the manufacturer’s recommended schedule, usually every three to six months. A clogged or dirty filter can reduce water flow and lead to poor ice quality.
- Use High-Quality Filters: Invest in high-quality filters that are designed to remove impurities from the water. This will not only improve the taste and clarity of the ice but also reduce the likelihood of clogs and other issues.
Inspecting Components
Regularly inspecting the key components of your ice maker can help you catch potential issues before they become major problems.
- Check Seals and Gaskets: Inspect the seals and gaskets around the water reservoir, ice bin, and other components for any signs of wear or damage. Replacing worn seals can prevent leaks and improve the machine’s efficiency.
- Inspect the Fan and Compressor: Make sure the fan and compressor are free of dust and debris. Clean these components regularly to ensure proper ventilation and prevent overheating.
- Examine Water Lines: Check the water lines for any kinks, blockages, or leaks. Ensuring that the water lines are clear and properly connected will help maintain steady water flow and efficient ice production.
Seasonal Maintenance
Different seasons can affect the performance of your ice maker, especially if you live in an area with extreme temperatures or high humidity.
- Summer Maintenance: During the summer, the ambient temperature can rise, putting extra strain on your ice maker. Ensure the machine is placed in a cool, well-ventilated area and consider using a fan to help with airflow.
- Winter Maintenance: If you won’t be using your ice maker during the winter, it’s important to winterize the machine. Drain the water reservoir, clean the machine thoroughly, and store it in a cool, dry place. This will help prevent mold and bacteria from growing inside the machine during periods of inactivity.
By following these regular maintenance tips, you can prevent many of the common issues that affect countertop ice makers and ensure that your machine continues to produce high-quality ice for years to come.
When to Call a Professional
While many issues with your countertop ice maker can be resolved with basic troubleshooting, there are times when professional assistance is necessary. Knowing when to call a professional can save you time, money, and the hassle of dealing with a malfunctioning appliance.
Identifying Complex Problems
Some problems with your ice maker may be too complex to handle on your own, especially if they involve the machine’s internal components.
- Electrical Issues: If you suspect that there is an internal electrical problem, such as a faulty control board or blown fuse, it’s best to contact a professional. Attempting to repair electrical components yourself can be dangerous and may void the machine’s warranty.
- Mechanical Failures: Issues with the compressor, motor, or other mechanical components often require specialized knowledge and tools to diagnose and repair. If your ice maker is making unusual noises or not operating correctly, a professional repair service can help identify and fix the problem.
Warranty Considerations
If your ice maker is still under warranty, it’s important to follow the manufacturer’s guidelines for repairs.
- Check the Warranty Terms: Before attempting any repairs, check the terms of your warranty. Many warranties require that repairs be performed by an authorized technician to remain valid. Attempting to fix the machine yourself could void the warranty, leaving you responsible for the full cost of repairs.
- Contact the Manufacturer: If your machine is still under warranty, contact the manufacturer for assistance. They can provide guidance on troubleshooting steps and, if necessary, refer you to an authorized repair service.
Choosing a Repair Service
When selecting a repair service for your ice maker, it’s important to choose a reliable and experienced technician.
- Look for Certified Technicians: Choose a repair service that employs certified technicians with experience in repairing ice makers. Certification ensures that the technician has the necessary skills and knowledge to diagnose and fix the problem correctly.
- Check Reviews and References: Before hiring a repair service, check online reviews and ask for references. A reputable repair service will have positive reviews and be willing to provide references from satisfied customers.
Cost vs. Replacement
In some cases, the cost of repairing your ice maker may be close to or even exceed the cost of replacing it.
- Evaluate the Cost of Repairs: Get an estimate for the cost of repairs before proceeding. If the repair is expensive and the ice maker is old or has had multiple issues, it may be more cost-effective to replace the machine with a new one.
- Consider the Age of the Machine: If your ice maker is several years old and has experienced frequent problems, it may be nearing the end of its lifespan. In this case, investing in a new machine might be a better option than continuing to pay for repairs.
By knowing when to call a professional and how to choose a reliable repair service, you can ensure that your countertop ice maker receives the care it needs to function properly. In some cases, replacing the machine may be the best option, especially if it has reached the end of its useful life.
Conclusion
Troubleshooting common issues with your countertop ice maker doesn’t have to be a daunting task. By understanding the potential causes of problems and following the troubleshooting steps outlined in this guide, you can often resolve issues on your own and keep your ice maker running smoothly. Regular maintenance is key to preventing many of these problems and ensuring that your machine continues to produce high-quality ice for years to come.https://amzn.to/4cwk6tP
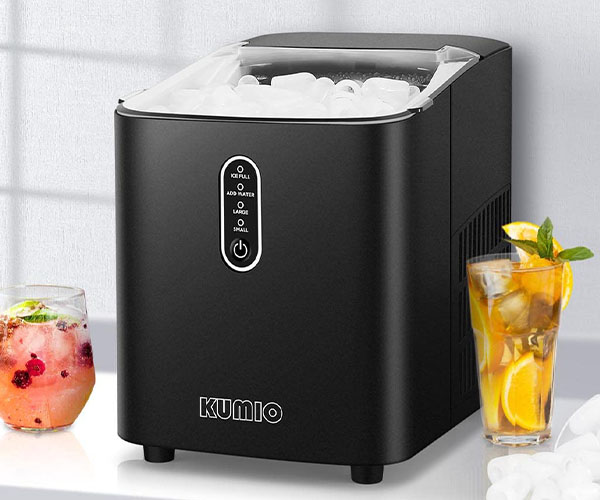
However, there are times when professional assistance is necessary. Knowing when to call a professional can save you time, money, and the frustration of dealing with a malfunctioning appliance. Whether you need help with electrical issues, mechanical failures, or deciding whether to repair or replace your ice maker, a certified technician can provide the expertise you need.
We hope this guide has provided you with the knowledge and confidence to troubleshoot and maintain your countertop ice maker with troubleshoot options. If you have any questions or need further assistance, don’t hesitate to contact a professional repair service or consult the manufacturer’s support resources. And remember, regular maintenance is the best way to keep your ice maker in top working condition, so be sure to follow the tips and recommendations provided in this article.
Call to Action: We invite you to share your own troubleshooting tips and experiences in the comments below, or visit homesolutionzone.com for more resources and advice on maintaining and repairing your countertop ice maker. Your insights could help others facing similar issues, and together, we can ensure that everyone enjoys the full benefits of their ice maker!

