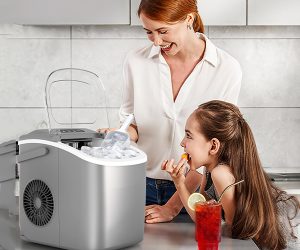
When it comes to enjoying refreshing, crystal-clear ice at home, keeping your countertop ice maker in top-notch condition is essential. Over time, these handy appliances can accumulate mineral deposits, bacteria, and mold, all of which can negatively affect the quality of the ice and the machine’s performance. This guide will walk you through the process of deep cleaning your countertop ice maker, ensuring it remains in pristine condition for years to come.
Why Deep Cleaning Your Countertop Ice Maker Is Essential
Importance of Hygiene in Appliances That Handle Food and Drink
Your countertop ice maker is more than just a convenient appliance—it’s a vital part of your kitchen that directly impacts the quality of what you consume. Just like any kitchen equipment, ice makers require regular cleaning to ensure they remain safe and efficient. Water, by its nature, can leave behind minerals, scale, and even foster the growth of bacteria and mold, especially in moist environments. If these contaminants build up, they can compromise the taste of your ice and potentially pose health risks.https://amzn.to/3WfVOOL
Consider how often you use your ice maker, whether for daily refreshments, parties, or family gatherings. The ice it produces comes into direct contact with your drinks and food, making it critical to maintain a high standard of cleanliness. Neglecting to deep clean your countertop ice maker can lead to the accumulation of mold, mildew, and mineral deposits, which not only affect the taste and clarity of the ice but can also clog the machine’s components, leading to reduced efficiency or even mechanical failure.
The Impact of Regular Maintenance on the Lifespan of Your Ice Maker
Regular maintenance and deep cleaning aren’t just about ensuring the quality of your ice—they’re also crucial for extending the life of your appliance. Countertop ice makers are a significant investment, and like any appliance, they require upkeep to perform optimally. By consistently cleaning your ice maker, you can prevent the buildup of hard water deposits and scale, which can obstruct the water lines and reduce the machine’s efficiency. This kind of proactive care can help you avoid costly repairs and extend the life of your ice maker, ensuring you get the most out of your investment.
Moreover, a well-maintained ice maker will operate more quietly and efficiently. Over time, dirt and debris can cause the machine to work harder than necessary, leading to increased energy consumption and wear and tear on the components. By performing regular deep cleaning, you ensure that your ice maker continues to run smoothly, producing high-quality ice without unnecessary strain on the machine.
Who Should Deep Clean Their Ice Maker?
Homeowners Using Ice Makers Frequently
If you’re someone who relies on your countertop ice maker regularly—whether for cooling down drinks after a long day, hosting gatherings, or preparing meals—a deep cleaning routine is essential. The more often you use your ice maker, the more frequently it should be cleaned to maintain the quality of the ice it produces. Regular users will benefit from setting a cleaning schedule to ensure that the machine remains in top condition and continues to deliver clear, fresh-tasting ice.
Offices or Small Businesses with Shared Kitchen Appliances
In environments like offices or small businesses where the ice maker is shared among multiple people, the need for cleanliness becomes even more critical. Shared appliances are more prone to bacteria and mold growth due to the frequent handling and varied maintenance practices of different users. Establishing a regular cleaning routine can help ensure that everyone who uses the ice maker is getting safe, high-quality ice, while also prolonging the machine’s lifespan.
Special Occasions: Prepping for Holidays or Gatherings
Whether you’re preparing for a holiday feast, a summer barbecue, or a large family gathering, having plenty of clean, fresh ice on hand is a must. Before any big event, it’s a good idea to give your countertop ice maker a thorough deep cleaning. This not only ensures that the ice you serve will be free from any unpleasant tastes or odors but also that your machine will be working at full capacity when you need it most. A clean ice maker is less likely to experience issues or breakdowns during times of heavy use, allowing you to focus on enjoying your event rather than troubleshooting appliance problems.
Understanding Your Countertop Ice Maker
How Does a Countertop Ice Maker Work?
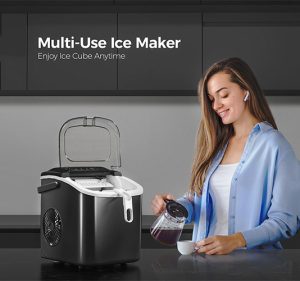
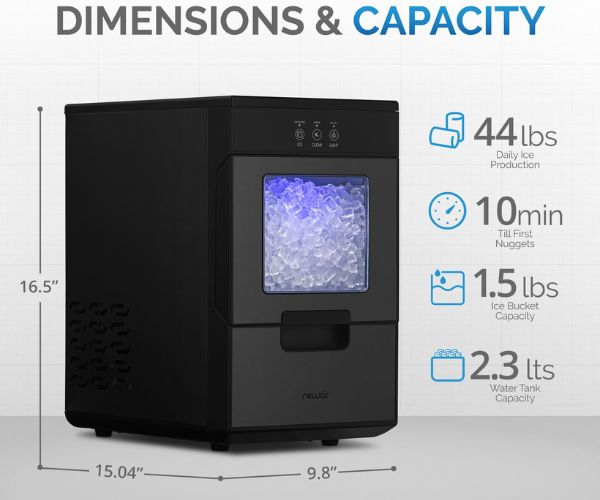
To effectively deep clean your countertop ice maker, it’s important to understand how it operates and the key components involved. Most countertop ice makers work by drawing water into a reservoir, cooling it rapidly using a refrigeration system, and then freezing it in a mold to create ice cubes. The type of ice produced can vary, from nugget ice that’s soft and chewable to bullet-shaped ice that’s harder and longer-lasting.
These machines are designed to be compact and efficient, capable of producing a significant amount of ice in a short period. They typically have a water reservoir, an ice tray or mold, a cooling system, and a storage bin where the ice is collected after it’s made. Some models may also have additional features like self-cleaning modes or filters to improve water quality.
Understanding these components is key to deep cleaning because each part requires specific attention. For example, the ice mold where the water is frozen can develop mineral deposits over time, while the water reservoir may accumulate bacteria or mold if not cleaned regularly. Knowing how your ice maker works allows you to target your cleaning efforts more effectively, ensuring that every part of the machine is thoroughly cleaned.
Different Types of Countertop Ice Makers (Nugget, Bullet, etc.)
There are several types of countertop ice makers available, each producing a different style of ice that suits various preferences and needs:
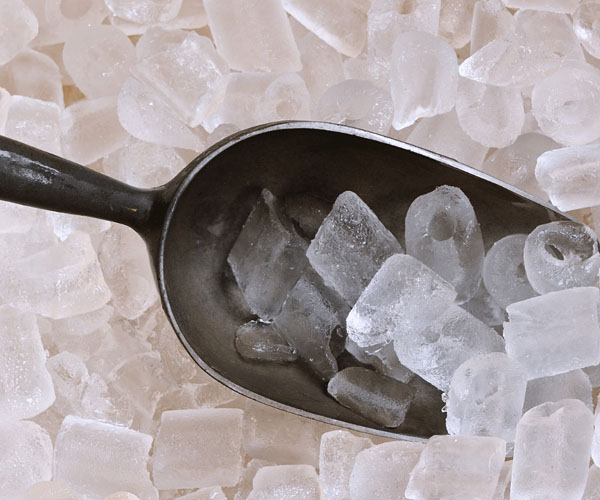
- Nugget Ice Makers: These machines produce soft, chewable nugget ice that’s popular in restaurants and bars for its ability to absorb flavors and cool drinks quickly. Nugget ice makers often require more frequent cleaning due to the porous nature of the ice, which can trap odors and contaminants more easily.
- Bullet Ice Makers: These machines produce hard, cylindrical ice that’s slow to melt, making it ideal for cocktails and drinks that need to stay cold for extended periods. Bullet ice makers typically require less frequent cleaning, but the ice molds can still develop scale and mineral deposits that need to be addressed.
- Cube Ice Makers: These machines produce classic, square-shaped ice cubes that are versatile and suitable for a wide range of uses. Cube ice makers are common in home kitchens and are generally straightforward to clean, but they can also suffer from mineral buildup if not maintained properly.
- Flake Ice Makers: These machines produce small, flaky ice that’s often used in seafood displays and for cooling perishable items quickly. Flake ice makers can be more challenging to clean due to the small size and shape of the ice, which can lead to more hidden areas where bacteria and mold can accumulate.
Each type of ice maker may have slightly different cleaning requirements, so it’s important to consult your user manual and understand the specific needs of your machine. Regardless of the type, regular deep cleaning is essential to maintaining the quality of the ice and the performance of the machine.
Common Issues Arising from Lack of Cleaning
Neglecting to deep clean your countertop ice maker can lead to a range of issues, many of which can be avoided with regular maintenance:https://amzn.to/3WfVOOL
- Mold and Mildew Buildup: Moisture is a breeding ground for mold and mildew, and if your ice maker is not cleaned regularly, these can develop inside the machine, particularly in the water reservoir and ice molds. Mold not only affects the taste and smell of the ice but can also pose serious health risks if ingested.
- Unpleasant Odors and Taste in Ice: If your ice maker isn’t cleaned regularly, the ice it produces can start to develop an unpleasant odor or taste. This is often due to bacteria, mold, or leftover cleaning residues that haven’t been properly rinsed away. Ice that smells or tastes bad can ruin the flavor of your drinks and meals.
- Reduced Efficiency or Breakdowns: Over time, mineral deposits and scale can build up inside your ice maker, clogging the water lines and reducing the machine’s efficiency. This can lead to slower ice production, smaller ice cubes, or even complete breakdowns. Regular deep cleaning helps prevent these issues and keeps your ice maker running smoothly.
By understanding how your countertop ice maker works and the potential issues that can arise from a lack of cleaning, you’ll be better equipped to maintain your appliance and ensure it continues to produce high-quality ice. Regular deep cleaning is not just about keeping the ice tasting great—it’s also about protecting your investment and ensuring the longevity of your machine.
Preparing for a Deep Clean
Tools and Materials You’ll Need
Before you begin the process of deep cleaning your countertop ice maker, it’s essential to gather all the necessary tools and materials. Having everything on hand will make the process smoother and more efficient. Here’s what you’ll need:
- Soft Cloths and Sponges: These are essential for wiping down both the interior and exterior of the ice maker. Microfiber cloths are especially effective because they trap dust and grime without scratching surfaces.
- Mild Dish Soap: A gentle, non-abrasive soap is ideal for cleaning the removable parts of your ice maker. Avoid using harsh chemicals that could damage the machine or leave behind harmful residues.
- White Vinegar: A natural and effective cleaner, vinegar is excellent for descaling and disinfecting. It helps to break down mineral deposits and remove odors. A vinegar solution for ice maker cleaning is one of the safest and most effective methods.
- Specialized Ice Machine Cleaner: For a deeper clean, especially if your ice maker hasn’t been cleaned in a while, consider using a cleaner specifically designed for ice machines. These products are formulated to tackle mineral buildup and bacterial contamination without harming the machine’s components.
- Toothbrush or Small Brush: A small brush with soft bristles is perfect for cleaning hard-to-reach areas, such as corners of the ice mold or around buttons and seams. It allows for precision cleaning in areas where dirt and grime often accumulate.
- Bucket or Large Bowl: Useful for mixing cleaning solutions and soaking removable parts. Ensure it’s large enough to fully submerge parts like the ice basket or water reservoir.
- Towels: Keep a few towels handy to dry parts after cleaning and to wipe up any spills during the process.
Safety Precautions
Before you start cleaning, it’s crucial to follow some basic safety precautions to protect both yourself and your appliance:
- Unplug the Machine: Always disconnect your countertop ice maker from the power source before starting any cleaning. This prevents the risk of electric shock and ensures that the machine’s moving parts won’t operate while you’re working on it.
- Handle Parts Carefully: When disassembling your ice maker, take care not to force or bend any parts. Many components are made of plastic, which can crack or break if handled roughly. If a part doesn’t come off easily, refer to the user manual for guidance rather than using excessive force.
- Use Non-Toxic Cleaners: Ensure that any cleaning agents you use are food-safe and non-toxic, especially for parts that come into direct contact with ice or water. Residues from harsh chemicals can leach into the ice, potentially posing health risks.
Reading the User Manual
Every countertop ice maker is slightly different, so it’s important to consult your specific model’s user manual before you begin cleaning. The manual will provide detailed instructions on how to safely disassemble the machine and which parts can be submerged in water or cleaned with certain solutions.
- Identifying Removable Parts: The manual will help you identify which components, such as the ice basket, water reservoir, or ice mold, can be removed for thorough cleaning. Some parts may be dishwasher safe, while others should only be washed by hand.
- Understanding Cleaning Restrictions: Certain models may have components that are sensitive to specific cleaning agents or techniques. For example, some ice makers may have coated surfaces that can be damaged by abrasive scrubbing or harsh chemicals. The manual will outline any such restrictions.
By preparing adequately and following these preliminary steps, you’ll be ready to deep clean your countertop ice maker effectively, ensuring that you remove all contaminants while keeping the machine in good working order.
Step-by-Step Guide to Deep Cleaning Your Countertop Ice Maker
Disassembling Your Ice Maker
The first step in deep cleaning your countertop ice maker is to carefully disassemble it. This process allows you to access all the areas that need cleaning, including those that are often overlooked during regular maintenance.
- Removing the Ice Basket: Start by taking out the ice basket where the finished ice cubes are stored. This part is usually easy to remove and is often the most straightforward to clean. Soak it in warm, soapy water to loosen any dirt or debris.
- Taking Out the Water Reservoir: The water reservoir is where water is stored before being turned into ice. This part should be removed and cleaned thoroughly, as it can harbor bacteria and mineral deposits over time. Soak it in a vinegar solution to help break down any scale.
- Detaching the Ice Mold: The ice mold is the part of the machine where water is frozen into ice cubes. Depending on the model, this may be removable. If it is, take it out carefully and soak it in a descaling solution to remove mineral buildup. Use a soft brush to clean any remaining deposits from the mold.
- Removing the Ice Chute: If your machine has an ice chute (the part where ice is dispensed), detach it and clean it thoroughly. This area can accumulate dust, grime, and bacteria, especially if it’s exposed to the open air.
Make sure to lay out all the parts on a clean towel once they’ve been removed and cleaned, allowing them to air dry while you move on to cleaning the rest of the machine.
Cleaning the Exterior
The exterior of your countertop ice maker should be cleaned regularly to keep it looking new and to prevent the buildup of dust and grime. Here’s how to do it:
- Wiping Down the Outer Surfaces: Use a soft cloth dampened with a mild dish soap solution to wipe down the exterior surfaces. Pay particular attention to the areas around the buttons and seams, as these can collect dirt. Avoid using abrasive cleaners or scrubbers, as they can scratch the surface.
- Cleaning Control Buttons and Display Screens: The control panel is another area that needs regular attention. Over time, it can collect grease and fingerprints. Use a slightly damp cloth to wipe down the buttons and any display screens. If necessary, use a small brush to clean around the buttons. Be careful not to let water seep into any openings, as this could damage the electronics.
Cleaning the Interior
The interior of your ice maker is where the real work happens, and it’s crucial to clean it thoroughly to prevent the buildup of harmful bacteria and mineral deposits.
- Descaling with Vinegar Solution: Start by preparing a mixture of equal parts white vinegar and water. Pour this solution into the water reservoir and let it sit for about 10 minutes to break down any mineral deposits inside the machine. After soaking, use a soft brush to scrub the interior surfaces gently. Be sure to clean the water lines as well, as they can accumulate scale that affects water flow and ice quality.
- Scrubbing Interior Components: Use a soft-bristled brush to clean all the nooks and crannies inside the machine. Focus on the ice mold, water reservoir, and any other areas that come into contact with water or ice. If your ice maker has any hard-to-reach spots, a toothbrush can be particularly useful for getting into tight corners.
- Rinsing Thoroughly: After scrubbing, rinse the interior of the machine thoroughly with clean water to remove any traces of vinegar or soap. It’s important to rinse well to prevent any cleaning solution residue from getting into your ice.
Cleaning the Ice Mold
The ice mold is a critical component of your ice maker and needs special attention during cleaning. This is where the water freezes and takes shape, so keeping it free of debris and scale is essential for producing high-quality ice.
- Removing Mineral Deposits: If you notice any white or chalky deposits in the ice mold, these are likely mineral deposits left behind by hard water. To remove them, soak the mold in a descaling solution or a vinegar solution for about 10-15 minutes. Then, scrub the mold gently with a soft brush to remove any remaining buildup.
- Ensuring All Nooks and Crannies Are Free from Debris: Ice molds often have small crevices where debris can collect. Use a small brush or toothpick to clean these areas thoroughly. Be careful not to scratch the surface of the mold, as this could damage it and affect ice production.
Sanitizing the Ice Maker
Sanitizing your ice maker is the final step in the deep cleaning process, ensuring that all bacteria and mold are eliminated.
- Using a Food-Safe Sanitizer: Once you’ve cleaned and rinsed the ice maker, prepare a sanitizing solution using a food-safe sanitizer. This step is particularly important if your ice maker has been neglected or if you’ve noticed any signs of mold or bacteria. Follow the instructions on the sanitizer’s packaging to ensure you’re using it correctly.
- Letting the Machine Air Dry: After sanitizing, allow the ice maker to air dry completely before reassembling it. This helps ensure that no moisture remains that could foster the growth of mold or bacteria. If you’re in a hurry, you can also use a clean, dry cloth to wipe down the interior components.
Reassembling and Testing Your Ice Maker
Proper Reassembly Tips
After deep cleaning, it’s time to put your countertop ice maker back together. Reassembly is a crucial step, and it’s important to ensure that all parts are dry and correctly placed to avoid issues when the machine is turned back on.
- Ensuring All Parts Are Dry: Before reassembling, double-check that all components are completely dry. Moisture left in the machine can lead to mold growth or cause water spots in the first few batches of ice. Wipe down any parts with a clean, dry cloth if needed.
- Double-Checking Connections: As you reassemble your ice maker, ensure that all parts are securely connected. This includes the water reservoir, ice mold, and any tubing or connections that were detached during cleaning. Improper connections can lead to leaks or malfunctioning parts.
Running a Test Cycle
Once your machine is reassembled, it’s important to run a test cycle before you start using the ice. This step helps to ensure that the machine is working properly and that no cleaning residues remain.
- Running the First Batch of Ice: Fill the reservoir with fresh water and run a complete cycle. Discard the first batch of ice to ensure that any remaining cleaning solution is flushed out of the system. This batch might have a slight taste of vinegar or sanitizer, so it’s better to discard it than to use it.
- Checking for Unusual Noises or Odors: As the machine runs, listen for any unusual noises that might indicate a problem with the reassembly. Also, smell the ice to ensure there are no lingering odors from the cleaning agents. If you notice anything unusual, you may need to disassemble the machine again to check for missed cleaning spots or improperly connected parts.
Maintenance Tips to Keep Your Ice Maker Clean
How Often Should You Clean Your Ice Maker?
The frequency of cleaning your countertop ice maker depends on how often you use it and the quality of your water supply. However, establishing a regular cleaning schedule can help maintain your machine and prevent the need for more intensive deep cleaning sessions.https://amzn.to/3WfVOOL
- Weekly, Monthly, and Deep-Clean Schedules: For optimal performance, you should perform light cleaning tasks weekly, such as wiping down the exterior and emptying any unused ice. A more thorough cleaning, including the interior, should be done monthly. Deep cleaning, which involves disassembling the machine and cleaning all components, should be done every 3-6 months, depending on usage.
- Factors That May Require More Frequent Cleaning: If you live in an area with hard water, you may need to clean your ice maker more frequently to prevent scale buildup. Similarly, if you notice any unpleasant odors or tastes in the ice, or if the machine seems to be working harder than usual, it’s a good idea to clean it sooner rather than later.
Daily and Weekly Maintenance Tasks
Regular maintenance is key to preventing the buildup of dirt, bacteria, and scale. Incorporating these simple tasks into your routine can help keep your ice maker in top condition:
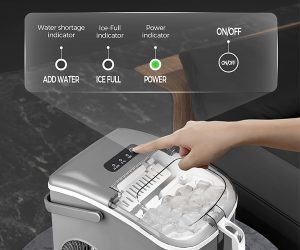
- Wiping Down the Exterior and Checking Water Levels: Daily, wipe down the exterior of the machine with a damp cloth to remove dust and fingerprints. This not only keeps the machine looking clean but also prevents the buildup of grime around buttons and seams. Additionally, check the water levels in the reservoir to ensure they’re sufficient for ice production.
- Regularly Changing the Water: The water you use in your ice maker should be fresh. Stagnant water can lead to the growth of bacteria and affect the taste of your ice. Change the water in the reservoir at least once a week, and more often if you notice that the ice isn’t as fresh as it should be.
Using Filters to Reduce Mineral Buildup
One of the most effective ways to maintain your ice maker and reduce the need for frequent deep cleaning is to use filtered water. Filters can significantly reduce the amount of minerals and impurities that cause scale buildup inside the machine.
- Importance of Filtered Water: Using filtered water not only improves the taste and clarity of your ice but also reduces the likelihood of mineral deposits forming in the machine. This helps keep the internal components clean and prolongs the time between deep cleanings.
- How to Install and Maintain Water Filters: If your ice maker doesn’t have a built-in filter, you can purchase an external filter designed for use with ice makers. Install it according to the manufacturer’s instructions, and be sure to replace the filter cartridge regularly to maintain its effectiveness. This simple step can make a significant difference in the longevity and performance of your ice maker.
Troubleshooting Common Cleaning Issues
What to Do If Your Ice Maker Still Smells After Cleaning
Even after a thorough deep cleaning, you may occasionally find that your ice maker still has a lingering odor. This can be frustrating, but there are steps you can take to address the issue.
- Possible Causes and Solutions: Residual bacteria, mold, or cleaning agents are common culprits behind persistent odors. If the smell persists, try running another cleaning cycle with a stronger vinegar solution or a specialized ice machine cleaner. Ensure that all parts are thoroughly rinsed and dried before reassembling the machine. You might also want to check the ice mold and water lines for any hidden mold or mildew that could be causing the smell.
Handling Stubborn Mineral Deposits
Mineral deposits, especially from hard water, can be tough to remove and often require more than just a basic cleaning.
- Using Stronger Descaling Agents: If vinegar alone isn’t enough to remove stubborn scale, consider using a commercial descaling agent specifically designed for ice machines. These products are formulated to dissolve tough mineral deposits without damaging your machine. Follow the manufacturer’s instructions carefully, and ensure that the machine is thoroughly rinsed before using it again.
- When to Consider Professional Cleaning Services: If you’re unable to remove the deposits or if they’ve caused damage to the machine, it might be time to call in a professional. A professional cleaning service can safely disassemble and clean the internal components of your ice maker, ensuring that it’s restored to optimal condition.
Addressing Persistent Mold or Mildew
Mold and mildew are serious issues that can affect the taste and safety of your ice. If you notice recurring mold or mildew in your ice maker, it’s essential to take immediate action.
- Advanced Cleaning Techniques: In addition to regular deep cleaning, you may need to use a stronger disinfectant to kill mold spores. A solution of bleach and water can be effective, but it must be used with caution. After cleaning with bleach, thoroughly rinse the machine with clean water to ensure no residue remains.
- Preventing Mold Regrowth: To prevent mold and mildew from returning, make sure your ice maker is completely dry after each use. Leaving the machine open when not in use can help prevent moisture buildup, which is a key factor in mold growth. Regularly clean and sanitize the machine to keep it free from contaminants.
Frequently Asked Questions (FAQ)
How Long Does It Take to Deep Clean a Countertop Ice Maker?
The time required to deep clean a countertop ice maker depends on how dirty the machine is and how familiar you are with the process. On average, a thorough deep clean can take between 1-2 hours, including disassembly, cleaning, rinsing, and reassembly. It’s a good idea to set aside time when you won’t need to use the ice maker, as you’ll need to let it air dry completely before using it again.
Can I Use Bleach to Clean My Ice Maker?
Bleach can be used to disinfect an ice maker, especially if you’re dealing with mold or mildew. However, it’s important to use it carefully. Mix a very diluted solution of bleach and water (about 1 tablespoon of bleach per gallon of water), and use it to clean the interior surfaces. Be sure to rinse the machine thoroughly with clean water afterward to remove any bleach residue, as it can be harmful if ingested.
What Are the Signs That My Ice Maker Needs Cleaning?
There are several signs that indicate your ice maker is due for a cleaning:
- Strange Odors or Tastes in the Ice: If your ice has an off smell or taste, it’s likely that bacteria, mold, or mineral deposits are affecting the water or the machine itself.
- Slower Ice Production: If your ice maker is taking longer than usual to produce ice, it could be a sign that scale or debris is clogging the system.
- Smaller or Misshapen Ice Cubes: If the ice cubes are smaller than usual or have an irregular shape, this may indicate a problem with the ice mold or a buildup of mineral deposits.
- Visible Dirt or Mold: If you see any signs of dirt, mold, or mildew inside the machine, it’s definitely time for a deep clean.
Can I Put Ice Maker Parts in the Dishwasher?
Some parts of your countertop ice maker may be dishwasher-safe, but it’s essential to check the user manual before doing so. Typically, components like the ice basket and water reservoir can be washed in the dishwasher on a gentle cycle. However, more delicate parts, like the ice mold or any electronic components, should always be washed by hand to avoid damage.
What’s the Best Cleaning Solution for Ice Makers?
The best cleaning solution for your ice maker depends on the type of cleaning you’re doing:
- Vinegar Solution: A mixture of white vinegar and water is a safe, effective, and natural cleaning solution that can be used for general cleaning and descaling.
- Specialized Ice Machine Cleaners: For a deeper clean, especially if your machine has a lot of scale buildup, a specialized ice machine cleaner may be necessary. These products are designed to be safe for use in ice makers and are highly effective at removing stubborn deposits.
- Bleach Solution: For disinfecting and mold removal, a diluted bleach solution can be used, but it must be rinsed thoroughly to ensure no harmful residues remain.
Conclusion
Recap of Key Points
Maintaining a clean countertop ice maker is essential for ensuring the quality of the ice it produces and the longevity of the machine. Regular deep cleaning helps to remove bacteria, mold, and mineral deposits that can accumulate over time, affecting the taste and safety of your ice. By following a regular cleaning schedule and using the right tools and techniques, you can keep your ice maker in excellent condition, ensuring it continues to serve you well for years to come.
Encouragement to Take Action
If you haven’t cleaned your ice maker in a while, now is the perfect time to start. Set aside an hour or two to give it a thorough deep clean, and then establish a regular maintenance routine to keep it in top shape. Your efforts will pay off with better-tasting ice, a longer-lasting machine, and the peace of mind that comes from knowing your appliance is clean and safe to use.
Additional Resources
Links to Detailed How-To Videos
For those who prefer visual guides, here are some helpful videos on how to deep clean your countertop ice maker. These videos provide step-by-step instructions and demonstrate the process in real-time, making it easy to follow along.
Recommended Products for Ice Maker Maintenance
To make the cleaning process even easier, here are some products that are specifically designed for ice maker maintenance. These include specialized cleaners, brushes, and sanitizers that can help you keep your machine in top condition.
Further Reading
If you’re interested in learning more about maintaining other kitchen appliances or choosing the best countertop ice maker for your needs, here are some additional articles that provide valuable insights and tips.
By following the guidelines in this comprehensive guide, you’ll be well-equipped to maintain your countertop ice maker, ensuring it remains a reliable and valuable tool in your kitchen. Regular cleaning not only keeps your ice fresh and safe but also extends the life of your machine, making it a smart investment in your home’s comfort and convenience.https://amzn.to/3WfVOOL

