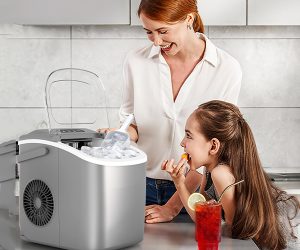
If you find your home countertop ice maker leaking water, it can be a frustrating issue that disrupts your kitchen’s functionality. Understanding the common causes and solutions for this problem can help you fix it effectively and prevent further issues.
Common Causes of Ice Maker Leaks
Over time, water filters can become clogged with impurities and debris, which can cause water to overflow and leak. Regularly replacing the water filter can prevent this issue. However, there are several other potential causes for an ice maker leaking water. Understanding these can help you troubleshoot and fix the problem effectively.
Blocked Defrost Drain
- Description: The defrost drain, found in most refrigerators and ice makers, helps channel excess water out of the appliance. When blocked by debris or ice, the drain can cause water to back up and leak.
- Solution: Clear the drain by removing any debris and using warm water to melt any ice build-up. Avoid using boiling water as it can damage the plastic components.
Frozen Water Supply Line
- Description: If the temperature in the freezer is set too low, the water supply line can freeze, preventing water from reaching the ice maker properly.
- Solution: Adjust the freezer temperature to the recommended level, usually around 0°F (-18°C), to prevent the line from freezing. Thaw any ice build-up with warm water .
Improperly Sealed Ice Bin or Tray
- Description: If the ice bin or tray is not sealed correctly, water can leak out, creating a mess inside the freezer or on the floor.
- Solution: Inspect the bin or tray for cracks or misalignment. Replace any damaged parts and ensure the bin is properly aligned within the ice maker .
Misaligned Fill Valve and Cup
- Description: The fill valve directs water into the ice tray, but if misaligned, water can miss the tray and leak into the ice maker.
- Solution: Check the alignment of the fill valve and adjust it so that it correctly directs water into the tray. Refer to your appliance’s manual for precise instructions .
Loose or Damaged Water Supply Line
- Description: A loose or damaged water supply line can cause leaks at connection points.
- Solution: Inspect the water supply line for any signs of damage or looseness. Tighten loose connections and replace any damaged sections of the line .
Jammed Ice Clumps
- Description: Ice can clump together in the ice bin or dispenser chute, leading to blockages that cause leaks when warm air melts the ice.
- Solution: Use a long plastic or wooden handle to gently break up any ice clumps. If necessary, remove the ice bin and allow it to thaw. Ensure there’s no ice obstructing the dispenser chute .
High Fill Level
- Description: If the ice maker’s fill level is set too high, it can overfill with water, leading to leaks.
- Solution: Adjust the fill level by turning the set screw on the ice maker to lower the amount of water it uses. Consult your appliance’s manual for the exact location and method to adjust the fill level .
The Water Inlet Valve and Leaks in Ice Makers
The water inlet valve controls the flow of water into the ice maker. If this valve is damaged or clogged, it can lead to leaks. Replacing the faulty valve can resolve the problem. However, several other issues can also cause an ice maker to leak water. Understanding these potential problems and their solutions can help maintain the efficiency of your ice maker and prevent water damage.
Common Causes of Ice Maker Leaks
- Ice Jams
- Cause: Ice can jam in the dispenser chute or the ice bin, blocking the normal flow and causing water to overflow.
- Solution: Gently break up the ice jam using a plastic or wooden utensil. If the ice is too lodged, remove the ice bin and allow it to thaw naturally. Pouring warm water through the dispenser chute can also help melt the jammed ice .
- Unbalanced Ice Maker or Refrigerator
- Cause: If the refrigerator or ice maker is not level, it can cause water to pool and leak.
- Solution: Use a leveler to ensure the appliance is balanced. Adjust the refrigerator’s feet or reinstall the ice maker if necessary .
- Misaligned Fill Cup
- Cause: The fill spout and the ice tray or fill cup must be perfectly aligned. Misalignment can cause water to miss the tray and leak into the ice maker compartment.
- Solution: Check the alignment of the fill spout and cup. Adjust as needed to ensure proper water flow into the ice tray .
- Clogged Defrost Drain
- Cause: The defrost drain can become blocked by ice or debris, preventing excess water from draining properly.
- Solution: Locate the defrost drain and inspect it for blockages. Pour warm water to melt any ice build-up and clear debris to restore proper drainage.
- Loose Water Connections
- Cause: Loose or disconnected water supply lines can lead to leaks.
- Solution: Check all water connections for tightness and security. Ensure there are no kinks or damage in the water lines. Tighten any loose connections and replace damaged hoses if necessary .
- High Fill Level
- Cause: Setting the water fill level too high can cause the ice maker to overflow and leak.
- Solution: Adjust the fill level according to the manufacturer’s instructions to prevent overfilling. Use the adjustment screw to lower the water level slightly .
- Faulty Water Filter
- Cause: A clogged or improperly installed water filter can disrupt water flow and cause leaks.
- Solution: Replace the water filter every six months. Ensure it is installed correctly and that the filter housing is not leaking. Consult your user manual for proper installation instructions .
- Cracked Fill Tube
- Cause: The fill tube can crack or become blocked with ice, leading to leaks.
- Solution: Inspect the fill tube for cracks or ice obstructions. Use a hairdryer on low heat to gently thaw any ice in the tube. If the tube is cracked, it will need to be replaced .
Misaligned Fill Tube in Home Countertop Ice Makers
The fill tube in your home countertop ice maker is crucial for delivering water to the ice maker’s tray. When this tube is misaligned or damaged, it can cause significant issues, including water leaks. Ensuring the fill tube is properly aligned and free from any damage can prevent these leaks and maintain the efficient operation of your ice maker.
Causes of a Misaligned Fill Tube
Several factors can lead to a misaligned fill tube in your ice maker:
- Installation Errors: Improper installation can result in the fill tube being out of place.
- Movement and Vibration: Over time, the vibrations from the ice maker’s operation can cause the tube to shift.
- Blockages: Ice or debris can build up and push the fill tube out of alignment.
Symptoms of a Misaligned Fill Tube
A misaligned fill tube can manifest in several ways:
- Water Leaks: Water dripping from the ice maker or pooling around it is a common sign.
- Improper Ice Formation: If the water isn’t reaching the ice mold properly, the ice cubes may be irregular or incomplete.
- Ice Maker Noise: Strange noises can occur if the water is not flowing smoothly into the ice tray.
Troubleshooting a Misaligned Fill Tube
Here are some steps to diagnose and fix a misaligned fill tube in your home countertop ice maker:
- Inspect the Tube: Check the alignment of the fill tube with the ice mold. The tube should be directly above the mold, ensuring that water flows straight into it.
- Realign the Tube: If the tube is misaligned, gently adjust it so that it is correctly positioned. Make sure the ice maker is turned off during this process.
- Check for Blockages: Ensure there are no ice or debris blockages that could be pushing the tube out of place. Use a hairdryer on low heat to melt any ice obstructions.
- Secure Connections: Ensure all connections are tight and secure to prevent movement. Use an adjustable wrench to tighten any loose fittings.
Addressing Ice Maker Leaks: Causes and Solutions
A clogged drain line can prevent excess water from being properly removed, causing it to leak out. Cleaning or replacing the drain line can fix this issue. However, there are several other common causes of leaks in a home countertop ice maker, and understanding these can help you maintain your appliance and prevent water damage.
Common Causes of Ice Maker Leaks
- Jammed Ice Clumps
- Cause: Ice can clump together and get stuck in the chute, especially when exposed to warm air from the kitchen.
- Solution: Gently break up the ice clumps using a long plastic or wooden tool, or remove and defrost the ice bin.
- Loose Water Connections
- Cause: Over time, the connections in the water supply line can become loose, leading to leaks.
- Solution: Check and tighten all connections using an adjustable wrench. If there are any visible signs of damage, replace the faulty sections of the line .
- Misaligned Fill Valve and Cup
- Cause: If the water spigot isn’t properly aligned with the fill cup, water can miss the cup and leak out.
- Solution: Ensure the fill valve and cup are properly aligned by adjusting them according to the manufacturer’s instructions .
- Improper Leveling
- Cause: An unbalanced ice maker can prevent water from properly flowing into the ice tray, causing it to leak.
- Solution: Use a level tool to ensure the ice maker is properly balanced. Adjust the feet or add shims if necessary .
- Clogged or Frozen Water Fill Tube
- Cause: The fill tube that supplies water to the ice maker can become clogged with ice or debris.
- Solution: Disconnect the refrigerator from the power source and use a hairdryer on low heat to melt any ice blocking the tube. Ensure the tube is clear of any debris.
- Faulty Water Inlet Valve
- Cause: The inlet valve may malfunction, causing water to continuously flow into the ice maker even when not needed.
- Solution: Replace the malfunctioning inlet valve. This requires disconnecting the water supply line and the electrical connections, then installing a new valve .
- Damaged or Cracked Water Filter
- Cause: A damaged water filter can leak water, leading to puddles around the ice maker.
- Solution: Inspect the water filter for any visible cracks or damage and replace it if necessary. Regularly replacing the water filter every six months can prevent this issue .
Loose or Damaged Connections
Connections between the water supply line and the ice maker can become loose or damaged over time. Tightening or replacing these connections can stop leaks and ensure your home countertop ice maker functions correctly. Here’s a detailed guide on how to handle this issue.
Common Causes of Loose or Damaged Connections
1. Natural Wear and Tear
- Over time, the constant flow of water and the slight movements of the ice maker can cause connections to loosen.
2. Physical Damage
- Accidental bumps or improper installation can damage connections or create small leaks.
3. Water Pressure Changes
- Fluctuations in water pressure can strain the connections, causing them to loosen or crack.
Steps to Fix Loose or Damaged Connections
1. Shut Off the Water Supply
Before inspecting the connections, ensure the water supply is turned off to prevent further leakage and possible water damage.
- Locate the valve controlling the water line to your ice maker, usually found behind the refrigerator or under the sink.
- Turn off this valve to stop the water flow.
2. Inspect the Connections
After shutting off the water supply, examine the connections between the water supply line and the ice maker. Look for any visible signs of damage or wear, such as:
- Cracks or breaks in the connectors
- Loose fittings
- Water stains or mineral deposits indicating past leaks
3. Tighten the Connections
If the connections appear loose:
- Use an adjustable wrench to gently tighten the connections. Be careful not to overtighten, as this can cause damage.
- Ensure that all fittings are securely fastened and that there is no movement at the connection points.
4. Replace Damaged Parts
If you find any damaged connectors or hoses:
- Replace them with new, compatible parts. It’s important to use parts recommended by the manufacturer to ensure proper fit and function.
- Follow the manufacturer’s instructions for installation to avoid further issues.
Secure All Connections
Inspecting all connection points for leaks is crucial in preventing water damage and ensuring your ice maker operates efficiently. Here are the detailed steps to secure all connections and address issues related to a home countertop ice maker leaking water:
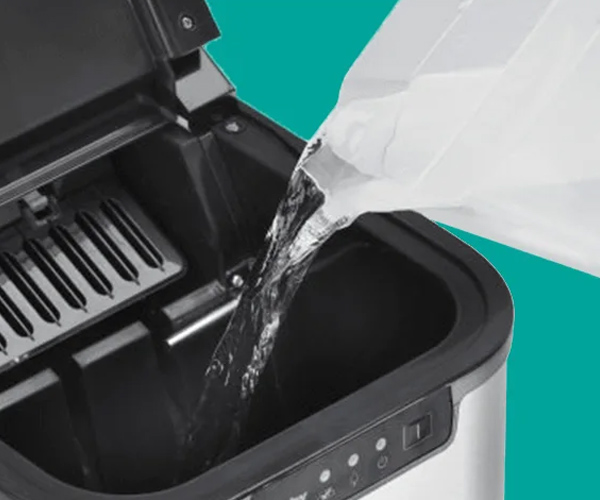
Tightening Loose Connections
Loose connections are a common cause of leaks in home countertop ice makers. Follow these steps to identify and tighten any loose connections:
- Turn Off the Water Supply: Before inspecting the connections, ensure the water supply is turned off to prevent any further leakage.
- Locate the Connections: Identify all connection points between the water supply line and the ice maker.
- Use an Adjustable Wrench: Tighten any loose connections using an adjustable wrench. Ensure that all fittings are snug but be careful not to overtighten, as this can damage the components.
- Check for Leaks: After tightening the connections, turn the water supply back on and check for any leaks. If leaks persist, you may need to replace the connectors or fittings.
Replacing Damaged Sections of the Water Supply Line
Damaged sections of the water supply line can lead to significant leaks. Here’s how to address this issue:
- Inspect the Water Supply Line: Look for any visible signs of damage such as cracks, holes, or kinks in the line.
- Replace the Damaged Sections: If you find any damaged areas, replace the affected sections with new tubing. Ensure that the new sections are compatible with your ice maker model.
- Secure the Connections: Reattach the new sections securely to the existing water line and ice maker. Use appropriate fittings to ensure a watertight seal.
Addressing Clogs in the Water Supply Line
Clogs can obstruct the flow of water, leading to leaks in your home countertop ice maker. Here’s how to fix this:
- Identify the Blockage: Disconnect the water supply line and inspect it for any blockages. Common signs include reduced water flow or complete stoppage.
- Clear the Blockage: If you find a clog, use a hairdryer on a low setting to melt any ice build-up or pour hot water through the line to dissolve the obstruction. Ensure the line is completely clear before reattaching it.
- Reattach and Test: Reconnect the water supply line to the ice maker and turn the water supply back on. Check for proper water flow and any signs of leaks.
Fixing Issues with the Inlet Valve
The inlet valve controls the flow of water into the ice maker. If it’s malfunctioning, it can cause leaks. Here’s what to do:
- Inspect the Inlet Valve: Locate the inlet valve on the back of the refrigerator or ice maker. Check for any visible damage or wear.
- Test for Continuity: Use a multimeter to test the inlet valve for electrical continuity. If the valve fails the test, it needs to be replaced.
- Replace the Inlet Valve: Purchase a replacement valve that is compatible with your ice maker model. Follow the manufacturer’s instructions for proper installation.
Preventing Future Leaks
Preventive measures can help avoid future leaks in your home countertop ice maker:
- Regular Maintenance: Clean your ice maker regularly to prevent the build-up of ice and debris. Follow the manufacturer’s maintenance schedule.
- Check Water Supply Lines: Periodically inspect the water supply lines for any signs of wear or damage. Replace any compromised sections promptly.
- Monitor Temperature Settings: Ensure that the ice maker is operating within the recommended temperature range to prevent freezing and clogging of the water supply line.
- Replace Filters Regularly: Change water filters as recommended by the manufacturer to maintain water flow and quality.
By following these steps and performing regular maintenance, you can prevent and address issues related to your home countertop ice maker leaking water, ensuring it operates
Preventative Measures for Ice Maker Leaking Water
Taking proactive steps can significantly reduce the likelihood of dealing with a leaking ice maker. Here are some comprehensive preventative measures to ensure your home countertop ice maker remains in optimal working condition and avoids common issues such as leaking water:
Regular Maintenance
Regular maintenance is crucial to prevent leaks and keep your ice maker running smoothly. Here are the key maintenance tasks:
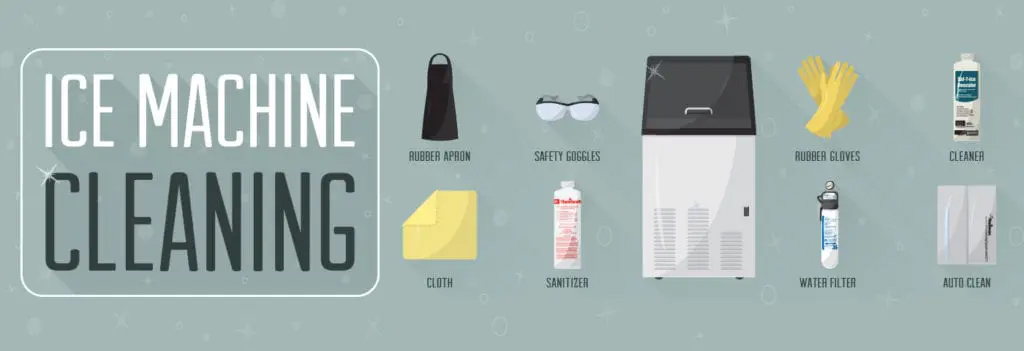
- Clean the Ice Maker Regularly: Regularly clean your ice maker to remove any build-up of ice or debris. This can prevent blockages that might cause leaks.
- Inspect and Clean the Water Line: Periodically check the water line for any signs of damage, kinks, or obstructions. Clean it to ensure a steady water flow.
- Replace the Water Filter: The water filter should be replaced every six months to prevent clogging and ensure clean water supply to the ice maker. A clogged filter can lead to leaks and poor ice quality .
Proper Installation and Leveling
Ensuring your home countertop ice maker is properly installed and leveled can prevent many issues:
- Level the Ice Maker: Use a level tool to ensure your ice maker is properly balanced. An unbalanced machine can cause water to flow improperly, leading to leaks .
- Secure Connections: Check all connections between the water supply line and the ice maker to ensure they are tight and secure. Loose connections are a common source of leaks .
Monitor Water Supply and Pressure
Proper water supply and pressure are essential for the efficient operation of your ice maker:
- Check Water Pressure: Ensure that the water pressure is within the recommended range for your ice maker. Both high and low water pressure can cause leaks by affecting the fill process .
- Inspect the Water Inlet Valve: Regularly inspect the water inlet valve for signs of wear or damage. If the valve fails, it can lead to water leakage. Use a multimeter to test the valve’s functionality and replace it if necessary .
Addressing Common Leak Causes
Understanding and addressing common causes of leaks can prevent them from occurring:
- Clear Ice Jams: Ice jams can block the proper flow of ice and water, causing leaks. Regularly check and clear any jams in the ice chute or bin .
- Fix Misaligned Fill Tubes and Cups: Ensure the water spigot and fill cup are properly aligned. Misalignment can cause water to miss the tray and leak out. Adjust them according to the manufacturer’s instructions .
- Unclog Defrost Drains: Check and clear the defrost drain line to prevent water from backing up and leaking. Pour warm water over the drain to melt any ice blockages .
Preventative Products
Using preventative products can provide an extra layer of protection against leaks:
- Water Leak Detectors: Invest in water leak detectors that can alert you to any leaks before they cause significant damage. Place these sensors near your ice maker to catch leaks early .
- Quality Replacement Parts: Always use high-quality, compatible parts when replacing components in your ice maker. This ensures a proper fit and reduces the risk of leaks .
Routine Checks
Performing routine checks can help identify potential issues before they become serious problems:
- Monthly Inspections: Conduct monthly inspections of your ice maker, including checking the water line, connections, and overall condition of the appliance.
- Seasonal Maintenance: At the start of each season, perform a thorough maintenance check, including cleaning the ice maker, replacing filters, and inspecting all components.
By implementing these preventative measures, you can significantly reduce the risk of your home countertop ice maker leaking water. Regular maintenance, proper installation, and routine checks are key to ensuring your ice maker operates efficiently and remains leak-free. Taking these steps not only extends the life of your appliance but also saves you from the hassle and expense of repairs.
Conclusion
Understanding and maintaining your home countertop ice maker is crucial to ensuring it operates efficiently and provides a steady supply of high-quality ice. By addressing common issues such as malfunctioning ice trays and taking preventative measures, you can avoid interruptions and extend the lifespan of your appliance. However, another frequent problem that can disrupt your ice maker’s performance is leaking water.
Addressing Ice Maker Leaking Water Issues
If your ice maker is leaking water, it’s important to diagnose the cause quickly to prevent further damage and maintain optimal performance. Here are some common reasons why your ice maker might be leaking and how to address them:
Common Causes of Ice Maker Leaking Water
- Clogged or Frozen Drain Line: One of the most common causes of water leakage in ice makers is a clogged or frozen drain line. When the drain line is obstructed, it can cause water to back up and leak out of the ice maker.
- Faulty Water Inlet Valve: The water inlet valve controls the flow of water into the ice maker. If this valve is defective, it can cause water to leak.
- Improperly Leveled Ice Maker: If your ice maker is not properly leveled, it can cause water to overflow and leak out of the unit.
- Damaged or Cracked Water Supply Line: Over time, the water supply line can become damaged or cracked, leading to water leakage.
- Excessive Water Pressure: High water pressure can cause the water inlet valve to fail, resulting in leaks.
Diagnosing the Problem
To accurately diagnose the issue, follow these steps:
- Check the Drain Line: Inspect the drain line for any clogs or ice build-up. If the line is frozen, use a hairdryer to gently thaw it.
- Inspect the Water Inlet Valve: Look for any signs of damage or wear on the water inlet valve. If the valve is faulty, it will need to be replaced.
- Level the Ice Maker: Use a level to ensure that your ice maker is properly aligned. Adjust the legs of the unit as needed to achieve a level position.
- Examine the Water Supply Line: Check the water supply line for any cracks or damage. If you find any issues, replace the line immediately.
- Test the Water Pressure: Measure the water pressure coming into the ice maker. If the pressure is too high, you may need to install a pressure regulator.
Troubleshooting Tips
Once you’ve identified the cause of the leakage, use these troubleshooting tips to resolve the issue:
- Clear the Drain Line: If the drain line is clogged, use a pipe cleaner or a similar tool to remove the obstruction. If the line is frozen, thaw it gently with warm air.
- Replace the Water Inlet Valve: If the water inlet valve is defective, purchase a replacement part that is compatible with your ice maker model. Follow the manufacturer’s instructions for installation.
- Adjust the Leveling: Make sure your ice maker is sitting on a flat surface. Adjust the legs to ensure the unit is level, which can help prevent water from overflowing.
- Replace the Water Supply Line: If the supply line is damaged, replace it with a new one. Ensure that the new line is securely connected to prevent future leaks.
- Install a Pressure Regulator: If the water pressure is too high, install a pressure regulator to keep it within the recommended range. This can help prevent damage to the water inlet valve and reduce the risk of leaks.
Preventative Measures
To prevent future issues with your ice maker leaking water, consider implementing these preventative measures:
- Regular Maintenance: Perform regular maintenance on your ice maker, including cleaning the unit, inspecting the water supply line, and checking for clogs in the drain line.
- Monitor Water Pressure: Regularly check the water pressure to ensure it remains within the recommended range. Adjust as necessary to prevent excessive pressure from damaging the ice maker.
- Keep the Ice Maker Level: Periodically check that your ice maker is properly leveled to prevent water from overflowing.
- Inspect Components: Regularly inspect the water inlet valve and supply line for signs of wear or damage. Replace any faulty components promptly to prevent leaks.
Call to Action
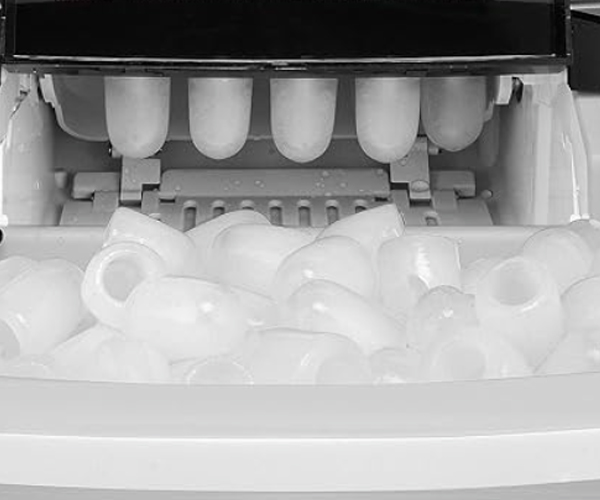
For more detailed solutions and expert advice on maintaining your home countertop ice maker and preventing leaks, visit Home Solution Zone’s blog. Here, you’ll find comprehensive guides, tips, and product reviews to help you keep your ice maker in top condition. Don’t let a leaky ice maker ruin your day—explore our resources and ensure your appliance runs smoothly.
Why Choose Home Solution Zone?
- Expert Advice: Get insights from industry professionals who understand the intricacies of ice maker maintenance and repair.
- Comprehensive Guides: Access detailed, step-by-step guides on troubleshooting and fixing common ice maker issues.
- Product Reviews: Read reviews of the best home countertop ice makers on the market to make an informed purchase decision.
- User-Friendly: Our blog is designed to be easy to navigate, with clear and concise information to help you find solutions quickly.
By following these steps and utilizing the resources available on Home Solution Zone, you can ensure that your home countertop ice maker remains in excellent working condition, providing you with the perfect ice every time.

